
User guide


Table Of Contents
- Table of contents
- Introduction
- System overview of the 4635 LPS
- Using the PC UI
- Paper facts
- System control tasks
- Job control tasks
- Online printing tasks
- Offline printing tasks
- UNKNOWN
- Power on the open-reel tape drive
- Load an open-reel tape
- Load an open-reel tape by hand
- Unload an open-reel tape
- Unload an open-reel tape during a power failure
- Handle open-reel tapes
- Power on the 18 track 1/2 inch cartridge tape drive
- Unload a 1/2 inch cartridge
- Power off the 18/36 track 1/2 inch tape drive
- Handle cartridge tapes
- Load a 1/4 inch cartridge tape
- Handle 1/4 inch cartridge tapes
- Load a floppy disk
- Handle floppy disks
- Start an offline print job
- Rewind/unload tape
- Space
- Move
- UNKNOWN
- HIP printing tasks
- Status and print tasks
- File control tasks
- Maintenance tasks
- Precautions you should take
- Cleaning supplies
- Maintaining the printer
- Replacing the dry ink cartridge
- Replacing the dry ink waste container
- Adding fuser agent
- Cleaning the sensors and the reflecting surfaces
- Tape drive cleaning schedule
- Cleaning precautions—READ BEFORE CLEANING
- Cleaning procedures
- When to clean the tape drive
- Cleaning procedures
- How to clean the floppy disk drive
- Installing the custom transfer assist blade
- Setting tray size with the custom transfer assist blades
- Problem solving tasks
- LPS problems
- Printing problems
- Paper jams
- Incorrect paper size message
- Stacker bin problems
- System controller problems
- Tape drive does not perform self-load routine
- “OK” appears on the tape drive message display, but the loading door is closed
- Basic recovery procedure
- Initial program load (IPL) procedure fails
- You cannot insert a cartridge
- Tape does not unload
- Unloading a cartridge after a power failure
- Tape winds completely out of cartridge
- Message display is blank
- Tape drive does not become ready
- LPS problems
- MICR operating procedures
- Bar code operating procedures
- A. Meter reading and reporting
- B. Supplies
- Glossary
- Index
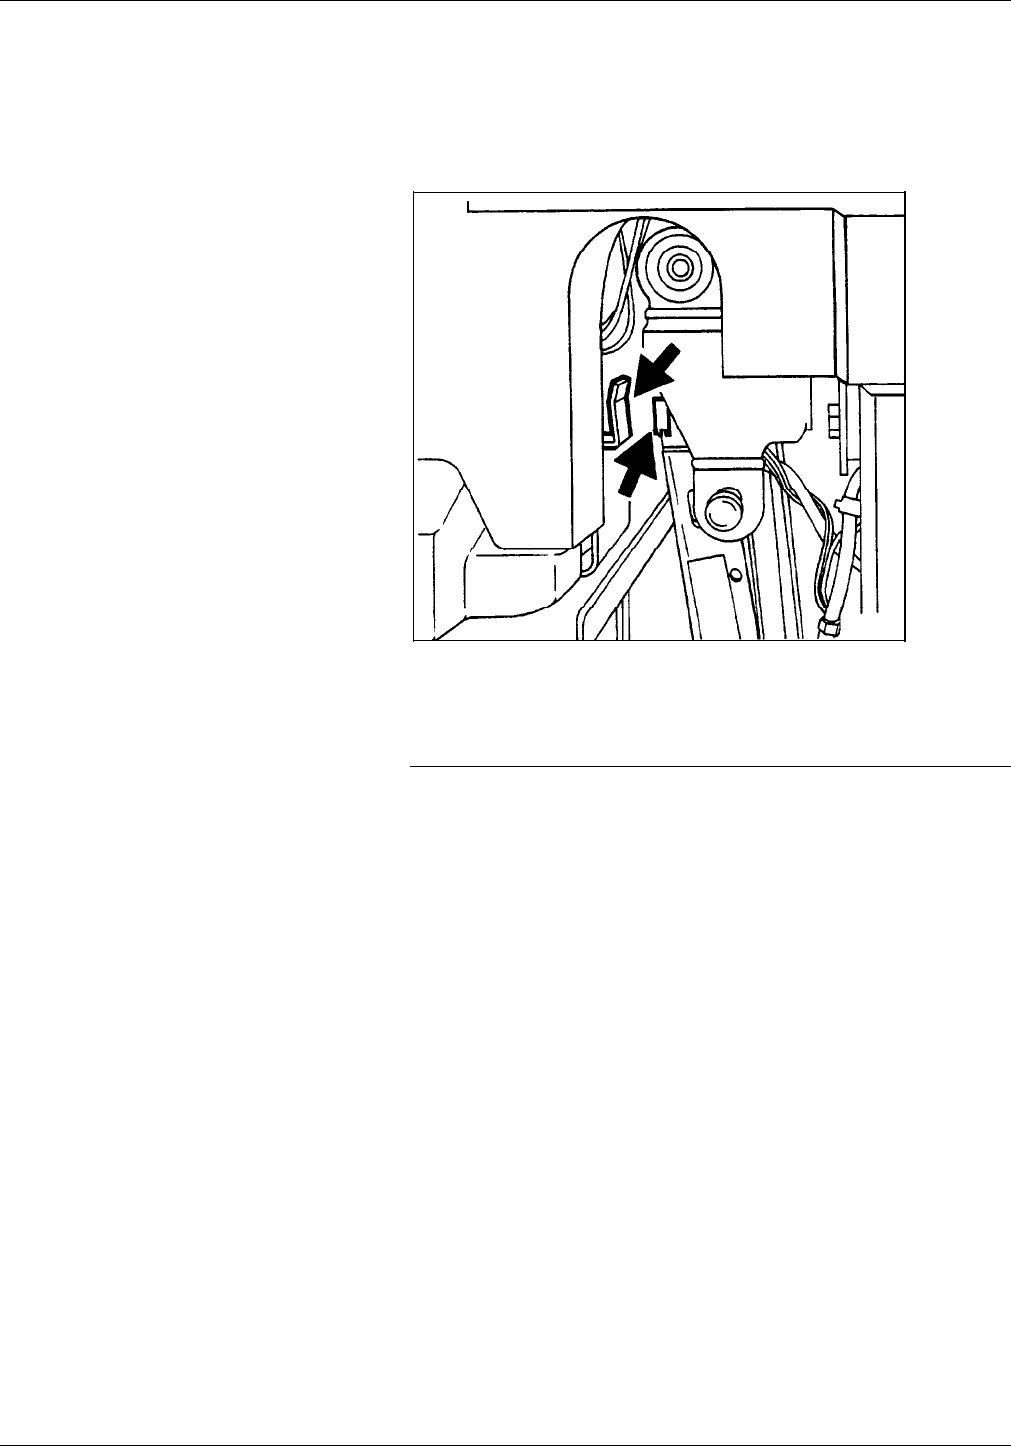
MAINTENANCE TASKS
2. Apply a small amount of lens and mirror cleaner to a cleaning
pad.
3. Wipe the sensor and mirror gently with the cleaning pad.
Figure 1-17. Areas to clean
4. Close the printer doors.
Cleaning additional sensors
There are additional sensors which you should clean when
directed by the Xerox Customer Support Center personnel. To
clean the sensors, follow this procedure:
1. Brush or wipe the sensor window lightly.
2. Remove any paper dust present in the area.
Note: If the sensor is very dirty, you may use a small amount of
alcohol on a swab to clean it.
CAUTION: Do not use any abrasive materials or stronger solvents
on the sensor.
11-12 XEROX 4635 LASER PRINTING SYSTEM OPERATOR GUIDE