Version 3.
© 2010 Xerox Corporation. All rights reserved. Xerox, the sphere of connectivity design, and Xerox 4112/4127 Enterprise Printing Systems, are trademarks of Xerox Corporation in the United States and/or other countries. Microsoft, MS-DOS, Windows, Microsoft Network, and Windows Server are either trademarks or registered trademarks of Microsoft Corporation in the United States and/or other countries. Novell, NetWare, IntranetWare and NDS are registered trademarks of Novell, Inc.
Table of Contents 1 Overview . . . . . . . . . . . . . . . . . . . . . . . . . . . . . . . . . . . . . . . . . . . . . . 1-1 Related information sources . . . . . . . . . . . . . . . . . . . . . . . . . . . . . . . . . . . . . . . . . . . . . . . 1-1 Guides for optional accessories . . . . . . . . . . . . . . . . . . . . . . . . . . . . . . . . . . . . . . . . 1-1 Customer documentation updates . . . . . . . . . . . . . . . . . . . . . . . . . . . . . . . . . . . . . . . . . 1-1 Tools . . . . . . . . . . .
Table of Contents Printer Lockout Duration . . . . . . . . . . . . . . . . . . . . . . . . . . . . . . . . . . . . . . . . . . 3-10 Power Saver/Energy Saver Timers . . . . . . . . . . . . . . . . . . . . . . . . . . . . . . . . . 3-11 Time Zone . . . . . . . . . . . . . . . . . . . . . . . . . . . . . . . . . . . . . . . . . . . . . . . . . . . . . . . 3-12 Daylight Savings. . . . . . . . . . . . . . . . . . . . . . . . . . . . . . . . . . . . . . . . . . . . . . . . . . 3-12 Adjust off . . . . . . . . . .
Table of Contents Data Encryption . . . . . . . . . . . . . . . . . . . . . . . . . . . . . . . . . . . . . . . . . . . . . . . . . 3-64 Encryption Key for Confidential Data . . . . . . . . . . . . . . . . . . . . . . . . . . . . . 3-66 Start data encryption and/or changing the settings: . . . . . . . . . . . . . . . 3-68 Service Representative Restricted Operation . . . . . . . . . . . . . . . . . . . . . . 3-68 Software download . . . . . . . . . . . . . . . . . . . . . . . . . . . . . . . . . . . . . .
Table of Contents Overview . . . . . . . . . . . . . . . . . . . . . . . . . . . . . . . . . . . . . . . . . . . . . . . . . . . . . . . . . . . . 4-19 Authentication Controlled Users. . . . . . . . . . . . . . . . . . . . . . . . . . . . . . . . . . . 4-19 Types of Authentication . . . . . . . . . . . . . . . . . . . . . . . . . . . . . . . . . . . . . . . . . . 4-20 System Administrator Settings . . . . . . . . . . . . . . . . . . . . . . . . . . . . . . . . . . . . . . . .
1 Overview Related information sources Guides for optional accessories Optional accessories are also available for the machine. User Guides are provided with the optional accessories exclusively for this product. These User Guides are referred to as “guides for optional accessories.” Guides for optional accessories are provided as printed guides or electronically as On-line Help. Guides for optional accessories describe all the necessary steps for operating optional accessories and installing software.
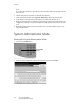
Overview User Interface The User Interface (UI) consists of the Touch Screen and the Control Panel. The Touch Screen is located at the center of the UI. Messages required for operation and feature buttons are displayed on this display. You can directly touch the buttons and tabs displayed on the touch screen to set features or to instruct operations in screens.
Overview Powering off 1. Before turning the power off, make sure that all print jobs have completely finished and that the Online indicator is not lit. KeyPoint Never turn the power off while data is either being received or when jobs are being printed. 2. Open the Power Switch cover at the front of the machine and press the power switch to the [ ] Off position. KeyPoint Power off processing is performed internally on the machine for a while after the power switch is turned off.
Overview Note If you turn the power back on after turning it off, first make sure that the display on the UI has gone out. 2. Switch off the main power switch on the back of the machine. 3. From the Controller window, select [System: Shutdown] to shut down the Controller. 4. At the machine, switch the main power switch on the back of the machine to on. 5. Open the power switch cover at the front of the machine and press the power switch to the on [|] position.
Overview Note The default User ID value is 11111. When using the Authentication feature, a password is required. The default password is x-admin. 3. Press the Machine Status button on the Control Panel. 4. Press the Tools tab. 5. Select the appropriate Mode, Group, and Feature. Exiting the System Administrator Mode 1. Press the Log In / Out button. Log In / Out button 2. When the Logout screen appears, Press Yes.
Overview Low Power mode (Power consumption: 225W) In this mode, the power to the UI and fuser unit is lowered to save power. The display goes out, and the Power Saver button on the Control Panel lights. To use the machine, press the Power Saver button. The Power Saver button goes out to indicate that the Power Saver feature is canceled. Sleep mode (Power consumption: 15W) In this mode, the power is lowered to 15 watts and the fuser switches off.
Overview 3. Select Machine Clock /Timers. 4. Select Auto Power Saver/Energy Saver, and select Change Settings. 5. Using the up/down arrow buttons, configure a power saver mode migration time from 1 to 240 minutes, in 1 minute increments. a. From Last Selection to Low Power Mode: Set the time to move to the Low Power Mode after the last operation. Note The default for From Last Selection to Low Power Mode is 15 minutes. b.
Overview Note The default for From Last Selection to Sleep Mode is 60 minutes. Configure the From Last Selection to Sleep Mode time to be longer than the From Last Selection to Low Power Mode time. 6. Press Save. 7. Select Close. 8. Exit the System Administrator Mode (page 1-5).
2 Installation Tip The User Interface (UI) screens shown in this guide may or may not reflect the screens displayed on your system. The UI screens are a representation of the type of screens that may be seen on your particular system and vary from system to system and from marketplace to marketplace. Also, some features displayed on the UI screens may not be enabled for this product or are not applicable.
Installation Installing the network cable The Ethernet interface supports the following types of connectors: • 10/100/1000Base-T • CAT5 1. Confirm that the power switch is turned off. 2. Connect a network cable to the Ethernet interface connector. Note Prepare a network cable suitable for your network connection. When changing the network cable, consult the appropriate personnel. 3. 2-2 Switch on the machine.
3 Setups Tip The User Interface (UI) screens shown in this guide may or may not reflect the screens displayed on your system. The UI screens are a representation of the type of screens that may be seen on your particular system and vary from system to system and from marketplace to marketplace. Also, some features displayed on the UI screens may not be enabled for this product or are not applicable. Overview The machine has factory default (initial) settings which can be customized.
Setups Network Controller Settings: You can select and set the following network controller features: • • • • • Ethernet Rated Speed TCP/IP - IP Address TCP/IP - Subnet Mask TCP/IP - Gateway Address Frame Type All Other Settings: Not applicable to this product. Setup menu From the Setup Menu, you can assign paper tray attributes. For more information, refer to “Setup menu” in this chapter.
Setups Accounting You can set restrictions on users using specific machine features, or set restrictions on individual users. For more information, refer to System settings with optional FreeFlow scanner on page 375. Authentication/Security Settings You can set the system administrator ID and system administrator password used to enter System Administration mode. For more information, refer to Authentication/Security Settings on page 4-19.
Setups Common settings In Common Settings, you select default settings that affect the machine itself. The following settings can be made and are detailed in the sections that follow: • Machine clock/timers • Audio tones • Screen defaults • Paper tray settings • Reports • Maintenance/diagnostics • Other settings 1. From the System Settings screen, select Common Settings. 2. Select the item to be set.
Setups Machine clock/timers You can set the clock time, or the timer interval until power saving or reset features take effect. 1. From the Common Settings screen, select Machine Clock/Timers. 2. Select the item to be set or changed. 3. Select Change Settings. 4. Follow the screen directions to change the settings. Note Depending on the item, entry with the numeric keypad may not always be possible. 5. Select Save.
Setups Date Set the date and date format in the system clock of the machine. The date set here is printed on lists and reports. 1. From the Machine Clock/Timers screen, select Date, and select Change Settings. 2. Select the date format. 3. Select Year/Month/Day by using the quantity. , , or the numeric keypad to enter a numeric Note Depending on the item, entry with the numeric keypad may not always be possible. 4. Select Save to save the settings and return to the previous window.
Setups NTP time synchronization You can get the time from a time server (NTP: Network Time Protocol), to synchronize the machine to the time server time. 1. From the Machine Clock/Timers screen, select NTP Time Synchronization, and select Change Settings. 2. Select On or Off. 3. Select Save to save the settings and return to the previous window. Connection interval Select the time interval at which a connection is made to the time server.
Setups Time Server Address This is used to enter the IP address for the time server. Note Set the NTP Time Synchronization to on. 1. From the Machine Clock/Timers screen, select Time Server Address and press Change Settings. 2. Enter the IP address: • IP Address: Set the IP address of the time server from which the time is obtained, using values 0 to 255. Note Addresses 244 to 255.XXX.XXX.XXX and 127.XXX.XXX.XXX cannot be set.
Setups 1. From the Machine Clock/Timers screen, select Auto Clear and select Change Settings. 2. Select Off or On. 3. If you selected On, set the time by using the numeric quantity. , , or the numeric keypad to enter a If you selected Off, you must exit System Administration mode for the system to return to the default screen. 4. Select Save to save the settings and return to the previous window.
Setups Auto print Set the time from the end of the print job until the execution of the next print job. Set the value from 1 to 240 seconds, in one second increments. If you select Off, once the machine is ready, printing can start immediately. 1. From the Machine Clock/Timers screen, select Auto Print, and select Change Settings. 2. Select Off or On. 3. If you selected On, set the wait-to-print time by using the enter a numeric quantity. 4.
Setups Power Saver/Energy Saver Timers This machine provides a Power Saver mode used to reduce power consumption when the machine is inactive. In power saving mode, there is a Low Power mode and a Sleep mode.
Setups Time Zone Set the time difference from the Greenwich Mean Time (GMT) in the system. 1. From the Machine Clock/Timers screen, select Time Zone and then select Change Settings. 2. Use the 3. Select Save to save the settings and return to the previous window. , to set the time difference from Greenwich Mean Time (GMT). Daylight Savings With this feature enabled, the machine automatically adjusts the current time when the summer time starts and ends.
Setups Adjust by Month, Week, Day of Week & Time Select this feature to specify the start of the daylight savings feature, by month, week, day of the week and time. Audio Tones Select whether or not to sound an alarm, for example when a job ends or there is a fault. 1. From the Common Settings screen, select Audio Tones. 2. From the Audio Tones screen that displays, select the tone setting to be set or changed. Note Select 3. to display the previous screen and select to display the next screen.
Setups 4. Select the desired setting for the specific Audio Tone feature. Control Panel Select Tone Select the volume level that sounds when a button displayed on the screen is correctly selected. Select from Loud, Normal, and Soft. To disable the sound, select Off. Control Panel Alert Tone Select the volume level that sounds when a non-functioning (or grayed-out) button is selected or when an error occurs. Select from Loud, Normal, and Soft. To disable the sound, select Off.
Setups Auto Clear Alert Tone Select the volume level that sounds when the automatic clear feature is enabled and it is 5 seconds before the machine automatically returns to the initial screen. Select from Loud, Normal, and Soft. To disable the sound, select Off. Alert Tone Select the volume level that sounds when a fault, such as a paper jam occurs, and the fault is left unattended. Select from Loud, Normal, and Soft. To disable the sound, select Off.
Setups 2. From the Screen Defaults window that displays, select the Default Language. 3. Select the item to be set or changed. 4. Select Change Settings. 5. Select the desired language to use for the screen UI, text and reports. 6. Select Save to save the settings and return to the previous screen. Note The changed setting will take affect after you reboot the machine.
Setups 2. From the Paper Tray Settings screen that displays, select the item to be set or changed. 3. Make the appropriate selections or changes to that item and select Save to save the setting and return to the Paper Tray Settings screen. 4. Repeat Step 2 for each of the specific Paper Tray Settings features. 5. Select Close to return to the Common Settings screen. Custom paper name You can set a custom name for paper 1-5. A maximum of twelve characters can be entered for each custom paper name.
Setups 3. The Keyboard screen opens. 4. Enter the desired name for Custom Paper 1. 5. Select Save to save the name and return to the previous screen. 6. If desired, repeat Steps 1-5 for the other custom paper names. 7. Select Close to return to the Paper Tray Settings screen. Paper tray attributes Select the paper size and paper type that will be loaded in trays 1-4, tray 5 (Bypass) and trays 6 and 7. 1. From the Paper Tray Settings screen, select Paper Tray Attributes. 2.
Setups 3. Select Paper Size or Paper Type. Paper Size Standard-sized paper that is loaded into trays 3, 4, 6, and 7 is automatically detected. However, when a nonstandard size is loaded, it is necessary to specify the width and height. Tip Depending on the paper size, the guide lever may not fit, and this may cause paper jams or other errors. Tray detection may also not be possible. In such cases, use tray 5 (Bypass Tray). Note Trays 1 and 2 are preset at manufacturing at size 8.5 x 11 in.
Setups Auto Size Detect Standard-sized paper loaded in trays 3, 4, 6, and 7 is automatically detected. Variable Size When setting a non-standard size for trays 3 and 4, set the size in the X (horizontal) direction within the range of 182-488 mm (7.2-19.21 in.) and in the Y (vertical) direction within the range 148-330 mm (5.5-13 in.) in 1 mm increments. For trays 6 and 7, set the size in the X direction within the range 210-241 mm (8.3-9.5 in.) and in the Y direction within the range 297-330 mm (11.
Setups Note Select to display the previous screen and select to display the next screen. 4. Select Save to save the Paper Type and return to the previous screen. 5. Select Save to return to the Paper Tray Attribute screen and select a different tray. 6. Set the attributes for other trays as desired. 7. Select Close to return to the Paper Tray Settings screen.
Setups Paper tray attributes during loading When a paper tray is removed from the machine and then replaced, the selection made on this screen determines whether or not the tray change is displayed on the UI. 1. From the Paper Tray Settings screen, select the Paper Tray Attributes During Loading. 2. Select Disabled or Enabled. Off: If this feature is selected, then the UI does not display the paper tray attributes while you are loading paper in the tray.
Setups 3. Select the item to be set or changed, and select Change Settings. 4. Select a Priority setting (First-Sixth) and assign a specific tray (Tray 1 - 7) to that priority setting. Note Only one tray can be set to each priority. 5. Select Save to save the selections and return to the Paper Tray Priority screen. 6. Select Close to return to the Paper Tray Settings screen.
Setups Paper type priority Set the paper type priority sequence for automatic tray selection. Automatic tray selection means that a tray containing the appropriate paper is automatically selected by the machine for printing. You can select from a variety of paper types including bond paper, plain paper, recycled paper, side 2 paper, etc.
Setups Auto tray switching Choose the auto tray switching method and how to print mixed size documents. 1. From the Paper Tray Settings screen, select Auto Tray Switching. 2. Select the Auto Tray Switching item, and select Change Settings. 3. Set the method of auto tray switching. Always Enable Regardless of which paper tray is selected, depending on circumstances, the machine automatically selects a tray containing appropriate paper.
Setups The Reports screen is displayed. Note The reports actually listed on your Reports screen may vary according to the enablement or disablement of related features or options. 2. Select the item to be set or changed, and select Change Settings. 3. For the Job History Report, you can select whether or not to automatically print a Job History Report after a total of fifty jobs have been processed.
Setups Initialize hard disk This procedure initializes the hard disk. The data erased by formatting includes additional fonts, ESC/P, HP-GL/2, and SMB folder. Tip The secure print document log is not erased. 1. From the Maintenance screen, select Initialize Hard Disk. 2. Select the partition to be reformatted and select Start. 3. Select Yes. 4. When reformatting completes successfully, the message screen appears, select Confirm. 5. Select Close to return to the Maintenance screen. 6.
Setups Delete all data Tip Do not use this function unless you are authorized and have checked with your Xerox Service Representative. This deletes all data recorded in the machine. This includes all user settings, and data recorded automatically by the system. 1. Select Close to return to the Maintenance screen. 2. Select Close to return to the Common Settings screen. Software Options Use the Keyboard to type passcodes for the Software Options and select Reboot. Up to 5 passcodes can be typed.
Setups Alignment Adjustment Settings Adjustments can be made to the image based on the alignment output of a document. Various adjustments can be modified such as: image position, scale, and skew. This can be achieved through the use of the twenty default adjustment types. In addition, a specific paper tray can be assigned to a specific adjustment type. Adjustments can be made when the position of the output image is misaligned or skewed.
Setups Alignment Adjustment Settings procedure Save the adjustment results for squareness, print position, and scale as an alignment adjustment type, and then assign the type to the desired paper tray. 1. Load paper in a tray. 2. Press the Log In/Out button, and enter the system administrator mode. Log In/Out 3. Select the Tools tab followed by the System Settings tab. 4. Select the Common Service Settings followed by the Maintenance Settings.
Setups 5. Select Alignment Adjustment Settings. 6. Select Alignment Adjustment Type Setup, and press Change Settings. 7. Select the alignment adjustment type you want to set or adjust, and press Change Settings.
Setups 8. Select Name, and press Change Settings. 9. Assign a type name, and press Save. Note We recommend using a name such as “A4 Plain” that allows you to know what the content of the paper type is. 10. Press Sample Printout. 11. Select the paper tray in which you loaded paper in Step 1, and then select 1-Sided or 2Sided followed by the desired number of sheets via the Number of Sheets option Note When using the Squareness Adjustment option, select the A3 paper size.
Setups Note Two lines are printed on the image of side 1 and one line is printed on the image of side 2 of the sample that is printed with Sample Printout to indicate the paper feed direction. 13. Press Save. 14. Check the sample output, and adjust the position if misalignment has occurred. Note For details on making each adjustment, refer to the following sections . 15. After you finish making adjustments, print another output sample by pressing the Sample Printout and verify the adjustment results. 16.
Setups 20. Select the adjusted type, and press Save. Squareness Adjustment Adjust image skew (squareness) in 0.1 mm increments for Side 1 and 2. Maximum adjustment is 1.2 mm. Specify a positive value when you want to adjust the position of the image in the opposite direction to the paper feed direction, and a negative value when you want to adjust the image in the paper feed direction. 1. Check the sample output, and measure the squareness offset amount that occurred.
Setups 2. Select Squareness, and press Change Settings. 3. Enter a value with the squareness offset amount measured in Step 1 added as the current setting value of Side 1 and Side 2.
Setups Note Entering a positive or negative value adjusts the squareness as shown below. 4. Press Save. Scale Adjustment Adjust the size (scale) of the image with respect to the lead edge direction and the side edge direction according to the paper feed direction by 0.025% increments for each of sides (side 1 and 2). You can adjust up to 0.400%. Specify a positive value when you want to increase the scale, and a negative value when you want to reduce it. 1.
Setups Note The reference lengths for a sample output of A3 or A4 size printed with [Sample Printout] are as follows. Paper Size Image Reference Length in X Direction Image Reference Length in Y Direction A3 400 mm 277 mm A4 190 mm 277 mm 2. Select X% or Y%, and press Change Settings. 3. Enter the offset amount of the X direction scale you measured in Step 1 for Side 1 and Side 2 of X%. 4. Enter the offset amount of the Y direction scale you measured in Step 1 for Side 1 and Side 2 of Y%.
Setups Note For a rough guide on the image scale adjustment values to enter, refer to Chapter 3 Sample Printout of 11 x 17 in./A3 Size on page 3-38 and Chapter 3 Sample Printout of 8.5 x 11 in./ A4 Size on page 3-39. 5. Press Save. Table 1: Sample Printout of 11 x 17 in./A3 Size 11 x 17 inch/ 11 x 17 inch/A3 Y A3 Y Direction Direction (Back) (Front) 11 x 17 inch/A3 X Direction (Front) Offset Amount (mm) Offset Amount (mm) Offset Amount (mm) 1.60 1.60 -0.400 1.04 1.50 1.50 -0.375 0.97 1.
Setups 11 x 17 inch/ 11 x 17 inch/A3 Y A3 Y Direction Direction (Back) (Front) 11 x 17 inch/A3 X Direction (Front) Offset Amount (mm) Offset Amount (mm) Offset Amount (mm) Offset Amount (mm) 0.07 0.07 0.10 0.10 -0.025 0 0 0 0 0 -0.07 -0.07 -0.10 -0.10 0.025 -0.14 -0.14 -0.20 -0.20 0.050 -0.21 -0.21 -0.30 -0.30 0.075 -0.28 -0.28 -0.40 -0.40 0.100 -0.35 -0.35 -0.50 -0.50 0.125 -0.42 -0.42 -0.60 -0.60 0.150 -0.48 -0.70 -0.70 0.175 -0.55 -0.80 -0.80 0.
Setups 8.5 x 11 inch/A4 Y Direction (Front) 8.5 x 11 inch/A4 Y Direction 8.5 x 11 inch/A4 X Direction (Back) 8.5 x 11 inch/A4 X Direction (Front) Offset Amount (mm) Offset Amount (mm) Offset Amount (mm) Offset Amount (mm) 0.69 0.48 0.48 -0.250 0.62 0.43 0.43 -0.225 (Back) Adjustment Amount (%) 0.55 0.55 0.38 0.38 -0.200 0.48 0.48 0.33 0.33 -0.175 0.72 0.72 0.29 0.29 -0.150 0.35 0.35 0.24 0.24 -0.125 0.28 0.28 0.19 0.19 -0.100 0.21 0.21 0.14 0.14 -0.075 0.
Setups Print Position Adjustment Adjust the position of the image in the lead edge and side edge direction in relation to the paper feed direction by 0.1 mm increments for each of side (sides 1 and 2). You can adjust up to 2.0 mm. Adjustments to the paper position feed direction can be made by making changes to the X Print Position, and Y Print Position. 1. 2. Check the sample output, and measure the print position offset amount that occurred.
Setups 3. Enter the value obtained by the difference X measured in Step 1 added as the current setting value of Side 1 and Side 2 of X Print Position. Enter the value obtained by the difference Y measured in Step 1 added as the current setting value of Side 1 and Side 2 of Y Print Position.
Setups Adjust Fold Position This section describes the procedure for adjusting the fold position. You can adjust the fold position for various paper types, as well as set adjustment values to any of 10 default types. You can assign a set type to each tray. In addition, you can adjust the fold positions for single fold, booklet, C fold, Z fold, Z fold half sheet. Fold Position Adjustment 1. Load the paper for adjusting the fold position in the desired paper tray. 2.
Setups 5. Select Finisher Adjustment. 6. Select Adjust Fold Position. 7. Select Fold Position Type Setup, and press Change Settings.
Setups 8. Select the paper fold position type you want to set or adjust, and press Change Settings. 9. Select Name, and press Change Settings. 10. Enter the desired type name, and press Save. Note We recommend using a name such as “Single Fold Plain” that allows you to recall what the content of that fold type is. 11. Select the fold type, and press Change Settings. Note For details on making each fold adjustment, refer to the following procedures.
Setups 12. Select the desired settings, and press Sample Printout. 13. Select the tray in which you loaded paper in Step 1, and then press the Start button. 14. Measure the fold position via the output sample, and adjust the fold position accordingly. 15. Make adjustments to the items if necessary. 16. After you finish making adjustments, print another output sample with [Sample Printout] and check the adjustment results. 17. Make adjustments accordingly. If necessary, repeat steps 12-14. 18. Press Save.
Setups 20. Select the tray to assign the set type (the tray in which you loaded the paper in Step 1), and press Change Settings. 21. Select the adjusted fold position type, and press Save.
Setups Adjust Paper Curl Adjust Paper Decurler The Adust Paper Curl Decurler screen allows you to configure the default settings for each of the Paper Curl options. Access the screen as follows: 1. Enter the System Administration mode. 2. Touch the Tools tab. 3. Touch System Settings. 4. Touch Common Service Settings. 5. Touch Maintenance. 6. Touch Adjust Paper Curl. 7. Select the item to be set or changed. 8. Touch Change Settings. 9. Touch the Name field. 10.
Setups 12. Select the appropriate settings for 1 Sided-Face Up, 1 Sided-Face Down, and 2 Sided output. You can select Auto, or use the arrow buttons to select the correct amount of curl. To check the results, use the Sample Prrintout button. 13. Touch Save. 14. Touch Close. Single Fold Position Adjustment Adjust the single fold position. 1. Select Single Fold, and press Change Settings. 2. Specify Sheets to be folded, and press Sample Printout.
Setups 3. Select the tray in which you loaded paper, and press the Start button. An output sample is printed. 4. Press Close. 5. Check the output sample printout, and measure the offset amount. 6. Select Long at Left or Long at Right. 7. Enter the measurement value you obtained in Step 5 in Values A Before Adjustment. 8. Press Adjust. 9. Press Sample Printout again to print an output sample printout, and check the adjustment results. 10. Make adjustments again if necessary. (Steps 6 - 8) 11.
Setups Booklet Position Adjustment Adjust the booklet position. 1. Select Booklet, and press Change Settings. 2. Press Sample Printout.
Setups 3. Select the tray in which you loaded paper, select 2-Sheet Stack, and press the Start button. An output sample is printed. 4. Select the tray in which you loaded paper, select 15-Sheet Stack, and press the Start button. An output sample is printed. 5. Press Close. 6. Check the output sample, and measure the position offset amount for 2-sheet stack and 15-sheet stack. 7. Press Booklet Fold State (2 Sheets).
Setups 8. Select the state of the fold and staple position of the output paper, and enter the 2-sheet stack offset amount you measured in Step 6 in Values A & B Before Adjustment. 9. Press Save. 10. Set Booklet Fold State (15 Sheets) in the same way. Note The values between 2-sheet stack and 15-sheet stack are adjusted automatically.
Setups Note When you want to specify the number of sheets separately, use the set Variable-Sheet Booklet option to make the proper selections. 11. Press Sample Printout again to print an output sample, and check the adjustment results. 12. Make adjustments again if necessary. (Steps 7 - 10) 13. Press Save. C Fold Position Adjustment Adjust the C fold position. 1. Select C Fold-A4 or C Fold-8.5x11”, and press Change Settings.
Setups 2. Press Sample Printout. 3. Select the tray in which you loaded paper, and press the Start button. An output sample is printed. 4. Press Close. 5. Check the output sample, and measure the A and B fold position movement amounts.
Setups 6. Enter the measurement value you obtained in Step 5 in Values A & B Before Adjustment, and the final value you want after adjustment in Desired Values A & B. Tip Set value A and value B so that an edge of the paper does not extend past a fold position of the paper. An edge of paper extending past a fold position of the paper may cause a paper jam. 7. Press Sample Printout again to print an output sample, and check the adjustment results. 8. Make adjustments again if necessary. 9.
Setups 2. Press Sample Printout. 3. Select the tray in which you loaded paper, and press the Start button. An output sample is printed. 4. Press Save. 5. Check the output sample, and measure the A and B fold position movement amounts.
Setups 6. Enter the measurement value you obtained in the previous step in Values A & B Before Adjustment, and the final value you want after adjustment in Desired Values A & B. Tip Set value A and value B so that an edge of the paper does not extend past a fold position of the paper. An edge of paper extending past a fold position of the paper may cause a paper jam. 7. Press Sample Printout again to print an output sample, and check the adjustment results. 8.
Setups 2. Press Sample Printout. 3. Select the tray in which you loaded paper, and press the Start button. An output sample is printed.
Setups 4. Press Save. 5. Check the output sample, and measure the A and B fold position movement amounts. A B 6. Enter the measurement value you obtained in the previous step in Values A & B Before Adjustment, and the final value you want after adjustment in Desired Values A & B. Tip Set value B so that an edge of the paper does not extend past a fold position of the paper. An edge of paper extending past a fold position of the paper may cause a paper jam. 7.
Setups Other settings This feature allows you to select the default settings for miscellaneous other options that relate to the machine. Note For any of these settings to take affect, you may need to reboot the machine. Use the following procedure to access the Other Settings feature. 1. From the Common Settings screen, scroll down and select Other Settings. 2. Select the item to be set or changed, and select Change Settings.
Setups Auto job promotion This Other Settings option allows you to set the machine to automatically promote a job for printing if the machine is unable to start a prior job. For example, the machine is unable to start an operation because there is no paper in the tray (at the start of a print operation). If this feature is enabled, then the machine can bypass the current job and allow other jobs to start. Tip The other jobs must not have the same print requirements as the faulted job.
Setups Default print paper size Select the default paper size that will be used when printing a report/list. Select between A4, or 8.5 × 11 in. Paper size settings Select the default paper sizes for automatic paper detection. Select from five possibilities: A/B series (8 × 13"), A/B series, A/B series (8K/16K), A/B series (8×13”/8×14”), and Inch series. Refer to the table in Chapter 6, Paper Size Settings.
Setups Data Encryption Tip This is an optional feature that may not be available on your copier/printer; it is part of the optional Data Security Kit. For more information, contact the Customer Support Center. If you want the recorded data on the hard disk encrypted, select On as the default setting for this feature. By switching on the data encryption, all data written to the hard disk is automatically encrypted. Encryption prevents unauthorized access to the stored data.
Setups 7. Select Change Settings. 8. Select either On or Off. If On is selected, Data Encryption screen is displayed. 9. From the Data Encryption screen, enter the desired encryption key password twice. a. Select Keyboard and enter a 12-character encryption key. Note The default value for the encryption key is 111111111111 (twelve ones). b. Select Save (from the Keyboard screen). You are returned to the Data Encryption screen. a. Select Keyboard again. b.
Setups 12. Exit the System Administration mode. Encryption Key for Confidential Data IMPORTANT! Do not forget the encryption key! The data cannot be restored if you forget the encryption key. Tip • This is an optional feature that may not be available on your copier/printer; it is part of the optional Data Security Kit. For more information, contact the Customer Support Center. • A service representative can block changes to the settings of this feature.
Setups 1. Select Encryption Key for Confidential Data. 2. Select Keyboard and enter a 12-character encryption key. Note The default value for the encryption key is 111111111111 (twelve ones). 3. Select Save (from the Keyboard screen). You are returned to the Encryption Key for Confidential Data screen. 4. Select Keyboard again. 5. Enter the same encryption key once more. 6. Select Save (from the Keyboard screen). 7. Select Save (from the Encryption Key for Confidential Data screen). 8.
Setups Start data encryption and/or changing the settings: When data encryption is started or ended and when the encryption key is changed, the machine must be restarted. The corresponding recording area of the hard disk is reformatted when the machine restarts. Previous data is not guaranteed.
Setups The following settings are covered in this section: • • • Port Settings Protocol Settings Machine E-mail Address/Host Name 1. From the System Settings screen, select Connectivity & Network Setup. 2. Select the item to be set or changed.
Setups Port Settings Select the interface by which the machine is connected to the client. In Port Settings, you can set the following items: LPD Receive E-mail NetWare Send E-mail SMB E-mail Notification Service IPP UPnP Discovery EtherTalk WSD Bonjour Internet Services (HTTP) Port9100 SOAP SNMP WebDAV FTP Client Protocol Settings Select the parameters that are required for communications between the machine and client workstations.
Setups Print Service Settings In Print Service Settings, you select settings that relate to the machine’s memory and miscellaneous features, including tray substitution, paper type mismatch, printing a banner sheet, and more. Use the following procedure to access and change the various Print Service Settings. • From the System Settings screen, select Print Service Settings and select the item to be set.
Setups Note It is not possible to assign more than the total memory. When the power is turned on, if the settings exceed the available memory capacity, they are automatically adjusted by the system. 1. From the Print Service Settings screen, select Allocate Memory. Note Some of these items on the screen may not be available for this product. 2. Select the item to be set or changed, and select Change Settings. 3. Select the desired value for that item. 4.
Setups Receiving Buffer - Port 9100 Set the Port9100 receiving buffer. Set a value from 64 to 1024 KB, in 32 KB increments. Other settings For information about each of the following items, refer to “Overview of features” in this guide. Make settings relating to the paper used in the machine. 1. From the Print Service Settings screen, select Other Settings. 2. Select the item to be set or changed, and select Change Settings. 3. Select the item to be changed. 4.
Setups Paper Type Mismatch Set the action to be taken when the paper type loaded in the paper tray does not match that specified. • Print: Carry on printing, even if the paper type is different. • Display Confirmation Screen: Show a confirmation screen, and prompt for action. • Display Paper Supply Screen: This selection shows the Paper Supply screen when a paper type mismatch occurs.
Setups Banner Sheet Tray Select the paper tray from which the banner sheets are printed. Select one of the following trays: 1, 2, 3, 4, 6, or 7. System settings with optional FreeFlow scanner For information about installing and using the FreeFlow Print Manager with this product, refer to the FreeFlow Print Manager Installation Guide or the FreeFlow Print Manager User Guide.
Setups 3-76 Xerox 4112/4127 EPS System Administration Guide
Accounting and Authentication/ Security Settings 4 The machine has Accounting and Authentication/Security Settings that are used for numerous security measures This chapter describes how to adjust these settings. The User Interface (UI) screens shown in this guide may or may not reflect the screens displayed on your system. The UI screens vary from system to system and from marketplace to marketplace.
Accounting and Authentication/Security Settings Xerox 4112/4127 EPS • Track the number of copies, scanned pages and printed pages for any user account. This can be useful when machine expenses are shared among various departments. As an example, the human resources and maintenance departments can each be invoiced separately for their machine usage. • Impose restrictions on individual accounts, such as limiting the number of copy, scan, and prints jobs that are allowed a user.
Accounting and Authentication/Security Settings 4. Select Create / View User Accounts. 5. From the Create / View User Accounts screen, perform one of the following to select a user account: • • Select a (Not in Use) account that you want to create and then press the Create/ Delete button. Using the numeric keypad, enter a four-digit number from 0001 to 1000, which corresponds to a (Not in Use) account. The entered number displays in the Go To field. Then select the Create/Delete button.
Accounting and Authentication/Security Settings Xerox 4112/4127 EPS User ID, User Name, Account Limit and Feature Access To access the User ID, User Name, Account Limit and Feature Access screens login as System Administrator > select the Machine Status button > Tools tab > Accounting > Create View User Accounts > select a User.> Create / Delete. The following is a continuation of the user account creation process from the previous page. UserID 7. Select the UserID button. The User ID screen appears.
Accounting and Authentication/Security Settings Account Limit 9. Select the Account Limit button. Account Limit You can set the maximum number of pages that can be used in a copier, scanner and printer. You can set from 1 to 9,999,999 pages (7 digits) in 1 sheet increments. a. Select Account Limit. b. Select the Copy, Scan or Print Service button to set account limits. c. Select Change Account Limit. d. Enter the maximum number of pages using numeric keypad and press Save.
Accounting and Authentication/Security Settings Xerox 4112/4127 EPS Feature Access 10. Select the Feature Access button for any Service. This allows you to set the type of access that you want to give users. e. Select the type of feature access you want to allow the user. f. Press Save. 11. Select Close and review the created user account information. 12. Select Close to return to the Tools tab.
Accounting and Authentication/Security Settings Resetting User Accounts Note Resetting user accounts within Authentication is a similar procedure to resetting user accounts in Accounting. Procedure differences are explained when encountered. There are two options when resetting user accounts. • • Resetting All User Account Information. You can reset All User Accounts, All Feature Access Settings, All Account Limits, Total Impressions and Meter (Print Jobs) and then print Auditron and Meter Reports.
Accounting and Authentication/Security Settings 4. Xerox 4112/4127 EPS Select from the Reset User Accounts options and press Reset. Once you select Reset, you will be prompted to accept (Reset) or Cancel the reset. Carefully review the displayed information before performing a reset. It is important to remember that once you accept a reset, that information cannot be restored. All User Accounts This deletes all registered information for each user.
Accounting and Authentication/Security Settings Print the Auditron Report button Prints the auditron reports. This option is available for all selections except Meter (Print Jobs). Print the Meter Report button Prints a print meter report. This option is available for Meter (Print Jobs), only. Resetting Individual User Accounts and Total Impressions Note Resetting user accounts within Authentication is a similar procedure to resetting user accounts in Accounting.
Accounting and Authentication/Security Settings 4. Xerox 4112/4127 EPS Select the user account that you want to reset.and press Create/Delete. Reset User Account This deletes all registered information for the selected user. 5. Select Reset Account. Once you select Reset, you will be prompted to accept (Reset) or Cancel the reset. Carefully review the displayed information before performing a reset. It is important to remember that once you accept a reset, that information cannot be restored.
Accounting and Authentication/Security Settings Note The selections available will depend on the setting selected in Accounting Type. System Administrator's Meter (Copy Jobs) You can check/reset the cumulative number of pages copied using the System Administration mode on the screen. The cumulative number of page is counted up to 9,999,999 pages. 1. Logon as System Administrator and select the Machine Status button. 2. Select the Tools tab. 3. Select System Administrator’s Meter (Copy Jobs).
Accounting and Authentication/Security Settings 4. Xerox 4112/4127 EPS To reset, select Reset. Accounting Type You can enable or disable the Accounting Type feature and specify the types of jobs that require account management. KeyPoint The available Accounting Type selections depend on the Login Type setting used in Authentication/Security Settings > Authentication.
Accounting and Authentication/Security Settings 4. Select an Accounting Type from the following: • • • • Accounting Disabled: The machine does not require a user login ID and password in order to operate it. Local Accounting: Enables the Account Administration feature. User registration can be performed using the touch screen or CentreWare Internet Services. Network Accounting: Performs account management using user information managed by an external accounting service on a network.
Accounting and Authentication/Security Settings • 6. Xerox 4112/4127 EPS Customize User Prompt - Specifies the type of user information used for the Account Administration feature. Select from the following options: Display User ID and Account ID Prompts, Display User ID Prompt Only, Display Account ID Prompt Only, or Display No Prompts. Select Save. Note Even if the Auditron Mode and Mailbox Access features are set to On, a login password is not required to operate the machine.
Accounting and Authentication/Security Settings 4. Select Off, Reset Every Year, Reset Every Quarter or Reset Every Month. 5. If you select Reset Every Year, Reset Every Quarter or Reset Every Month, you can then select the date the reset will occur. 6. Select Save.
Accounting and Authentication/Security Settings Xerox 4112/4127 EPS Copy Activity Report Enabling this feature will automatically generate a printed usage report of an individual's completed Copier service session. 1. Logon as System Administrator and select the Machine Status button. 2. From the Tools tab, select Accounting. 3. Select Copy Activity Report. 4. Select Disabled, or Enabled.
Accounting and Authentication/Security Settings Accounting Login Screen Settings This feature allows you to change the UserID designation and mask or unmask the User ID displayed on the Touch Screen. The available options depend on Accounting Type and Authentication Login Type selections. 1. Logon as System Administrator and select the Machine Status button. 2. From the Tools tab, select Accounting. 3. Select Accounting Login Screen Settings. 4. To change the UserID designation: a.
Accounting and Authentication/Security Settings 5. 4-18 To Show or Hide the User ID: a. Select Mask User ID (***). b. Select Change Settings. c. Select Show or Hide. d. Select Save.
Accounting and Authentication/Security Settings Authentication/Security Settings Authentication/Security Settings works in conjunction with the Accounting feature to provide additional security for your system. Overview While the Accounting feature restricts local and remote access to Copy, Scan and Print features, Authentication/Security Settings restricts local and remote access to the Services area, which includes All Services, Job Status and/or Machine Status pathways.
Accounting and Authentication/Security Settings Xerox 4112/4127 EPS Types of Authentication Three types of authentication are used depending on where user information is stored. • • Local Machine Authentication: Uses the user information registered for the Account Administration feature to manage authentication. You need, therefore, to enable the Account Administration feature when you use Local Machine Authentication.
Accounting and Authentication/Security Settings System Administrator’s Login ID The System Administrator’s Login ID can be from 1 to 32 characters. Note The default system administrator Login ID is 11111. 1. Select System Administrator Login ID. 2. Select On. 3. Select Keyboard, then in New System Administrator Login ID, enter the system administrator ID, and select Save. 4.
Accounting and Authentication/Security Settings Xerox 4112/4127 EPS For more about enabling and disabling passwords, refer to Accounting on page 4-2. 1. Select System Administrator Passcode. 2. Select Keypad. 3. Select Keyboard to enter the new password from 4-12 numeric digits in New Passcode, and select Next. 4. In Re-enter Passcode, enter the same password, and select Save. Note To set no passcode, leave the passcode blank, and select Save.
Accounting and Authentication/Security Settings Login Type When a Login Type is selected, users are required to login to their accounts before accessing the Copy, Scan and/or Print services. The availability of these services is determined by machine configuration and System Administrator’s settings. The Login Type can be changed at any time to fit your needs. 1. Logon as System Administrator and select Machine Status. 2. Select the Tools tab. 3.
Accounting and Authentication/Security Settings Xerox 4112/4127 EPS The functions restricted by Remote Access are as follows: • • • • • • Printing is limited to print jobs sent from a computer. To use the Account Administration feature, use the print driver to set account information such as user ID and passcode. If authentication using account information fails for a print job, the print data will be either saved in the machine or deleted depending on the Charge Print settings.
Accounting and Authentication/Security Settings Xerox Secure Access A system that uses a magnetic-card, IC-card, and biometrics systems for authentication. If prompted, users must enter their user information on the machine’s control panel. If you choose this option and select Save, accounting will be automatically disabled. However, job log will be kept instead. You will prompted to confirm your selection. Be sure to review the changes that will occur once Xerox Secure Access is enabled.
Accounting and Authentication/Security Settings 4. 4-26 Xerox 4112/4127 EPS Select from Device Access, Service Access or Feature Access: • Device Access: This determines the access allowed for pathway selections from the control panel, as indicated by the outlined buttons in the below graphic. • Select Lock or Unlock pathways and select Save.
Accounting and Authentication/Security Settings • Service Access a. Select the service that you want to change and then select Change Settings. b. Select and option and then select Save. Note If you are using local Authentication, the Unlock option is not available.
Accounting and Authentication/Security Settings • Xerox 4112/4127 EPS Feature Access: a. Select the service that you want to change and then select Change Settings. b. Select an option and then select Save. Create/View User Accounts Note Creating and viewing user accounts within Authentication is a similar procedure to creating and viewing user accounts in Accounting. See Chapter 4, Creating/Viewing User Accounts.
Accounting and Authentication/Security Settings Reset User Accounts Note Resetting user accounts within Authentication is a similar same procedure to resetting user accounts in Accounting. See Chapter 4, Resetting User Accounts. Create Authorization Groups Note Resetting user accounts within Authentication is a similar procedure to resetting user accounts in Accounting. See Chapter 4, Types of Authentication. User Details Setup This feature allows you to configure the settings for user ID authentication.
Accounting and Authentication/Security Settings d. Xerox 4112/4127 EPS Select Save. Display Login Status This option allows you to enable the Login Status to be displayed in the top right corner of the screen. a. Select Enabled b. Select Disabled Logout Confirmation Screen This option allows you to enable a confirmation screen when users logout. a. Select Change Settings. b. Select Enabled. c. Select Save. User ID for Login You can set the User ID for Login to be Non-case Sensitive.
Accounting and Authentication/Security Settings To cancel the access rejection, shut down the machine by switching off the power and switching it on again. 1. Logon as System Administrator and select the Machine Status button. 2. From the Tools tab, select Authentication/Security Settings. 3. Select Authentication > Maximum Login Attempts by System Administrator. 4. Select from: • • Unlimited Attempts Limit Attempts: Enter a number from 1-10 using the S and Tand then select Save.
Accounting and Authentication/Security Settings 7. Xerox 4112/4127 EPS Select Save. KeyPoint The setting of Password Entry from Control Panel applies to functions occurring on the machine. If you are using CentreWare Internet Services (or other external access), a password is ALWAYS required regardless of the password settings on the machine. Furthermore, a password may be required depending on authentication methods set on the machine.
Accounting and Authentication/Security Settings 6. Select from the displayed options: Receive Control When using the authentication feature, set how to handle print jobs for which authentication failed (the print driver did not provide the correct UserID, password, and other authentication information). The available options depend on your selection of According to Print Auditron, Save in Private Charge Print, or Save in Charge Print.
Accounting and Authentication/Security Settings Xerox 4112/4127 EPS Allow User to Disable Active Settings This feature allows privileged users to temporarily disable certain active settings such as Force Watermark, Universal Unique ID that have been enabled by the System Administrator to be applied to all jobs. Select Disable Active Settings to temporarily disable the active settings before running a job. Return to this screen and select Enable Active Settings at the end of your job.
Accounting and Authentication/Security Settings Completed Jobs View The system administrator can set the default view of the completed jobs. 1. Select Completed Jobs View. 2. Set the defaults for the Completed Jobs view. • • Allow Job Viewing at All Times: Allows all users to view the details of completed jobs. Select Yes or No from Hide Job Details. Require Login to View Jobs: Allows only authenticated users to view the details of completed jobs.
Accounting and Authentication/Security Settings Xerox 4112/4127 EPS Overwrite Hard Disk (optional) Tip This is an optional feature that may not be available on your copier/printer; it is part of the optional Data Security Kit. For more information, contact the Customer Support Center.
Accounting and Authentication/Security Settings 4. Select Authentication/Security Settings. 5. Select Overwrite Hard Disk. 6. Select Number of Overwrites. 7. Select the desired number of overwrites. 8. Select Save. 9. Exit the System Administration mode.
Accounting and Authentication/Security Settings Xerox 4112/4127 EPS Scheduled Image Overwrite This option allows administrators to specify how frequently (daily, weekly, or monthly) the overwrite hard disk process should occur. The Scheduled Image Overwrite feature may also be disabled. Perform the following steps: 1. Enter the System Administration mode (Chapter 1 Entering the System Administrator Mode on page 1-4). 2. Press the Machine Status button on the Control Panel. 3. Select the Tools tab.
Accounting and Authentication/Security Settings Accounting and Authentication using CentreWare Internet Services CentreWare Internet Services enables you to display, configure and change settings of the machine by using a web browser instead of the machine’s control panel. A System Administrator can manage how users access the machine by selecting from similar accounting and authentication accounting that are available through the control panel.
Accounting and Authentication/Security Settings Xerox 4112/4127 EPS Enabling Accounting and Setting User Account Options You can perform the following accounting options form within the Accounting Configuration screen of CentreWare Internet Services: Enabling Accounting At your workstation: 1. Open your web browser and in the Address bar, enter the machine’s TCP/IP address. 2. Select the Properties tab. 3.
Accounting and Authentication/Security Settings 10. Customize User Prompts: Specify whether to prompt entry of both a User ID and an Account ID or only a User ID or an Account ID upon authentication. This item becomes active only when the Accounting Type is set to Network Accounting. 11. Select from the following: • • Select the Next button to access individual account settings. Select Apply and follow any prompts to enable the changes you made. Setting User Account Options 12.
Accounting and Authentication/Security Settings Xerox 4112/4127 EPS 18. From the Feature Access section, you can select from Free Access or No Access to a particular service. As an example, you may want to allow a user access to the Print Service, but deny access to the Copy and Scan Services. 19. In the Impressions / Limits section, you can set the maximum number of impressions that the user is allowed.within the range of 0 to 9999999.
Accounting and Authentication/Security Settings 7. Select Apply to enable any changes and follow any prompts. Authentication/Security Settings using CentreWare Internet Services This feature allows you to select the login type that will be required by machine users. You can select from: • No Login Required • Login to Local Accounts • Login to Remote Accounts • Xerox Secure Access You can also set user account options using this feature. Enabling Authentication At your workstation: 1.
Accounting and Authentication/Security Settings Xerox 4112/4127 EPS 5. Select a Login Type. 6. Select Enabled if you want to allow Mailbox to PC/Server. 7. Select Enabled in Non-account Print if you want to allow printing to those without an account on the machine. 8. If you want to allow Guest Users: 9. a. Select On. b. Enter and reenter the Guest Passcode. Select Apply and follow any prompts. • • 4-44 If you select Login to Local Accounts, you will be prompted to reboot the machine.
5 Options Enabling Options with Software Keys Options such as Disk Overwrite, Secure Watermark, Thumbnail Preview, and Job Based Accounting require the purchase and subsequent enabling with a supplied 12 character key before they will work. Software keys are usually included with the kit documentation as a sticker on the manual, or they may be already installed on the device as per the purchase agreement. Upon receipt of the software key, use the following procedure to enable the associated Option. 1.
Options 5-2 Xerox 4112/4127 EPS System Administration Guide
6 Addendum This addendum is a supplemental addition to Chapter 4. It contains additional detailed information of various machine setups. How to enter text or numbers During operations, a screen sometimes appears for the entry of text. This section describes how to enter text using the screen keyboard. The following characters can be entered: numbers, letters, and symbols. Item Description Entering letters and numerals Select Alphanumeric. If you select Shift, capital letters appear.
Addendum Paper size settings To select the default paper sizes for standard size originals and for automatic paper detection, refer to Paper size settings on page 3-63. The following are the sizes that can be detected automatically when the document is placed on the document glass or in the document feeder.
Addendum A/B series(8 × 13") Paper size group A/B series HCF (Trays 6 and 7) Tray 5 (Bypass) Tray 3 and 4 Tray 1 and 2 High capacity (Trays 6 and 7) Tray 5 (Bypass) Tray 3 and 4 Tray 1 and 2 Orientation Size 9 × 11 No No No No No No No No 12 × 18 No No No No No No No No SRA3 No Yes No No No Yes No No 12.6 × 19.
Addendum A/B series(8 K/ 16 K) Paper size group Inch series A/B series(8×13”/ 8×14”) High capacity (Trays 6 and 7) Tray 5 (Bypass) Tray 3 and 4 Tray 1and 2 Tray 1and 2 High capacity (Trays 6 and 7) High capacity tray 6 and 7 Tray 5 (Bypass) Tray 5 (Bypass) Tray 3 and 4 Yes Yes Yes Yes Yes Yes Yes No Yes No Yes A3 No Yes Yes No No Yes Yes No No Yes No No B6 No No No No No No No No No No No No B6 No No No No No No No No No No No No B5 No Yes Y
Addendum A/B series(8 K/ 16 K) Paper size group Inch series A/B series(8×13”/ 8×14”) High capacity (Trays 6 and 7) Tray 5 (Bypass) Tray 3 and 4 Tray 1and 2 High capacity tray 6 and 7 Tray 5 (Bypass) Tray 3 and 4 Tray 1and 2 High capacity (Trays 6 and 7) Tray 5 (Bypass) Tray 3 and 4 Tray 1and 2 Orientation Size 16 K No Yes No No No Yes No No No No No No 18 K No Yes No No No No No No No No No No Postcard No No No No No No No No No No No No Return postca
Addendum 6-6 Xerox 4112/4127 EPS System Administration Guide
Index Index E Numerics F 2 Side Report (system settings), 3-26 Fault Tone (system settings), 3-14 A I Account Limit (system settings), 4-5 Alert Tone (system settings), 3-15 Allocate Memory (system settings), 3-71 Audio Tones (system settings), 3-13 Auto Clear (system settings), 3-8 Auto Clear Alert Tone (system settings), 3-15 Auto Job Promotion (System Settings), 3-62 Auto Job Release (system settings), 3-9 Auto Power Saver (system settings), 3-11 Auto Print (system settings), 3-10 Auto Tray Swit
Index P Paper Size Settings, 3-63, 6-2 Paper Tray Attributes (system settings), 3-17, 3-18 Paper Tray Priority (system settings), 3-22 Paper Type Mismatch (system settings), 3-74 Paper Type Priority (system settings), 3-24 Port Settings (system settings), 3-70 Power On / Off, 1-2 Power Saver Mode, 1-5 Print Area (system settings), 3-73 Print ID (system settings), 3-74 Printer Mode Settings (system settings), 3-71 Printing Paper Size Defaults (system settings), 3-63 Protocol Settings (system settings), 3-70