
RV Series Remote Control Owner's Manual RC/GS RC7

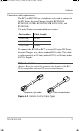
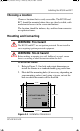
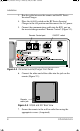
Table Of Contents
- Important Safety Instructions
- Introduction
- Installation
- Configuration
- Set Idle
- Battery Capacity
- Battery Type
- Max Charge Rate
- Set Shore Power
- Remote Setup
- LCD Contrast
- Set Clock (RC/GS Only)
- Select Genset (RC/GS Only)
- Generator Start (RC/GS Only)
- Generator Stop (RC/GS Only)
- Thermostat Start Enable and Disable (RC/GS Only)
- Begin Gen Quiet and End Gen Quiet (RC/GS Only)
- Saving Setup Choices
- RV Series Inverter/Charger and RC/GS and RC7 Setup
- Auto Gen Start Setup (RC/GS Only)
- Operation
- Status LEDs
- LCD Screen
- Buttons
- AC Source Messages
- Genset Error Messages (RC/GS Only)
- Inverter Mode Messages
- Charger Mode Messages
- Inverter/Charger Error Messages
- Meters Display
- System Status Messages
- Preparation for Storage
- System Status Messages
- Generator Status Messages (RC/GS Only)
- System Status Display
- Meters Display
Installation
8 975-0210-01-01
3. Run the cable between the remote and the RV Series
Inverter/Charger.
4. Place the
ON/OFF switch on the RV Series Inverter/
Charger to the
OFF position and disconnect the AC power.
5. Connect the communications cable into the RJ11 port on
the inverter/charger marked “Remote Control” (Figure 2-2).
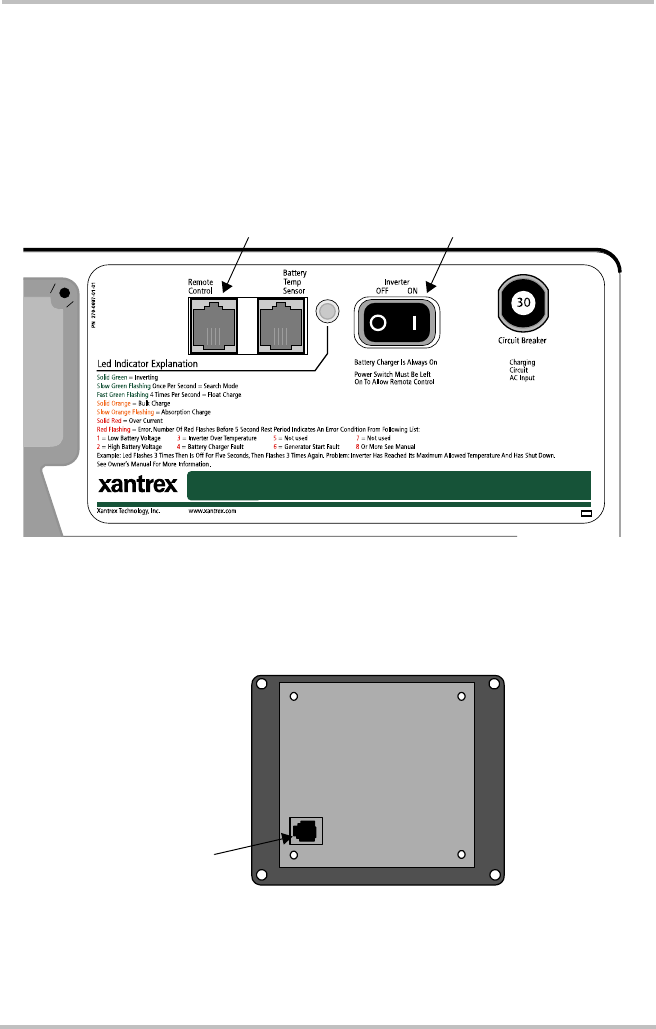
6. Connect the other end of the cable into the jack on the
remote (Figure 2-3).
7. Secure the remote to the wall or outlet box using the
appropriate screws (4 required).
Figure 2-2
RV Series Inverter/Charger Front Panel
Figure 2-3
RC/GS and RC7 Back View
Remote Control port
ON/OFF switch
Remote
cable jack
RC-GS_manual.book Page 8 Thursday, May 26, 2005 4:58 PM