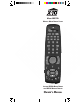
MODEL MK19A WIRELESS MOUSE REMOTE SYSTEM INCLUDES JR20A MOUSE REMOTE AND JR21A W IRELESS RECEIVER OWNERS MANUAL
READ THIS FIRST! SAFETY CONSIDERATIONS Remember to exercise good common sense when using your X-10 Mouse Remote for home automation applications - especially when scheduling unattended devices. There can be some unexpected consequences if not used with care. For example, an empty coffee pot can be remotely turned on. If that should happen, your coffee pot could be damaged from overheating. If an electric heater is turned on by remote control while clothing is draped over it, a fire could result.
C ONTENTS INTRODUCTION .................................. 5 BATTERY INSTALLATION ......................... 6 SETTING UP YOUR MOUSE REMOTE .......... 7 B UTTON DESCRIPTIONS ...................... 7 B UTTON DEFAULTS ............................ 9 MOUSE OPERATION ........................ 14 MOUSE S OFTWARE INSTALLATION ......... 16 MOUSE S OFTWARE CONFIGURATION .... 16 T YPICAL APPLICATION SCENARIO .......... 21 S ETTING UP FOR TV, VCR, CD, C ABLE BOX AND SATELLITE RECEIVER ..... 22 C ODE LISTINGS ............
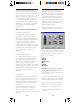
SETTING UP YOUR M OUSE R EMOTE Here are just some of the things you can do with your X-10 Mouse Remote... BUTTON DESCRIPTIONS INDICATOR LIGHT Control your entire audio/video and lighting setup for the ultimate Home Theater experience. Turn on lights at night to scare away intruders if you hear a noise. Start the coffee from your bedroom when you wake up. Turn on your electric blanket before the movie ends, so its nice and warm when you go to bed.
VOLUME +/- (UP/DOWN) Works like your original remote. Also brightens and dims lamps in X-10 mode. Works as Line Up/Down in PC mode. CHANNEL +/- (UP/DOWN) The Mouse Remote buttons can be programmed to perform various functions using the Mouse Remote software, but they are pre-programmed with the following defaults: Works like your original remote. Also works as on and off in X-10 mode. Also works as Page Up/Down in PC mode.
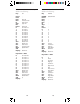
When WEB mode is selected the keys default to the following: When DVD mode is selected the keys default to the following: Key WEB Key DVD WEB Power Enter Play Rew FF Stop Rec Pause 0 1 2 3 4 5 6 7 8 9 Vol+ VolCH+ CHMute A.B Display Default Browser www.x10.com www.pc.orcaweb.com Line Up Line Down Page Up Page Down Minimize Maximize Power Enter Play Rew FF Stop Rec Pause 0 1 2 3 4 5 6 7 8 9 Vol+ VolCH+ CHMute A.
When CD mode is selected the keys default to the following: When PHONE mode is selected the keys default to the following: Key CD Key PHONE Power Enter Play Rew FF Stop Rec Pause 0 1 2 3 4 5 6 7 8 9 Vol+ VolCH+ CHMute A.
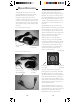
MOUSE OPERATION The MK19A kit consists of a remote control (JR20A) and a wireless receiver (JR21A). The remote control sends wireless RF signals (from up to 40 ft. away) to the receiver which is connected to your PC. You plug the receiver into the serial or PS/2 port on your PC and plug your regular mouse into the socket on the receiver. If you have a serial mouse.... To your serial mouse To serial port on your PC If you have a PS/2 mouse....
However, to take advantage of the advanced features of the Mouse Remote, you can install the software that came with it. This lets you configure the remotes special function buttons such as PC, WEB, DVD, PHONE, CD, etc. You can configure these buttons to perform special functions such as launching your WEB Browser, for example. If you prefer you can just use the defaults Listed on pages 9 to 13.
Clicking on the Launch button on the screen shown on page 17 displays a window similar to the one below. The actual window you see depends on what button you clicked and will be different for Launch, WWW, Multimedia, Edit, System, and Messages. In this case you clicked on Launch so you will see the window above. Next click in the File name box and then type in the path and name for your word processor, or browse to find its location.
Note that the mouse pad and the buttons on the back of the remote are always active, no matter what mode the remote is in (PC, TV, VCR, etc.). Note however that the special function buttons (WEB, PHONE, CD, DVD) are only active after the PC button has been pressed. Note also that the mouse cursor will move faster as you press harder on the mouse pad. It actually has three distinct speeds. Note also that speed, mouse trails, etc. can be set from the Remote Mouse Properties Sheet in the Control Panel.
SETTING UP FOR TV, VCR, CABLE, CD, AND SATELLITE RECEIVER 1. Turn on the device you want to control (TV, VCR, cable box, satellite receiver etc.). 2. Press and hold SETUP until the LED indicator lights steadily. Release the SETUP button. 3. Press and release the mode button that matches the device you want to control. The LED blinks once. Use AUX for CDs. 4. Enter the 3 digit Code from the Library Code Tables. The LED turns off after the last digit entered. 5.
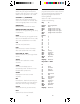
FISHER ......................................... 062,063,064,193 FUJITSO ............................................................ 059 FUNAI ................................................ 051,055,059 FUTURETEC ................................................ 051,055 ............................................................................. GE .................. 013,016,017,022,035,065,067,068 ...................... 100,176,177,178,179,180,181,194 GIBRALTER ...........................................
VICTOR ..................................................... 079,195 VIDTECH ............................................. 017,018,022 VIKING ............................................................. 187 ............................................................................. WARDS .................. 013,014,017,018,022,037,046 ............................. 059,065,075,081,082,087,088 ...................... 089,096,100,101,108,132,133,197 ............................................................
SANYO .............................................. 024,026,036 SCOTT ........................................ 025,028,038,045 .................................................. 051,078,106,129 SEARS .................................. 024,027,034,036,061 ........................................... 062,063,064,068,069 ................................................................ 120,131 SHARP .................... 014,015,030,042,107,108,109 SHINTOM ............................
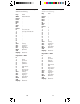
KENWOOD ...................................................... 051 ............................................................................. LUXOR .............................................................. 052 ............................................................................. MACOM STATE ................................................. 053 ............................................................................. NORSTAT .......................................................... 054 .
VICTOR ............................................................ 035 ............................................................................. YAMAHA ..................................... 018,065,066,077 HOME AUTOMATION CODES ............................................................................. X-10 HOME AUTOMATION (RF) ........................... 013 X-10 HOME AUTOMATION (IR543)...................... 014 GE HOMEMINDER ............................................ 015 ........................
SEARCHING FOR CODES IDENTIFYING C ODES FOUND USING THE SEARCH PROCEDURE 1. Turn on the device you want to control. 1. Press and hold SETUP until the LED indicator lights steadily. Release Setup button. 2. Press and hold SETUP until the LED indicator lights steadily. Release Setup button. 3. Press the mode button that matches the equipment you want to control. The LED blinks once. For AUX, press AUX, then the mode button. 4. Press CH + repeatedly* until the device to be controlled changes channel.
SETTING THE SLEEP TIMER The Sleep Timer automatically turns off the TV after the time you set. Press the TV button, then follow the instructions below to set the Sleep Timer: 1. Press and hold TIMER until the LED indicator lights steadily. Release TIMER button. 2. Use the number buttons to enter the sleep time required (1 to 99 minutes). 3. Press ENTER to confirm the setting. Note: Make sure you leave the remote pointing at the TV to ensure it turns off the TV at the time you set.
HOUSE CODES AND UNIT CODES UNIT CODE DIAL INSTALLING HOME AUTOMATION COMPONENTS TRANSCEIVER MODULE HOUSE CODE DIAL Each Module has a specific address made up of a House Code (red dial on the face of the Module) and a Unit Code (black dial on the face of the Module). The Controller first sends an address and then a command on the AC power lines. Only the Module with a matching address will execute the command. If more than one Module has the same address, both Modules will execute the command.
LAMP MODULE The Lamp Module (sold separately) may be used to control any incandescent lamp rated up to 300W. It is not suitable for other types of lamps such as fluorescent or energy saving lamps, or lamps which include a dimmer control. Caution: Do not connect an appliance such as a coffee pot or heater to the Lamp Module. It may damage the Module and the appliance and could cause a fire hazard. 1. Set the House Code to A and the Unit Code to 2.
TO SET THE X-10 S LEEP TIMER The X-10 Sleep Timer switches off the chosen modules after the preset time. 1. Press and release the X-10 button. CHANGING THE X-10 HOUSE CODE The Mouse Remote defaults to House Code A, and in most cases you will not need to change this unless you are experiencing interference from a neighboring X-10 system. 1. Press and release the X-10 button. 2. Press and hold TIMER until the LED indicator lights steadily. Release the TIMER button. 3.
CONTROLLING AN IR M INI CONTROLLER (IR543) E XPANDING YOUR S YSTEM If you already own an IR Mini Controller, you will need to change the X-10 Home Automation code in the remote to use it. The code for standard X-10 Home Automation is 013. The code to control the IR543 Mini Controller is 014. To change the code: The products illustrated below represent just a few of the wide range of X-10 compatible products you can choose from to expand your Home Automation system.
TROUBLESHOOTING Use a controller to trigger the Remote Chime Module SC546 to call Dad up for dinner, or warn people youre about to turn on the sprinkler. ON BRIGHT OFF DIM RF Wall Switch ON The PowerFlash Module PF284 connects to dry contact or low voltage alarm terminals on your burglar alarm system and flashes X-10 controlled lights when it is triggered.
Mouse related problems: Tray Icon not visible (Windows 95): No mouse control (even the standard mouse) or no cursor in Windows: The X-10 mouse driver included with the system has not been installed, or the Mouse Remote has not been detected. Check that the driver has been installed and that all mouse connections have been made correctly. Ensure that the JR21A Mouse Receiver is plugged into your serial or PS/2 port and your mouse is plugged into the receiver.
System Requirements Note: The system requirements are not defined by the Mouse Remote, but by the applications that will be enhanced with the use of the Mouse Remote. Minimum: Windows 3.1 or Windows 95, 486/ 66 processor, 8MB RAM, double speed CD ROM drive, local bus video adapter with 1MB RAM, 128kB level 2 cache, a Windows compatible sound card and a PS/2 or serial mouse.
X-10 (USA) Inc. 91 Ruckman Rd. Closter, NJ 07624-0420 http://www.x10.