Owner’s Manual X10.com, a Division of X10 Wireless Technology, Inc.
Read First Contents FCC Caution THIS DEVICE COMPLIES WITH PART 15 OF THE FCC RULES. OPERATION IS SUBJECT TO THE FOLLOWING TWO CONDITIONS: (1) THIS DEVICE MAY NOT CAUSE HARMFUL INTERFERENCE, AND (2) THIS DEVICE MUST ACCEPT ANY INTERFERENCE RECEIVED, INCLUDING INTERFERENCE THAT MAY CAUSE UNDESIRED OPERATION. NOTE: This equipment has been tested and found to comply with the limits for a Class B digital device, pursuant to part 15 of the FCC Rules.
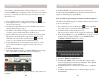
Introduction Introduction, cont. Congratulations! You’re now the proud owner of the newest technology in tablets. Powered by Android 2.3.4, the X10 AirPadX is equipped with a powerful 1 Ghz ARM Cortex A9 processor, it has a brilliant color screen, 4 GB onboard memory (plus an additional 32 GB with microSD card, not included), a built-in camera/video recording device, and access to thousands of Apps in the Amazon Market. You’ll find your AirPadX to be extremely fast, with a very responsive touch screen.
Getting Started Getting Started, cont. First charge the battery in your AirPadX, connect the included power supply to the jack on the side of your AirPadX (next to the ON/OFF button) and plug the power supply into an AC outlet. It may take up to 4 hours to fully charge the unit. The AirPadX does NOT charge via the included USB cable. For best battery performance leave your AirPadX charging overnight or when not in use. See also page 20.
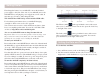
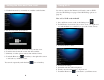
Setting the Date and Time, cont. 3. Uncheck Automatic (to manually set) and then touch Set time. Using Wi-Fi In order to connect to the Internet you’ll need to turn on Wi-Fi. (See also Wi-Fi Hotspot on page 19 and Wi-Fi Sleep options on page 21). How to Use Wi-Fi on the AirPadX 1. On your Home screen, touch on the Settings icon. 2. Touch Wireless & networks. (If you don’t see it, you might need to touch the Back icon or hard key to get to the correct screen). 4. Set the correct time and touch Set. 3.
Installing Apps You’ll want to install the Amazon Android Appstore so you can download FREE Apps, and purchase other ones. Note you will first need to go to amazon.com and set up a free account if you don’t already have one. Installing Apps, cont. Your AirPadX makes an excellent e-book reader. You can download and install FREE readers from the Amazon Android Appstore, including the popular Kindle. How to install a typical App from Amazon Android Appstore 1. On your Home screen, touch on the Settings icon.
Uninstalling Apps Moving Apps between screens Uninstalling Apps The Home Screen. 1. On your Home screen, touch the Settings icon. 2. Scroll to and touch Applications. (If you don’t see it, you might need to touch the Back icon to get to the correct screen). 3. Touch Manage applications. 4. Scroll to and then touch the application you want to uninstall. Here, we demonstrate the uninstallation of a music player. 5. Touch Uninstall. Touch the dots (or swipe the screen) to access other screens.
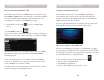
Moving Apps between screens, cont. Moving Apps between the 5 screens Transferring files from your PC You will need the included USB A to Mini-USB B cable to do this: You will notice 5 dots in the top center of the screen. These represent 5 discrete screens on your AirPadX. Your Home screen is the screen in the middle of the 5 screens, and so when the center dot is the solid one you are looking at your Home screen.
Transferring files from your PC, cont. 6. Touch OK in the window that appears. How to watch Movies or Videos 1. Download video files from the Internet, or transfer them to your AirPadX from your PC or laptop. (See Transferring files from your PC on page 15). 2. On the main Apps screen, find and touch the Video Player icon. 3. Find and touch the movie or video file you want to play.
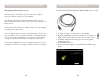
Connecting to a TV Managing your AirPadX How to connect the AirPadX to a TV Using an external microSD card First, make sure your TV has an HDMI input, you will also need a mini HDMI to HDMI cable (sold separately). Connect the AirPadX to your TV with the cable, then follow the instructions in your TV’s manual to view the correct HDMI video input. You can add more memory to your AirPadX by purchasing a microSD card, they come in various capacities.
Managing your AirPadX, cont. How to move Apps to a microSD Card, cont. 4. Touch Move to SD card, the button changes to Moving. After it’s moved, or if the App is already on the SD card, you will see an option to Move to Device. Wi-Fi Sleep Options When your AirPadX goes to sleep (i.e. the screen turns off) you might assume that it’s not consuming any battery power. However, it can still use up a lot of battery power if Wi-Fi is turned on.
Wi-Fi Sleep Options, cont. 5. Touch Advanced (at the bottom right hand corner of the screen). Resetting to Factory Settings If you play around and install a bunch of Apps to get familiar with your AirPadX you might want to know how to put your AirPadX back to its factory condition. Follow these instructions to do this: 1. On your Home screen, touch on the Settings icon. 2. Touch Privacy. (If you don’t see it, you might need to touch the Back icon to get to the correct screen). 6.