
User guide


PLATESCOPE
20
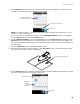
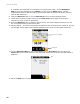
10. Press the Measure button or use the Next Arrow icon to active targeting mode.
11. Locate the instrument’s target window on the 10% patch of the 175 LPI step wedge using
the reticule icon in the screen for positioning.
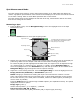
12. Press the Measure button to take the measurement. The screen displays a checkmark over
the 10% patch if it was measured successfully.
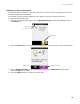
13. Repeat steps 10 - 12 until the remaining five patches on the 175 LPI step wedge have been
measured. After all patches are measured, a checkmark should appear over each patch on the
screen.
NOTE: A minus symbol (-) may appear in the patch location if the measurement failed or the
patch was skipped.
If you would like to re-measure a patch, use the Navigation Ring to move the highlight
focus to Delete icon and press the Select button. Each time delete is selected, the last patch
will be deleted.
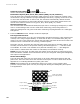
14. Use the Navigation Ring to move the highlight focus to Next Arrow icon and press the
Select button. The screen returns to the main calibration screen and displays updated
information.
NOTE: An “x” will appear instead of a “checkmark” over the instrument icon if patch was
skipped or if the verify procedure failed.
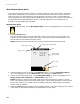
15. Select the Exit icon and return the calibration card to its protective envelope.
Exit
Checkmarks indicate
all patched measured
successfully
Next arrow