
User Guide


Creating a Dual-Illuminant DNG Profile in Photoshop Camera Raw
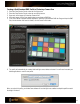
1. Shoot the ColorChecker Classic under the first light source.
2. Shoot the ColorChecker Classic under the second light source.
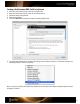
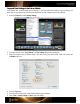
3. Open each of the images in Photoshop Camera Raw.
4. With each image, click the Save Image button to save them as DNG files.
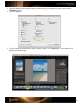
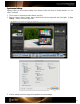
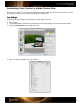
5. In the ColorChecker Passport Desktop Application, select the Dual-Illuminant DNG tab. Drag and drop the DNG
files, into the window. After each is located, click the Create Profile button.
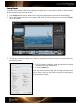
6. The profile will automatically be created with both light source tables and saved. You will need to restart your
Adobe applications to use this new profile.
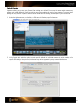
When you select this profile, your Adobe Raw software will use both light source tables to adapt the profile to match
the image’s illuminant.