
User Guide


How to Set White Balance in
Lightroom, Photoshop and
Photoshop Elements
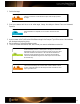
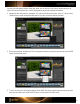
Photoshop and Photoshop Elements both use the same
Camera Raw Plug-in, and the white balance tool works
just as it does in Lightroom. Select the White Balance
eyedropper tool. For a neutral white balance, select
either the first patch, on the left, in the portrait row, or
the middle patch on the landscape row.
Because you are working in a Raw workflow, the custom white balance settings
are non-destructive. This means you can keep clicking and testing until you get
the look you want. If you aren’t happy with the results, you can always revert to
the white balance settings from import.
How to Set White Balance in
Capture One
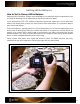
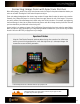
In Capture One, select the eyedropper in the toolbar. This is
the Pick White Balance tool. The curser will become an
eyedropper. As you move your curser over the image, the
current values for that area will appear on the window above
the image. For a neutral white balance, select either the first
patch on the left in the portrait row, or the middle patch on
the landscape row.
White balance can be saved as a preset so you can assign it to other images
that were shot in the same lighting. See the “Automating Color Control in Raw”
section for details.
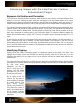
How to Set White Balance in
Aperture
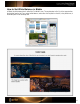
Aperture’s white balance is similar. In the Adjustments
panel, scroll down to white balance. Click on the
eyedropper; then, for a neutral white balance, select
either the first patch on the left in the portrait row, or the
middle patch on the landscape row.