
User Guide

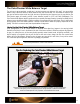

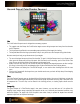

The ColorChecker White Balance Target
The only way to get a consistent, neutral gray is to shoot a proper gray reference. Why gray? You cannot white
balance if any of the RGB values are at the maximum limit, with no tone value. It is much easier to expose a light
gray card so that the values are all very light, but not so light that they don’t have any tone. A gray patch on the
ColorChecker target will actually provide a more balanced neutral for JPEG and RAW photography. The
ColorChecker White Balance target is produced to be a spectrally flat target, meaning it provides a neutral point of
reference across the different types of lighting conditions you encounter during a photo shoot. Since it reflects back
the light equally across the visible spectrum, a camera in white balance mode can properly compensate for the
lighting. The result is a more accurate, truer representation of image color.
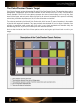
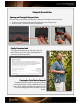
How to Use the ColorChecker White Balance Target
Some photographers try to do a white balance on whatever white object they happen to be carrying (printed
directions to the shoot) or see in the distance (the side of the house next door). While these objects may appear to
be gray, it’s unlikely that any of them are actually spectrally neutral (neutral under all lighting conditions); and
they’re certainly not consistent. Not only will this add a color cast to every image, but each new custom white
balance will be a little different. Although a piece of paper may seem to be a safe choice, it may not be neutral.
Plus, most have optical brighteners, which will only amplify your problems.
See the “Setting White Balance” section for more information.
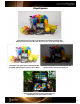
Shoot the ColorChecker White Balance target in the same lighting conditions you’ll be photographing.
Make sure the lighting is even and properly exposed. Strong shadows or reflections will alter the
results. Accurate exposure is very important, and will affect the final results.
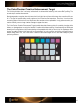
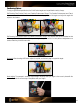
Tips for Capturing the ColorChecker White Balance Target