
User Manual
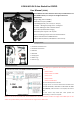

Appendix 1. The X-CAM A10-3H Sensor Advanced Calibration Guide
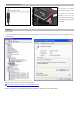
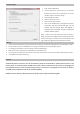
1. Connect the USB cable to the PC and launch the X-CAM Gimbal Assistant Software, then power on the X-CAM A10-3H.
2. Click the button “Connect” and then click the button “Read Params” you will hear beep-beep.
Notice :Please back up the Driven Voltage values and Servo Reverse values( as the picture 1 shows) before calibrating.
( Picture 1 )
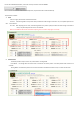
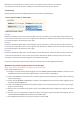
3. Click the button “initialize Params”. Then you will hear three beeps (beep-beep and beep), please input “0” into Driven
Voltage. Then click the button “Burn Params”, you will hear “beep-beep-beep" that means it has been burned into the
X-CAM A10-3H. (Do not double click )
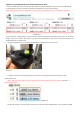
4. (1) Toggle the gimbal vertical to the ground (90 degrees). Put the bubble level on the sensor.
Picture 2 )
2 ) Adjust the camera to keep the bubble at the center position manually.(picture2) Click the button of “Auto
Calibrate ”(Picture 3)
Notice : when you click the button of “Auto Calibrate”,please keep the bubble at the center position. (picture2) ( If
failed ,please try again )
(Picture 3)
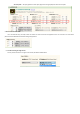
3 After the calibration ,click the button of “Disconnect ”,and power off the X-CAM A10-3H . Then re-power the X-CAM