
User manual


User Manual
• Press Button “OK” to playback recording. Pressing Button “C” will cancel
recording. The recording can be repeated until a satisfactory recording has been
made.
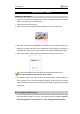
• Pressing Button “●” will confirm the recording and save both the image and
recording, with the indication of “
” appearing momentarily on the screen.
Indication like “Saved as IMAGE006” will appear on the screen temporarily when
finished.
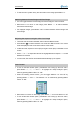
• To turn off the voice annotation option, press Button “M” to bring up the main
menu, press Button “ ”∧ , “ ”∨ , “<” and “>” to highlight the “Setup Analysis” option,
select by pressing Button “Menu” or “OK”
• Under the heading named “Voice Annotat”, you can toggle between “on” and “off”
by pressing Button “<” and “>”. The selection “off” is confirmed by pressing
Button “Menu” or “OK”
Note:
• Recording will automatically stop when it reaches 30 seconds
Non Uniformity Calibration (NUC)
• Non Uniformity Calibration allows the automatic adjustment of the camera
detector to ensure normalization and sharpness of the screen image.
• Non Uniformity Calibration can be performed on live image
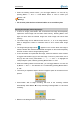
• To perform a Non Uniformity Calibration (NUC), keep Button “C” depressed for
two seconds.
• Then the live image pauses temporarily, whilst a shutter is placed in front of the
detector
• If the image quality is still not satisfying, keep “>” depressed and at the same
time press C to modify the background. There will be “Calibrating…” displayed on
the screen when modification starts and “Finished” when accomplished
• This process takes only a couple of seconds, however for best results, please
ensure that camera is pointed at an even object with temperature similar to the
ambient.
Note: It is advisable not to modify the background too frequently. The default setting
has reserved a group of accurate data which is approved by many tests. Better
quality image can also be achieved by going back to default setting.