
User manual
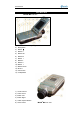


User Manual
• To exit the menu system at any time and return to the image press Button “C”
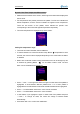
Switching between Infrared image and Visual Image
• You can toggle between infrared image and visual image to view each other
• When there is no menu on live image, press Button “<” to switch between
thermal and visual image
• For replayed images, press Button “OK” to switch between infrared image and
visual image
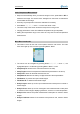
Adjusting the exposure and gain of the visual image
• There are also two modes available, Auto mode and Manual mode
• Press Button “●” to switch between Auto mode and Manual mode. The current
mode is displayed in left corner at the bottom of the screen
• In Manual mode, exposure control (EC) and gain control (GC) is available on the
screen.
• Press “∧” or “∨” to adjust the value of the highlighted item and press “>” to shift
between EC and GC
• In Auto mode, EC and GC will be defined automatically by the system.
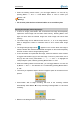
Laser Locator
• To turn on the laser locator option, press Button “M” to bring up the main menu,
press Button “ ”∧ , “ ”∨ , “<” and “>” to highlight the “Setup Analysis” option,
select by pressing Button “Menu” or “OK”
• Under the heading named “Laser”, you can toggle between “on” and “off” by
pressing Button “<” and “>”. The selection “on” is confirmed by pressing Button
“Menu” or “OK”
• When there is no menu on live image, press Button “ ”∧ to turn the laser on or off
• To turn off the laser locator option, press Button “M” to bring up the main menu,
press Button “ ”∧ , “ ”∨ , “<” and “>” to highlight the “Setup Analysis” option,
select by pressing Button “Menu” or “OK”