
User manual


User Manual
Quick Start Guide
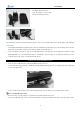
Ensure that the battery is fully charged and the SD memory card is inserted in the camera
Keep button “On/ Off” depressed for 3 seconds to switch on the camera.
Wait till the boot screen image disappears and uncover lens cap. Non Uniformity Calibration (NUC) is performed automatically.
Aim the camera at the target.
Rotate the W/T wheel manually to adjust the focus to get clear thermal image or you can press the W/T wheel to get clear thermal image
automatically.
Press button“☼”and release it instantly and then adjust Tmax, Tmin and palette if necessary.
Press button “PIC Mode”to switch to live visual image and fusion image.
In visual image, still rotate the W/T wheel to manually focus or you can press the W/T wheel to automatically get clear visual image.
Press button“PIC Mode”for 3 seconds to switch between manual and auto modes.
Press button “OK” to freeze the live image.
Press button “OK” again to store the frozen image into SD memory card or built-in flash memory of the camera.
Press button “C” to return to the live thermal image.
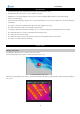
Using the Camera
Powering on the camera
Keep button On / Off depressed for 3 seconds to power on the camera.
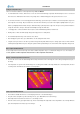
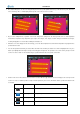
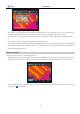
Then the loading image and boot-up flash as shown below appear on the screen.
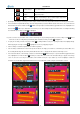
After the boot-up flash disappears, live image as shown below is displayed, with Guide logo and temperature setup menu lying at the right side
of the screen.
14