Quick Start Guide V1.
FCC WARNING This equipment may generate or use radio frequency energy. Changes or modifications to this equipment may cause harmful interference unless the modifications are expressly approved in the instruction manual. The user could lose the authority to operate this equipment if an unauthorized change or modification is made. This device complies with part 15 of the FCC Rules.
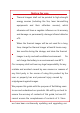
Notice for use Thermal imagers shall not be pointed to high-strength energy sources (including the Sun, laser transmitting equipments and their reflection sources), which otherwise will have a negative influence on its accuracy and damage or permanently damage infrared detector of it. When the thermal imager will be not used for a long time, charge the thermal imager at least 4 hours every two months during the storage, and store the thermal imager in a dry and well-ventilated environment.
products, we reserve the right to modify this guide at any time without prior notice.
Widget Name Photo/video button Down button Menu button Up button Power button Lens focusing ring External access interface Tripod interface External access interface Eyepiece Type C/Micro HDMI Diopter knob
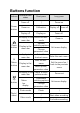
Buttons function Buttons Power button Device current status Short press Long press Power-off / Power on Power on Calibration Display off Power-off Display off Display on Power-off No display in the Switch to scene menu bar mode Down button M Menu button Display in the menu bar Upward switching options Change parameter value No display in the Enter the menu bar shortcut menu Display in the menu bar Enter the submenu Select option/ parameter value No display in the Switch to color menu bar
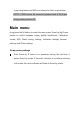
shortcut menu Short press the M button to enter the shortcut menu; Press the Up/Down button to switch between PIP, Screen BRI, Stadiametric Rangefinder, Hot track and Super energy-saving. PIP :Select the left / middle / right, the PIP window is open, and the window image is 2X magnification of the main image. Screen BRI : Ten brightness levels of10%-100% can be adjusted. Stadiametric rangefinder:The stadiametric rangefinder function can estimate the distance of an target by an known target distance .
Super energy-saving : When the Super energy-saving mode is turned on, the screen brightness is reduced to 30%, and the WiFi is turned off; when the Super energy-saving mode is off, the
screen brightness and WiFi are restored to their original state. NOTE : If WiFi cannot be turned on, please check if the Super energy-saving mode is off. Main menu Long press the M button to enter the main menu. Press the Up/Down button to switch between Image quality adjustment, Calibration model, WiFi, Power saving settings, Indication settings,General settings and Other settings. Power saving settings Auto Stand-by :If there is no operation during the set time, it enters Stand-by mode.
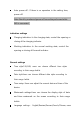
Auto power-off : If there is no operation in the setting time, power-off. Note: Stand-by mode and power-off cannot be performed while WiFi is connected. indication settings Charging indication :In the charging state, control the opening or closing of the charging indicator. Working indication :In the normal working state, control the opening or closing of the work indicator. General settings Time style:12H/24H, users can choose different time styles according to their usage habits.
can adjust the device language according to their needs. Memory card formatting : Memory card formatting and empty the memory.
Restore default : Restore the factory state. other settings (optional feature settings) Ranging: The rangefinder data can be controlled to be turned on/off, and the appearing when 'Ranging' is turned on is the actual measurement point and the measurement data is displayed. Ranging coordinates correction:This feature is available for devices equipped with rangefinders.
charging When using the thermal imager for the first time, make sure to charge the thermal imager for at least 4 hours with a matching USB charger.
When charging, please unplug the USB cover at the bottom of the thermal imager, insert the matching TypeC USB charging cable, and plug in the power, and then the charging begins.
no screen display on the screen of this device. When the HDMI cable is unplugged, the screen of the device is restored.
WUHAN GUIDE SENSMART TECH CO., LTD. Http://www.guideir.