
Installation Instructions
2
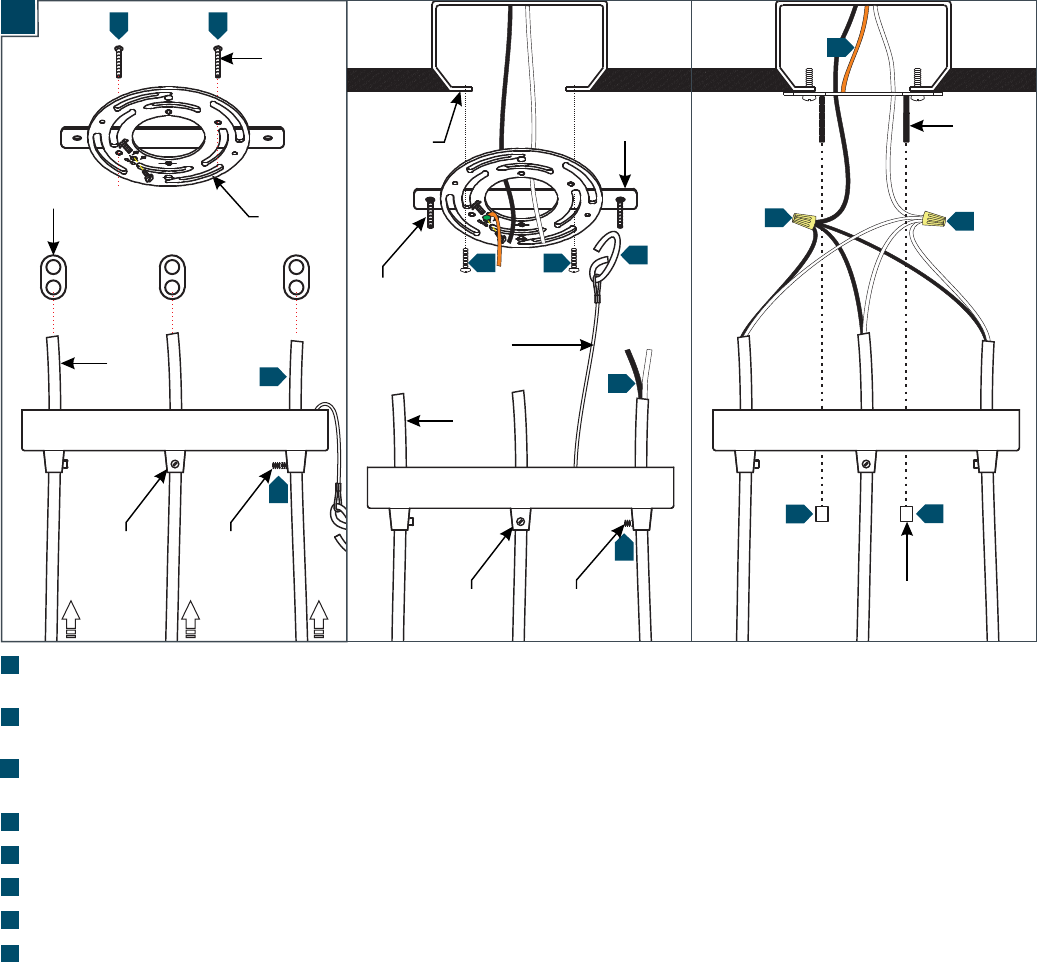
Install the Fixture
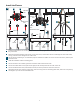
1
2
3
1A
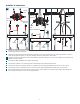
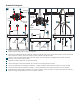
4
5
6
7
8
COLLAR
COLLAR
SCREW
2
CORD
2
THREADED
STUD
MOUNTING
PLATE
1 1
3
CORD
3
INSTALLATION CABLE
JUNCTION
BOX
MOUNTING
PLATE
THREADED
STUD
COLLAR
COLLAR
SCREW
4
11
6
7
THREADED
STUD
8
CAP NUT
8
5
Install threaded studs to the mounting plate, secure with a nut (if applicable or necessary). Secure the mounting plate to
the junction box.
Determine the desired length of the fixture, loosen collar screw, and feed the fixture cord through the strain relief collar,
canopy, and strain relief. Re-tighten the collar screw.
Cut the excess cord leaving 6” of cord behind, strip the insulation 4" (Make sure not to nick the inner wires), and strip the
end of the wires.
Hook the installation cable to mounting plate.
Connect the fixture to a suitable ground in accordance with local electrical codes.
Connect the white fixture wire (square and/or rigid) to the neutral power line wire with a wire nut.
Connect the black fixture wire (round and/or smooth) to the hot power line wire with a wire nut.
Neatly place all the wires into the junction box, place the canopy onto the mounting plate studs, and secure it in place by
screwing the cap nuts onto the threaded studs.
STRAIN
RELIEF