Commercial Mower Owner’s Manual For Stander Serial Numbers 53014 and Higher Until Superseded WARNING: READ THIS MANUAL BEFORE USING Revised 11/2010 For your safety and for proper operation and maintenance read carefully and keep readily available for future reference. Additional replacement owner’s manuals as well as illustrated parts lists are available from your authorized Wright Dealer for a nominal charge. Also check www.wrightmfg.com for the most up to date product literature.
Foreword Welcome to the progressive group of mowing professionals who use Wright mowers. We are focused on giving you advanced engineering and quality construction in each mower we build. This manual explains the features and promotes safer use of the mower. Please read it in its entirety and follow the instructions carefully so that you can have many years of safe and productive operation with your Wright product.
TABLE OF CONTENTS PRE-DELIVERY SERVICE OF MOWER BY DEALER .........................................................................................................................3 SAFETY INSTRUCTIONS .................................................................................................................................................................5 INTRODUCTION .......................................................................................................................................
PRE-DELIVERY SERVICE OF MOWER BY DEALER WARNING Before proceeding with the Pre-Delivery Service of your mower, please read the safety instructions manual in its entirety. Only your authorized Wright dealer should perform the Pre-Delivery Service of the mower. The Wright Mower is shipped completely assembled and has been adjusted and tested at the factory.
Before testing the blade clutch/brake operation, make sure the area is clear and there is nothing vulnerable to possible thrown objects from under the mower. No one should be near the mower deck or in its line of discharge at this or at any time. The discharge chute deflector should be in the down position. Move the engine throttle control to ¾ RPM speed setting. Turn on the blade clutch switch. Run blades for approximately one minute.
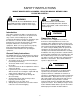
SAFETY INSTRUCTIONS WRIGHT MOWER USERS & OWNERS: READ THIS MANUAL BEFORE USING PLEASE BE CAREFUL! WARNING CAUTION This symbol with the word “WARNING” indicates a potentially hazardous situation which, if not avoided, could result in death or serious injury. This symbol with the word “CAUTION” indicates a potentially hazardous situation which, if not avoided, could result in minor or moderate injury. Introduction WARNING This mower is built to the highest standards in the industry.
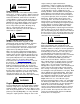
engine contrary to engine manufacturer specifications. Failure to comply can compromise operator safety, shorten equipment life and void your manufacturer’s warranty. Keep all nuts, bolts, and screws tight to be sure the equipment is in safe working condition. Check the blade mounting bolts for proper tightness every eight (8) hours of operation. Check the blades for excessive wear and sharpness every four to eight (4-8) hours of operation. Sharpen dull blades.
If the mower discharges grass clogs, turn off the blade clutch switch, apply the parking brake, stop the engine and remove the key before removing obstruction(s). Keep all shields and covers in place, namely, all blade and belt covers, engine shields, and grass discharge chute deflector. Keep hands, feet and clothing away from rotating parts, especially the rear wheels, blades, engine flywheel, belts and pulleys.
Recommendations for this angle: Lean back with arms stretched out straight while holding onto the stationary handlebar. This transfers more of your body weight to the rear drive wheels for more traction. Do not change speed suddenly to minimize the tendency of going into a slide. Accelerate and decelerate gently. If you ever go into an uncontrolled slide while pointing down a slope the recommended procedure is to let go of the handles and jump off if necessary.
where fumes may reach an open flame or spark. Allow the engine to cool before storing in any enclosure. (Drain fuel to a ½ tank when performing maintenance or repairs that require the unit to be tilted) Wright is fully concerned with your safety. Please read the above repeatedly until you fully understand the methods to promote the safest operation possible. REMEMBER – YOUR MOWER CAN BE ONLY AS SAFE AS THE OPERATOR. FAILURE TO FOLLOW SAFE OPERATING PRACTICES MAY RESULT IN SERIOUS INJURY OR DEATH.
OPERATING INSTRUCTIONS WARNING If you are not completely familiar with the Safety Instruction Manual read it now before proceeding with the operation of the mower. REMEMBER THERE ARE CERTAIN PRECAUTIONS LISTED IN THIS MANUAL THAT YOU MUST NOW TAKE BEFORE STARTING THE MOWER. Make sure the control levers are in the exact neutral position. Apply the parking brake if it is not already set. Turn OFF the blade engaging switch if it is on. Check the engine oil. Turn fuel valve to the “ON” position.
brake. The higher engine speed will make the controls much more responsive and the mower much quicker; Use caution if it is your first time. Now try moving the hand control levers, one at a time, very slightly, forward and backward. Gradually increase your speed until you are well acquainted with the operation of the hand controls and the mower’s behavior. After gaining a good feel for how the mower handles, gradually attempt higher engine speeds until familiar with operation at full throttle engine speed.
How to Adjust Neutral Neutral refers to the mower movement when the engine is set to full throttle, parking brake is off, and the control levers are in the neutral position. The mower should not move forward or backward during this time. If the mower is moving forward or rearward, the neutral setting must be adjusted. The hydraulic pump has a Return-to-Neutral (RTN) device built into the linkage of the pump.
The height-of-cut can be adjusted the following ways: Pull the deck lift lever on the right hand side of the mower towards the rear of the mower until it clicks once into the locked transport position. Then set the mower blade height with the selector pin on the left hand side of the mower. Once the proper height setting is set on the left, pull back on the deck lift lever on the right side and then lower the lever towards the front of the machine until it stops at the set height-of-cut.
height of cut range after any adjustments are made to these hangers to ensure that the height of cut adjustments work properly. If unable to make the adjustments needed to align deck properly, contact your dealer for assistance. Clutch Stop Belt Tension Adjustment The pump drive belt is self-adjusting, and requires no adjustment, just replacement. The blade drive belt is self-adjusting also and requires no adjustment, just replacement.
Spring platform Adjustment The factory setting is both springs set at the most forward position. The more rearward the spring position, the stiffer the platform gets. Adjustment will be to preference of feel. The two adjustment springs should at all times, be positioned next to each other not one forward or back more than the other. To adjust, loosen each spring retaining bolt from the top just enough to slide it, then tighten with impact wrench. The nut may spin using hand wrench.
port. Use fully synthetic oil: Mobil1 15W-50. With the bypass valves open and the engine running, slowly move the control levers back and forth five or six times. Now close the bypass valves and with the engine running, slowly move the control levers back and forth five or six times. It may be necessary to repeat the above steps until all the air is purged and the rear wheels are turning at normal speed. After purging is complete, adjust the oil level in the reservoir if necessary.
Torque Specifications Critical Application Models Wheel motor bolts (Securing motor to support) Big/Small Stander, Stander X, RH, WSES, Velke Wheel motor bolts / nuts (Securing motor to support) ZK, MMZ, Sentar3 Clutch to engine shaft All Models Thread Torque Locker Range (ft-lbs) Loctite 2760 40-50 50 N/A 103-125 110 Loctite 2760 50-55 50 175-225 160 160-240 138-158 80-90 13-17 160 130 90 n/a Big Stander, Stander X (MF14) Wheel hub to wheel motor ZK, MMZ, Sentar3 (15E) All Others (12P
ITE MS SE EN O T BE E L FI R OW ST HO 8 UR S DA I LY EV ER Y HO 25 EV URS ER Y HO 100 UR EV S ER Y HO 200 UR S EV ER Y3 HO 0 UR 0 S AN NU AL LY Maintenance Interval Chart EN GI NE MAINTENANCE ITEM *2 Inspect for cracks in frame, cutter deck or other steel parts X Inspect all belts for wear and alignment X Check all bolts and nuts for tightness (tighten as necessary) X Check hydraulic oil reservoir level and fill as needed - Use SYNTHETIC oil Mobil1 15W-50 (refer to Hydro Oil Tank Check & Fill) X
Maintenance Record Date Maintenance/Service Performed 19 Unit Hours Shop/Technician
An Illustrated Parts List (IPL) is available to download or print online at www.wrightmfg.com. Select Stander X from the “PRODUCTS” list, under “DOWNLOADS”, Illustrated Parts.
WRIGHT MANUFACTURING, INC. POWER EQUIPMENT LIMITED WARRANTY THIS WARRANTY SUPERSEDES ALL PREVIOUS ON UNITS WITH A RETAIL SALES DATE ON OR AFTER 04/01/05 Wright Manufacturing, Inc. (hereinafter: WMI) warrants to the original owner that the new WMI mower accompanying this document will be free from manufacturing defects in materials or workmanship subject to the following limitations and exclusions.
Cut Quality and Mowing Tips Problem Description Possible Cause Streaking is when strips of uncut grass are left behind. Streaking Stepped cutting is sharp ridges left in the lawn surface.
23
NOTES:
NOTES:
4600X Wedgewood Blvd Frederick, MD 21703 www.wrightmfg.