Commercial Mower Owner’s Manual For Stander serial #17124 and higher until superseded WARNING: READ THIS MANUAL BEFORE USING Revised 06/2007 For your safety and for proper operation and maintenance read carefully and keep readily available for future reference. Additional replacement owner’s manuals as well as illustrated parts lists are available from your authorized Wright Dealer for a nominal charge. Also check www.wrightmfg.com for the most up to date product literature.
Foreword Welcome to the progressive group of mowing professionals who use Wright mowers. We are focused on giving you advanced engineering and quality construction in each mower we build. This manual explains the features and promotes safer use of the mower. Please read it in its entirety and follow the instructions carefully so that you can have many years of safe and productive operation with your Wright product.
TABLE OF CONTENTS PRE-DELIVERY SERVICE OF MOWER BY DEALER............................................................. 1 SAFETY INSTRUCTIONS......................................................................................................... 3 INTRODUCTION ......................................................................................................................... 3 GENERAL SAFETY INSTRUCTIONS ..............................................................................................
Pre-Delivery Service of Mower by Dealer WARNING If you are not completely familiar with the Safety Instruction Manual read it now before proceeding with the Pre-Delivery Service of the mower. Only your authorized Wright dealer should perform the Pre-Delivery Service of the mower. The Wright Stander is shipped completely assembled and has been adjusted and tested at the factory.
• • • • • • of each pump one at a time and see if the wheels start to move. If the wheels move when the hand controls are in neutral position, adjust the pump neutral adjustment allen screw. The manual bypass valves on side of each pump should now be firmly closed. (Do not tighten these bypass valves with a wrench. Only hand tighten). Now try moving the hand control levers, one at a time, forward and backward. Check to see if the wheels move forward and backward according to position of the levers.
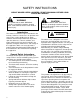
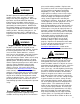
SAFETY INSTRUCTIONS WRIGHT MOWER USERS & OWNERS: READ THIS MANUAL BEFORE USING PLEASE BE CAREFUL! WARNING CAUTION This symbol with the word “WARNING” indicates a potentially hazardous situation which, if not avoided, could result in death or serious injury. This symbol with the word “CAUTION” indicates a potentially hazardous situation which, if not avoided, could result in minor or moderate injury. Introduction This mower is built to the highest standards in the industry.
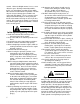
WARNING User Clothing DO NOT operate the mower while wearing sandals, tennis shoes, sneakers, or shorts. Always wear long non-baggy pants. Wear hightop leather steel-toed work boots with thick, textured tread, soft-rubber soled at all times. Hard or smooth soled shoes are too slippery for a good footing on mower platform. NEVER wear loose-fitting clothing or jacket pockets that can get caught on the handlebars or control levers of any mower you drive.
around. When the Wright mower is in use, never direct the grass discharge toward bystanders, traffic, cars or buildings nor allow anyone within 50 feet of the machine while in operation. Thrown objects can pass through glass windows and some walls of buildings. There is extreme risk of danger from thrown objects or being cut by the blades of the mower or being run over if you lose control. Never operate the mower in an enclosed area without good, approved ventilation. Exhaust fumes are dangerous.
Speeding with any mower is dangerous, and so is traveling faster than conditions should permit on this mower. Sudden stops from excessive speed or falling off the mower may cause serious injury or death. WARNING Operation In Reverse Always keep a firm grip on the mower stationary handlebar with both hands. Keep both feet firmly on the foot platform. Look behind you before backing to prevent injuring yourself or anyone behind you.
Recommendations for this angle: • Lean back. This adds weight to the rear drive wheels and will allow you to mow more quickly across the slope without sliding. If your mower is equipped with the optional weight bar on the front, the mower may not handle as well crossing slopes as without the weight bar on the front. Weight on the front of the mower reduces the traction of the rear drive wheels and can cause the mower to slide or nose dive down hill.
OPERATING INSTRUCTIONS WARNING If you are not completely familiar with the Safety Instruction Manual read it now before proceeding with the operation of the mower. REMEMBER THERE ARE CERTAIN PRECAUTIONS LISTED IN THIS MANUAL THAT YOU MUST NOW TAKE BEFORE STARTING THE MOWER. Inspect Mower Before Each Use Inspection of Mower: Do not use the mower if any parts are not maintained in good operating condition. Examine all moving parts prior to each use.
speed. Release the parking brake. The higher engine speed will make the controls much more responsive and the mower much quicker; Use caution if it is your first time. Now try moving the hand control levers, one at a time, very slightly, forward and backward. Gradually increase your speed until you are well acquainted with the operation of the hand controls and the mower’s behavior.
Changing the Speed/Sensitivity Adjustment The controls are initially set with the Speed/ Sensitivity Adjustment in the faster, more sensitive position. If an operator is not completely familiar with the mower operation the operator may desire to decrease the ground speed. The slower setting has a corresponding decrease in the sensitivity of the controls. In other words, a given amount of movement of the control levers will cause about a 25-30% change in the ground speed making the controls less sensitive.
¼” allen wrench at the Return-to-Neutral (RTN) mechanism, if necessary. It is normal to make these adjustments from time to time. How to Test/Use the Blade Clutch/Brake Switch Before testing the blade clutch/brake operation, make sure the area is clear and there is nothing vulnerable to thrown objects from under the mower. No one should be near the mower deck or in its line of discharge. The discharge chute deflector should be in the down position. The parking brake should now be applied.
l Temporary Height-of-Cut Adjustment: using the caster shims (or "C" spacers) you can adjust the blades downward temporarily .5" or 1" below the original coarse setting as described above. This assumes that the blades are level with two shims (or "C" spacers) on the bottom and one shim on the top of the caster support arm. With the blades level at this assumed starting point, you should never move all of the shims to the bottom since that would make the blades higher at the front.
low-pressure compressed air. Once the wash is complete, always lubricate and grease all applicable areas.
Check blades for wear and sharpness (sharpen and balance or replace as necessary) Check and adjust tire pressures to no more than maximum pressure listed on tire and maintaining good traction and comfort Clean out debris under blade belt cover Scrape clean underside of cutter deck Check blade mounting bolts for proper tightness Check blade spindle mounting bolts for proper tightness Clean air cleaner foam element Inspect tires, replace as needed Inspect and tighten all hydraulic hoses Adjust parking brake s
Maintenance Record Date Maintenance/Service Performed Unit Hours Shop/Technician
WRIGHT MANUFACTURING, INC. POWER EQUIPMENT LIMITED WARRANTY THIS WARRANTY SUPERSEDES ALL PREVIOUS ON UNITS WITH A RETAIL SALES DATE ON OR AFTER 04/01/05 Wright Manufacturing, Inc. (hereinafter: WMI) warrants to the original owner that the new WMI mower accompanying this document will be free from manufacturing defects in materials or workmanship subject to the following limitations and exclusions.
4600X Wedgewood Blvd Frederick, MD 21703 www.wrightmfg.