
Instruction manual


SI-H Muscle Testers
30
WORLD PRECISION IN STRU MENTS
5. Press the Display button to save the confi guration and return to the normal display.
NOTE: The unit remembers the state of all the parameters, even after it is powered
off. To reset the factory defaults, turn the unit off, press both the Up and Down but-
tons simultaneously while you turn the system back on.
NOTE: For safety reasons, the laser is always disabled at startup.
Choosing a Display Mode
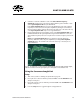
The default display is two lines and shows the calculated (exact) sarcomere spacing, fi rst
order diffraction distance that is used to calculate the sarcomere spacing and the signal
amplitude, which is used when you are aligning the camera. To toggle through the display
modes, press the Display button. Press one time to see the fi rst order diffraction distance.
Press it again to view the signal amplitude. Press it a third time to return to the sarcomere
spacing display.
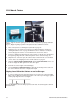
Setup Menu
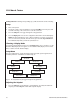
Press the Setup button to toggle through the Setup menu and cycle through the list of
available parameters. Parameters are shown in Fig. 25.
CCD Offset
CCD Offset
CCD Sensitivity (1–10)
CCD Sensitivity
Tissue to CCD Distance
Tissue Distance
CCD Mode (263Hz/1KHz)
CCD Mode
Backlight Level (1–8)
Backlight Level
Laser Off/On
LASER DISABLED
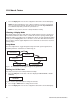
Fig. 25 The Setup button lets you toggle through the list of parameters.
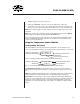
Turning On/Off the Laser
For safety reasons, the laser is always disabled at startup.
1. Press the Setup button. The state of the laser displays (LASER DISABLED or LASER
ENABLED).
LASER
DISABLED
Fig. 26 Press the Up or Down button to change the laser state.
2. Press the Up or Down button to change the laser state.
3. Press the Display button to save the confi guration and return to the normal display.