
User guide


8 21 068: M P E G-3 27 0 & 4290 Use r Guide
© 20 13 Wo h ler Tec hn ol ogi e s, In c . A l l r ig h ts re se rved.
37
Ch apt er 4 Configuration
Fu ncti o ns Men u
1. UMD Tally Src: The text of the UMD Tally may be set to Local to
display the text set in the UMD ID section of this menu or it may
be set to RS485 so that it may be received from the RS485
interface on the back panel. The tally protocols supported are TSL
3.1 and 4.0. Selection between them is automatic. The default
setting is Local.
2. UMD Enable: By default, this option is set to On, allowing the
UMD set up by this menu to appear on the screen. Selecting Off
will prevent the UMD from appearing.
3. UMD Position: The UMD may be displayed at one of six locations
on the screen. By default, the Bottom location is selected.
4. UMD Color: The color of the of the UMD can be one of six choices.
By default, the White choice is selected.
5. UMD Address: The numeric keys of the on-screen keypad can be
used to set the UMD address 0 - 127. To enter the address, first
press the Volume knob one more time and then rotate it to
highlight each number and the press it to add that number to the
address. Clear, Restore, Shift, Space, Backspace, and Done
controls are also provided. Up to 3 digits may be entered. When
you are finished, select Done. <Save> will then be highlighted.
To save, press the Volume knob one more time. To abandon the
text you entered, press the Menu button.
6. UMD ID: An on-screen keypad is provided to use to enter the local
UMD text. To enter text, rotate the Volume knob to highlight each
character and the press it to add that character to the text. Clear,
Restore, Shift, Space, Backspace, and Done controls are also
provided. Up to 16 characters may be entered. When you are
finished, select Done. Save UMD Text will then be highlighted.
To save the text, press the Volume knob one more time. To
abandon the text you entered, press the Menu button.
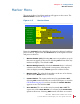
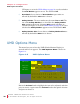
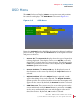
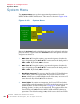
Functions Menu
This menu programs the action of the F1 through F6 function buttons
on the front panel. Each function button serves as a hot key to control
one or more functions, as desired. The Functions Menu is shown in
Figure 4–7.