
User Manual


67
Main Menu Options
works. They are activated from the Settings submenu of the
Tables menu or from the Scanning Options submenu of the
Edit Menu. The following instructions tell you how to get
started using the Tables application with its default settings.
The features are described below, when the Tables menu is
explained; there is an overview of some of them in the
Overview of Tables Features section immediately following
these instructions.
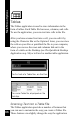
1. Open a new file:
• Select New File from the Tables menu.
• Enter a name for the file.
• Select OK.
The first cell, A1, is displayed in Scan Only mode.
2. Scan text into the cell, or scroll to the first cell in which
you want to enter text and then scan the text.
3. If the line of text you have just scanned is inaccurate,
you can either:
• Scan it again.
• Edit it manually using the Character Bar: Press 2
to de-highlight the text, and then press 2 again to
display the Character Bar. Press 3 to close the
Character Bar, and then press 3 twice to continue
entering text into the table.
• Edit it manually using the Opticard: Scan the
Opticard key on the Opticard and begin scanning
Opticard keys as needed. When you are done, press
3 twice to continue entering text into the table.
4. Press 6 to scroll to the next cell in the row.
5.
Scan in the text you want to store in the cell. The text in
the previous cell is saved automatically in the Tables file.
6. Continue to press 6 and scan text for each cell in the
row.