
User Manual


19
Setting up the Desktop
4. Click Start. The Main Menu appears.
5. Click Install Products. The Install Products menu
appears.
6. Click QuickLink Desktop Application. The
InstallShield Setup Wizard opens.
7. Follow the instructions given by the Setup Wizard until
the Select Components dialog box appears.
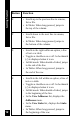
8. The Select Components dialog box contains the
following options:
• QuickLink Desktop Program Files: Installs the
QuickLink Desktop application. Select this option to
copy the program files for the QuickLink Desktop
from the CD-ROM to your computer.
• QuickLink Desktop Interface Languages: Installs
additional languages for the Desktop interface. If
you choose to add an additional interface language,
you will be able to see the Desktop menu options
and messages in that language. Otherwise, the
interface will only be available in English.
To select additional interface languages, click this
option to select it, and click the Change button. A
Select Sub-components dialog box appears. Click
the check box beside each interface language you
would like to add to the Desktop. A checkmark (√)
in the check box indicates that it is selected. When
you are done, click the Continue button to return to
the Select Components dialog box.
Note: To add interface languages later on, insert the
QuickLink CD-ROM, follow the instructions given here for
installing the Desktop, and select only this option.
A checkmark (
√
) beside an option indicates that it is
selected. To toggle a check box on or off, click the check