
Technical data
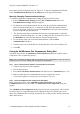

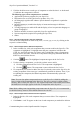
Table Of Contents
- Part 1: Introducing the SuperPen
- How to Use this Manual
- Conventions
- Package Contents
- Registration
- Part 2: Getting Started
- SuperPen Components
- Setting Up the SuperPen
- Basic SuperPen Commands
- Connecting the SuperPen to a Computer
- Using the SuperPen CD-ROM
- Connecting the SuperPen to a PDA or Cellular Phone
- Part 3: The SuperPen CD-ROM
- Part 4: SuperPen Main Menu Options
- Main Menu Overview
- General Main Menu Options
- Part 5: Working with the Quicktionary
- Installing a Dictionary
- Using the Dictionary
- Using the Quicktionary Menu
- Editing Scanned Text in the Quicktionary Application
- Part 6: Scanning Information into the QuickLink Applications
- Using the Notes Application
- Using the Address Book Application
- Using the Internet Links Application
- Using the Tables Application
- Using the Scan to PC Application
- Using the QuickLink Function
- Part 7: Viewing, Editing, and Manually Entering Text in the SuperPen
- Editing Modes
- Entering Text Manually
- Part 8: Using the QuickLink Desktop Application
- Installing the QuickLink Desktop
- Running and Exiting the QuickLink Desktop
- QuickLink Desktop Elements
- Working with QuickLink Applications on the QuickLink Desktop
- Managing Pens on the QuickLink Desktop
- Communicating between the SuperPen and the Computer
- Rearranging SuperPen Applications
- Reallocating Flash Memory
- Part 9: Maintaining and Troubleshooting the SuperPen
- Maintaining
- Troubleshooting
- Contact Us
- Appendix: SuperPen Technical Data
- Glossary
- Index

SuperPen Operation Manual, Version 2.34
3. If you change your mind about deleting a component, click the component in the On
Pen list, then click Undelete.
Warning: In order for one specific feature or application to work, a whole group of
components may need to be located on your SuperPen. Therefore, be very careful when
deleting components. System components should be deleted from your SuperPen only if you
are adding a new version of the component to the SuperPen at the same time, otherwise, your
SuperPen will not operate properly.
Note: If after adding or removing Pen components your Pen is not functioning as expected,
this may be due to missing interdependent components. In such cases, it is advised to use the
Pen Customization Wizard from the SuperPen CD-ROM in order to reinstall all the
components necessary for the default SuperPen.
Step 5.
Proceed
Click the Proceed button. The components you selected to add are added to your SuperPen.
Those you selected for deletion are deleted.
Note: If you change your mind and do not want to run the Add/Remove Components
procedure, click Exit instead of Proceed.
Stop
To stop the Add/Remove Pen Components process prior to completion, click Stop. This will
not damage your SuperPen. Any components that were not yet added or removed from the
SuperPen when you clicked Stop will remain as they were before.
Note: If you are updating Operating System components, the Stop button is disabled to
prevent damage to your SuperPen.
When the process of adding and removing components is completed, the Stop button changes
to OK.
Step 6.
Close the Log Window
Click OK to close the Add/Remove Pen Components Log Messages window once the
process is completed.
Step 7.
Compact the Flash Memory (Optional)
If you removed components from your SuperPen, you may want to compact flash memory at
this time. To do so, click Compact. (The compaction process is explained in detail on p. 91.)
Step 8.
Exit the Dialog Box
Click Exit to close the Add/Remove Pen Components dialog box. If you have added an
application to your SuperPen, it appears as an additional option in the SuperPen’s Main
Menu.
Communicating between the SuperPen and the Computer
90