
Technical data
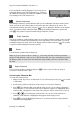
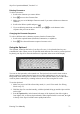
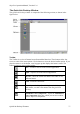
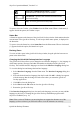

Table Of Contents
- Part 1: Introducing the SuperPen
- How to Use this Manual
- Conventions
- Package Contents
- Registration
- Part 2: Getting Started
- SuperPen Components
- Setting Up the SuperPen
- Basic SuperPen Commands
- Connecting the SuperPen to a Computer
- Using the SuperPen CD-ROM
- Connecting the SuperPen to a PDA or Cellular Phone
- Part 3: The SuperPen CD-ROM
- Part 4: SuperPen Main Menu Options
- Main Menu Overview
- General Main Menu Options
- Part 5: Working with the Quicktionary
- Installing a Dictionary
- Using the Dictionary
- Using the Quicktionary Menu
- Editing Scanned Text in the Quicktionary Application
- Part 6: Scanning Information into the QuickLink Applications
- Using the Notes Application
- Using the Address Book Application
- Using the Internet Links Application
- Using the Tables Application
- Using the Scan to PC Application
- Using the QuickLink Function
- Part 7: Viewing, Editing, and Manually Entering Text in the SuperPen
- Editing Modes
- Entering Text Manually
- Part 8: Using the QuickLink Desktop Application
- Installing the QuickLink Desktop
- Running and Exiting the QuickLink Desktop
- QuickLink Desktop Elements
- Working with QuickLink Applications on the QuickLink Desktop
- Managing Pens on the QuickLink Desktop
- Communicating between the SuperPen and the Computer
- Rearranging SuperPen Applications
- Reallocating Flash Memory
- Part 9: Maintaining and Troubleshooting the SuperPen
- Maintaining
- Troubleshooting
- Contact Us
- Appendix: SuperPen Technical Data
- Glossary
- Index
SuperPen Operation Manual, Version 2.34
If you switch the scanning language of your SuperPen to
a language that uses non-Latin characters (e.g., Hebrew),
the Character Bar displays an additional Alphabet symbol
for returning to the Latin character set.
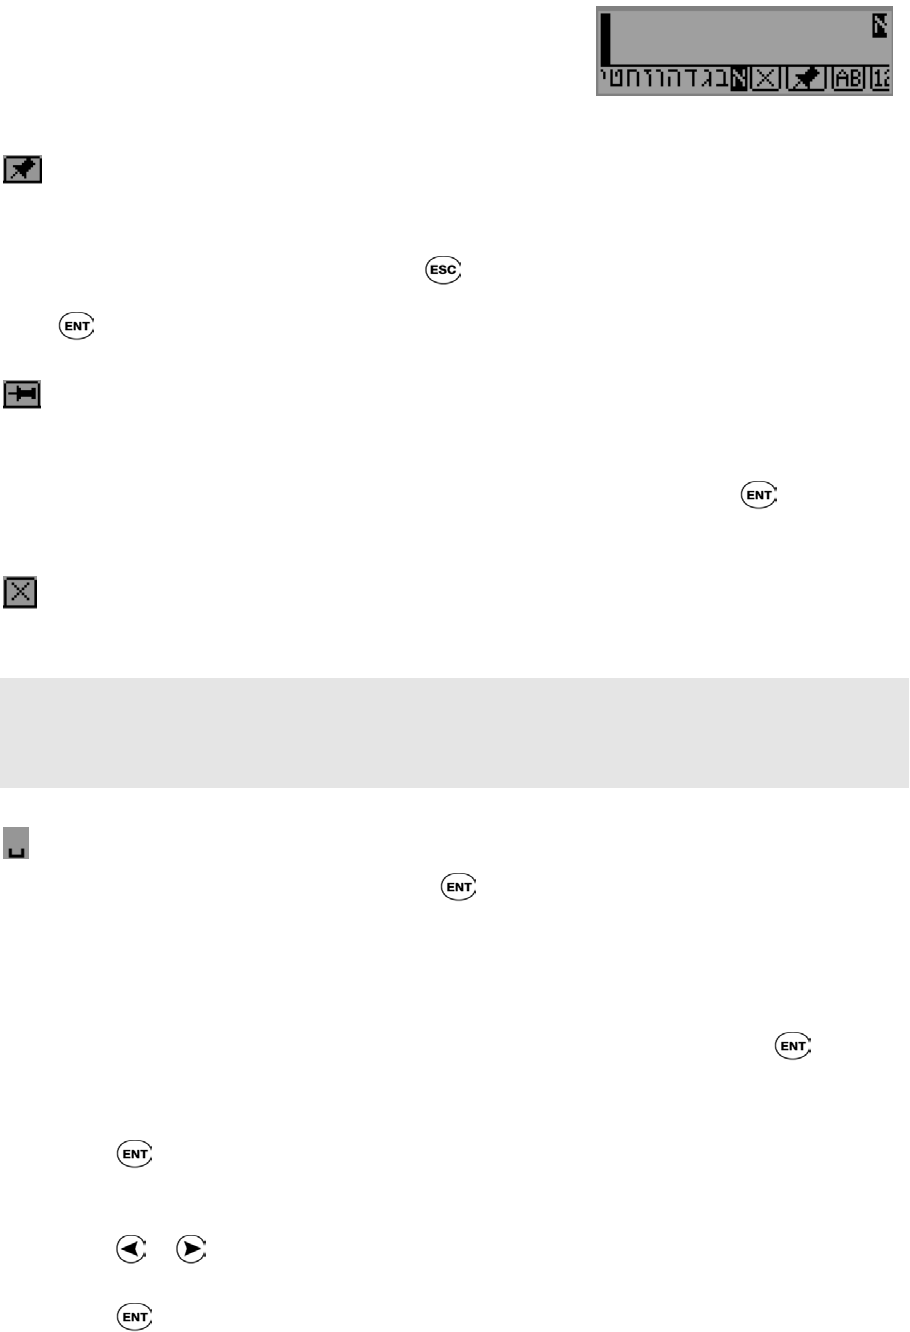
A Hebrew Character Bar with a Latin
Al
p
habet button
Multiple Characters
The Multiple Characters symbol indicates that you are in Multiple Characters mode. In this
mode, you can use the Character Bar to enter more than one character at the cursor. The
Character Bar remains open until you press
to close it. Multiple Characters is the default
mode. To switch to Single Character mode, scroll to the Multiple Characters symbol and
press . The symbol is replaced with the Single Character symbol.
Single Character
The Single Character symbol indicates that you are in Single Character mode. After you enter
a character, the Character Bar automatically closes and returns you to Edit mode. To switch
to Multiple Characters mode, scroll to the Single Character button and press
. The symbol
is replaced with the Multiple Characters symbol.
Delete
Use the Delete symbol to delete characters.
Note: If you are in Insert mode in a field (e.g., a file name) that has reached its maximum
number of 200 characters, and you access the Character Bar, the cursor immediately jumps to
the Delete symbol. It won't move from the Delete symbol until you delete a character from
the field.
Space Character
If you scroll to the Space character and press , it enters a space in the text string or
overwrites a character with a space.
Accessing the Character Bar
To access the Character Bar:
1. Make sure the SuperPen is in Edit mode. If it is in Scan Only mode, press
to switch
to Edit mode.
4. Scroll to the position at which you want to insert or overwrite a character.
5. Press . The Character Bar opens and the string of text you are editing is displayed
above or below it. The first letter of the active character sequence is highlighted on the
Character Bar, and appears in the string of text where it will be entered if you select it.
6. Press
or to scroll along the Character Bar. As you move from character to
character, each character is highlighted and appears in the string of text.
7. Press
to select the highlighted character. It is inserted in the text string when the
character is not highlighted.
Entering Text Manually
71