
Technical data
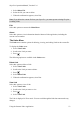
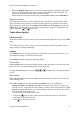
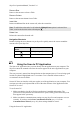
Table Of Contents
- Part 1: Introducing the SuperPen
- How to Use this Manual
- Conventions
- Package Contents
- Registration
- Part 2: Getting Started
- SuperPen Components
- Setting Up the SuperPen
- Basic SuperPen Commands
- Connecting the SuperPen to a Computer
- Using the SuperPen CD-ROM
- Connecting the SuperPen to a PDA or Cellular Phone
- Part 3: The SuperPen CD-ROM
- Part 4: SuperPen Main Menu Options
- Main Menu Overview
- General Main Menu Options
- Part 5: Working with the Quicktionary
- Installing a Dictionary
- Using the Dictionary
- Using the Quicktionary Menu
- Editing Scanned Text in the Quicktionary Application
- Part 6: Scanning Information into the QuickLink Applications
- Using the Notes Application
- Using the Address Book Application
- Using the Internet Links Application
- Using the Tables Application
- Using the Scan to PC Application
- Using the QuickLink Function
- Part 7: Viewing, Editing, and Manually Entering Text in the SuperPen
- Editing Modes
- Entering Text Manually
- Part 8: Using the QuickLink Desktop Application
- Installing the QuickLink Desktop
- Running and Exiting the QuickLink Desktop
- QuickLink Desktop Elements
- Working with QuickLink Applications on the QuickLink Desktop
- Managing Pens on the QuickLink Desktop
- Communicating between the SuperPen and the Computer
- Rearranging SuperPen Applications
- Reallocating Flash Memory
- Part 9: Maintaining and Troubleshooting the SuperPen
- Maintaining
- Troubleshooting
- Contact Us
- Appendix: SuperPen Technical Data
- Glossary
- Index
SuperPen Operation Manual, Version 2.34
Double-click this
button
To move the cursor to:
The beginning of the field
The end of the field
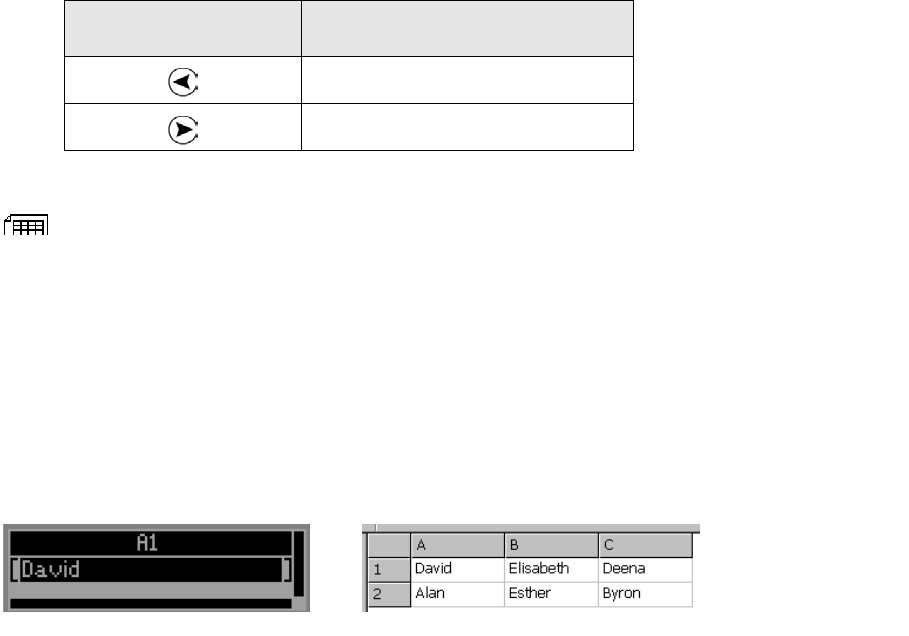
Using the Tables Application
The Tables application is used to store information in the form of tables. Each Table file has
rows, columns, and cells. To use the application, scan text into cells in the file.
After you have scanned text into a cell, you can edit it by using the Character Bar or the
Opticard. You can view the cells on your SuperPen or quicklink the file to your computer,
where you can see the rows and columns in table format on the QuickLink Desktop (see
Working with QuickLink Applications on the QuickLink Desktop on p. 80), in Microsoft
Excel, or even in another table application (when saved as a CSV formatted file and then
imported).
The first cell of a Table file, on the Pen The same Table file, displayed on the Desktop
Scanning Text into a Table File
The Tables application provides a number of features that you can use to customize the way
you create a Tables file. These features can change the way the application works. They are
activated from the Settings submenu of the Tables menu or from the Scanning Options
submenu of the Edit Menu.
The following instructions detail how to get started using the Tables application with its
default settings. An overview of the features can be found in the Overview of Tables Features
section immediately following these instructions.
1. Open a new file.
Select New File from the Tables menu.
Enter a name for the file.
Select OK.
The first cell, A1, is displayed in Scan Only mode.
2. Scan text into the cell, or scroll to the first cell in which you want to enter text and scan
the text.
3. If the line of text you have just scanned is inaccurate, you can either:
Scan it again.
Using the Tables Application
55