
Technical data
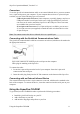
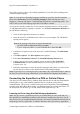
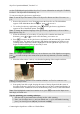

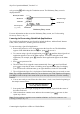

Table Of Contents
- Part 1: Introducing the SuperPen
- How to Use this Manual
- Conventions
- Package Contents
- Registration
- Part 2: Getting Started
- SuperPen Components
- Setting Up the SuperPen
- Basic SuperPen Commands
- Connecting the SuperPen to a Computer
- Using the SuperPen CD-ROM
- Connecting the SuperPen to a PDA or Cellular Phone
- Part 3: The SuperPen CD-ROM
- Part 4: SuperPen Main Menu Options
- Main Menu Overview
- General Main Menu Options
- Part 5: Working with the Quicktionary
- Installing a Dictionary
- Using the Dictionary
- Using the Quicktionary Menu
- Editing Scanned Text in the Quicktionary Application
- Part 6: Scanning Information into the QuickLink Applications
- Using the Notes Application
- Using the Address Book Application
- Using the Internet Links Application
- Using the Tables Application
- Using the Scan to PC Application
- Using the QuickLink Function
- Part 7: Viewing, Editing, and Manually Entering Text in the SuperPen
- Editing Modes
- Entering Text Manually
- Part 8: Using the QuickLink Desktop Application
- Installing the QuickLink Desktop
- Running and Exiting the QuickLink Desktop
- QuickLink Desktop Elements
- Working with QuickLink Applications on the QuickLink Desktop
- Managing Pens on the QuickLink Desktop
- Communicating between the SuperPen and the Computer
- Rearranging SuperPen Applications
- Reallocating Flash Memory
- Part 9: Maintaining and Troubleshooting the SuperPen
- Maintaining
- Troubleshooting
- Contact Us
- Appendix: SuperPen Technical Data
- Glossary
- Index
SuperPen Operation Manual, Version 2.34
or by pressing
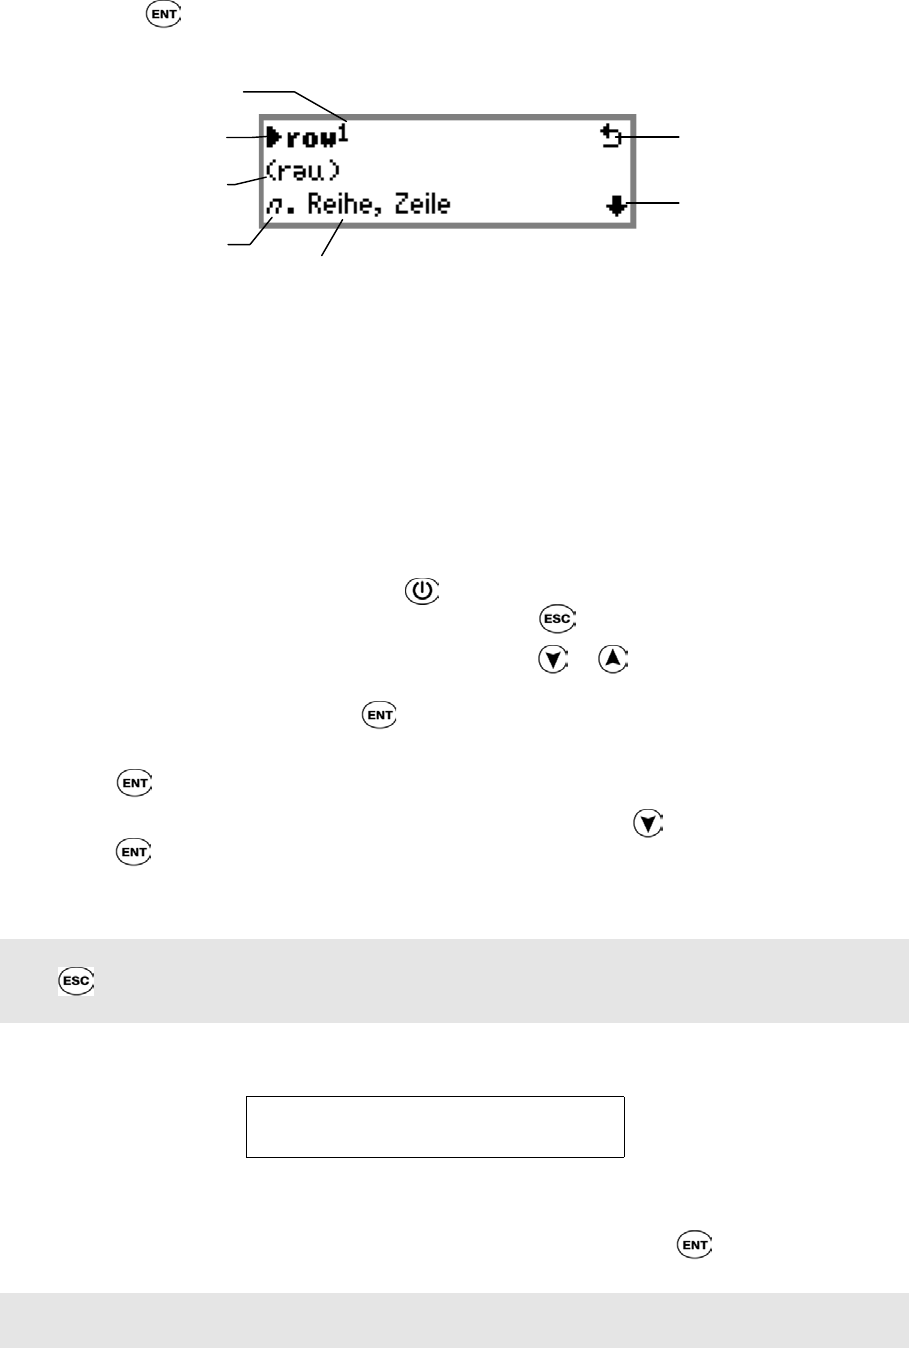
while using the Translation screen. The Dictionary Entry screen is
displayed below.
Translation
Word List sign
Part of speech
(e.g., noun)
Scroll arrow
Dictionary Entry screen
Homonym number
Headword
Phonetics
For more information on how to use the Dictionary Entry screen, see Understanding
Dictionary Entries, on p. 31.
Learning to Scan using QuickLink Applications
The QuickLink applications in your SuperPen include the Notes, Address Book, Internet
Links, Tables, Scan to PC, and the QuickLink functions.
To scan text using a QuickLink application:
1. Remove the protective cover. Press
to turn the SuperPen on. The Main Menu
appears. If the Main Menu does not appear, press to access it.
2. To scan text using a QuickLink application, press or until the desired QuickLink
application appears as one of the Menu options. To scan text using the Notes
application, for example, press
when the Notes application appears as the Menu
option.
3. Press to open a new file.
4. The new Notes file is assigned a name automatically. Press to scroll to OK and
press to accept the file name. A blinking cursor appears in the SuperPen display.
You can also scan a different name, up to eight characters, for the file. Select OK.
5. The red light in the SuperPen’s tip begins to blink indicating that you are ready to scan.
Note: The red light should blink whenever you are about to scan. If the light does not appear,
press to return to the previous menu, then repeat the steps that take you to the scanning
function.
6. You are now ready to scan! Place the rollers about ½ inch (1 cm) from the beginning of
the sample sentence below.
You can scan text anywhere,
even atop Mount Everest.
7. Scan gently from left to right, keeping the center of the tip aligned with the center of
the letters in the text.
8. If the scanned text contains errors and must be rescanned, press to erase it, then
repeat step 6 above.
Note: For tips on how to optimize your scanning technique, see Tips for optimizing your
scanning technique on p. 15.
Connecting the SuperPen to a PDA or Cellular Phone
17