
Technical data

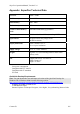
Table Of Contents
- Part 1: Introducing the SuperPen
- How to Use this Manual
- Conventions
- Package Contents
- Registration
- Part 2: Getting Started
- SuperPen Components
- Setting Up the SuperPen
- Basic SuperPen Commands
- Connecting the SuperPen to a Computer
- Using the SuperPen CD-ROM
- Connecting the SuperPen to a PDA or Cellular Phone
- Part 3: The SuperPen CD-ROM
- Part 4: SuperPen Main Menu Options
- Main Menu Overview
- General Main Menu Options
- Part 5: Working with the Quicktionary
- Installing a Dictionary
- Using the Dictionary
- Using the Quicktionary Menu
- Editing Scanned Text in the Quicktionary Application
- Part 6: Scanning Information into the QuickLink Applications
- Using the Notes Application
- Using the Address Book Application
- Using the Internet Links Application
- Using the Tables Application
- Using the Scan to PC Application
- Using the QuickLink Function
- Part 7: Viewing, Editing, and Manually Entering Text in the SuperPen
- Editing Modes
- Entering Text Manually
- Part 8: Using the QuickLink Desktop Application
- Installing the QuickLink Desktop
- Running and Exiting the QuickLink Desktop
- QuickLink Desktop Elements
- Working with QuickLink Applications on the QuickLink Desktop
- Managing Pens on the QuickLink Desktop
- Communicating between the SuperPen and the Computer
- Rearranging SuperPen Applications
- Reallocating Flash Memory
- Part 9: Maintaining and Troubleshooting the SuperPen
- Maintaining
- Troubleshooting
- Contact Us
- Appendix: SuperPen Technical Data
- Glossary
- Index

SuperPen Operation Manual, Version 2.34
Solutions:
Run the QuickLink Desktop and make sure that Pen Communications are on.
Run the Communications Wizard from the Help menu (see p. 86).
Make sure that the QuickLink communications cable or external infrared device is
attached properly to both the SuperPen and computer (see p. 10).
Make sure that the same communications settings are defined on both the SuperPen and
computer (see p. 86).
Your computer may not support the baud rate that is selected. Try lowering the baud rate
gradually. Make sure to change the baud rate on both the QuickLink Desktop (see p. 87)
and the SuperPen (see p. 24).
Problem:
Scan to PC mode does not work.
Solutions:
Make sure the QuickLink Desktop application is running (see p. 75).
Make sure that SuperPen communications are on (see p. 86).
Make sure that the QuickLink communications cable or external infrared device is
attached properly (see p. 10).
Make sure that the Scan to PC application was selected on the SuperPen (see p. 60).
Make sure that the Windows application you want to scan into is open and a cursor is
blinking in an open file.
To scan directly into the QuickLink Desktop, make sure you have opened a file in the
desired application, e.g., Notes and that the cursor is blinking.
Note: If the data does not transfer, you may have accidentally turned off the Send
immediately functionality. Select Scan-to-PC on your SuperPen, press to open the
setting and verify that there is an “X” in the Send Immediately box.
Problem:
The QuickLink process works, but a message indicates that there were errors.
Solution:
Check the QuickLink log in the QuickLink Desktop to see what type of errors occurred during
the process (see p.79). Host errors may occur because the selected host application is not
installed on your computer.
Problem:
The computer is unable to communicate with the SuperPen because it cannot access the serial
port.
Solutions:
Close other applications that are using the port. Some of these may have icons in the
System Tray. Try closing these applications first. If the PDA QuickLink Desktop icon
(such as the PalmPilot Hotsync application) is in the System Tray, begin by closing that
application. If you are using a laptop, and infrared communications are enabled, try
disabling them.
There may be a hardware conflict. The most common hardware conflicts are associated
with infrared devices and scanners.
Hardware conflicts can occur when two devices are set to use the same port or have the
same Interrupt request settings. If you are familiar with the Windows Device Manager,
Troubleshooting
101