
User manual

The Quicktionary®2 Premium
28
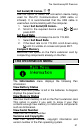
operation (to verify the settings), click on the Show
this Dialog before each file transfer checkbox
prior to closing the dialog box.
6. When you have finished, close the File Transfer
Settings menu by clicking on the Close button.
Change File Transfer Settings
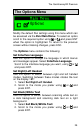
There are two options available when transferring Scan
and Store files to the PC:
1. Pen to PC: The Pen files are copied from the Pen
to the computer, overwriting the corresponding files
on the computer. To erase files from the Pen after
synchronizing check the Flush option.
2. Don’t transfer the files of this application: No
files are transferred between the Pen and computer;
the files remain untouched.
Synchronize with Host Applications
If you want your files to be saved in Microsoft Office
compatible formats you must activate the Host Settings
function in the File Transfer Settings menu.
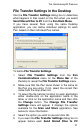
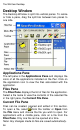
1. Select File Transfer Settings from the Pen
Communications menu on the Menu Bar of the
Desktop. The File Transfer Settings menu
appears.
2. Check the option This Pen Name will transfer
files with host applications.
Note: Only one Pen can be associated with host
applications. If the checkbox is disabled it means
another Pen has already been selected to interact
with these applications. If you wish to change it, go
through the Pen names list, find the one where the
option is checked and deselect it.
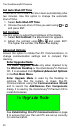
3. Click on the Host Settings button (now enabled).
4. Look at the information for Scan and Store in the
Host Application column. Click on the column and
a drop-down menu will appear.
5. Select the option you wish to activate.