
User manual
The Quicktionary®2 Premium
23
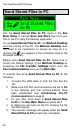
Using Scan to PC
To use Scan to PC:
1. Launch the WizCom Desktop.
2. Make sure that the Pen is connected to the PC with
the USB cable.
3. Ensure that communications are working between
your Pen and computer. If you are not sure if your
communications are working, run the
Communications Wizard from the Help menu on
the WizCom Desktop Menu Bar.
Note: If you have problems with Pen-PC
Communications, see Establishing Pen-PC
Communications on page 9.
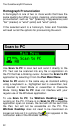
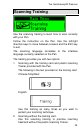
4. On your Pen, select Scan to PC from the Pen Main
Menu. The application opens in the scanning screen
so you can start scanning immediately.
5. When you have finished scanning, press ESC on the
Pen to exit Scan to PC.
Note: Scan to PC works in most Windows applications;
however, it may be incompatible with some applications.
Scan to PC Settings in the WizCom
Desktop
Use the Scan to PC Settings in the WizCom Desktop
to determine what key is inserted after each line of text is
sent to the PC application. The default setting is Space,
meaning that a space is inserted after each scan appears
in the application.
Access Scan to PC Settings from the Pen
Communications menu on the WizCom Desktop
Menu Bar.
From the Scan to PC Settings menu define the key you
want to enter after each scan:
Space: Inserts a space after each scan.
Tab: Inserts a tab after each scan.
New Line: The cursor moves to the next line after
each scan.