
User manual
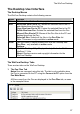


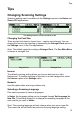

Tips
34
Troubleshooting Pen-PC Communications
If you receive an error message when attempting to select Connect to PC or
Scan to PC from the Pen Main Menu, please follow the instructions below
to confirm that you have successfully followed the installation procedures.
Confirm that:
1. Both the WizCom Desktop and the USB driver have been
successfully installed, as instructed in the CD-ROM. If they have not
been installed, or there were problems with the installation, insert the
CD-ROM and click on the WizCom Desktop Installation button for
instructions on installing the software and the USB driver.
2. The WizCom Desktop application is running.
Click on the WizCom Desktop icon on the Windows desktop to
launch the application. If you fail to launch the WizCom Desktop
application, and receive a message indicating that you should install
the WizCom Pen USB driver, do the following:
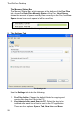
a. Connect the USB cable to both the Pen and PC.
b. The Add New Hardware Wizard should appear.
c. Select the recommended path for installing the driver.
d. During the installation, a pop up message appears warning that
the driver has 'not passed Windows Logo testing' - select
Continue Anyway.
e. Complete the Add New Hardware Wizard.
3. The PC connector side of the USB cable is connected to a USB port
on your PC
4. The Pen connector side of the USB cable is connected to the USB
outlet on the Top Panel of the Pen.
Important: The USB cable must be inserted into the Pen with the label
“up” facing upwards.
If you have followed all the above steps and you are still having problems, it
may be that the WizCom Pen USB Driver has only been partially
installed.
To rectify this:
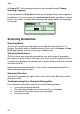
1. Make sure the WizCom Desktop is NOT running (if you can see the
icon
in the notification area of the Windows taskbar, click on it
and select Exit to completely shut the application down).
2. Connect the Pen to the PC with the USB cable as explained above
in steps 3 and 4.
3. Access the Windows Device Manager by doing the following: