
User manual

Getting Started
8
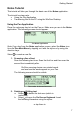
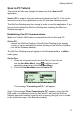
c. Select
to close the On-Screen Keyboard. The
edited text should appear on the screen.
Notes application displaying the text after editing
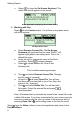
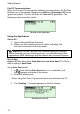
3. Working with files
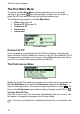
Select from the Notes toolbar. You will see a drop-down menu
with three options:
File Operations menu
a. Select Rename Current File. The On-Screen
Keyboard will open and the file name "file001" will
appear highlighted in the editing area. This is the
default file name.
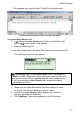
b. Using the stylus, change the name of the file to
'scanning'. Select to accept changes.
c. Select
to create another file. Scan in the
following text:
This is another scanning example.
d. Go to
and select Rename Current File. Change
the file name to 'example'.
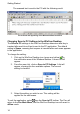
e. Go back to
and select Open File. You will see
that there are now two files on your Pen. Open the
previous file, 'scanning'.
f. Go to
and select Delete File. You will see both
files again. Select the second file and press
when prompted.
Note: All scanned text is automatically saved in the current file under
a default file name. If you have scanned text on your screen and you
choose to create a new file, you can return to the previous text by
selecting Open File in
and scrolling down to the last file saved.
Select
from the Notes toolbar to close the application and return to the
Pen Main Menu.