
User Guide
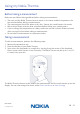
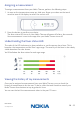
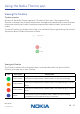

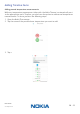
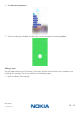
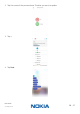
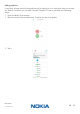
Table Of Contents
- Minimum requirements
- Nokia Thermo description
- Setting up my Nokia Thermo
- Customizing the settings of the Nokia Thermo
- Using my Nokia Thermo
- Using the Nokia Thermo app
- Getting personalized advice
- Dissociating my Nokia Thermo
- Cleaning and maintenance
- Specifications
- Document release overview
- Warranty
- Regulatory statements

EN-22
Nokia Thermo
v2.0 | April 2018
Assigning a measurement
To assign a measurement from your Nokia Thermo, perform the following steps:
1. As soon as the temperature comes up, slide your nger up or down on the touch
sensitive area of the display to select the correct user.
2. Press the button to conrm your choice.
The fever status LED turns on. Your Nokia Thermo will power o after a few seconds.
Your measurement is sent to the app after your Nokia Thermo turns o.
Understanding the fever status LED
The color of the LED indicates at a glance whether or not the person has a fever. This is
based on the temperature and the user’s age range. The severity of the fever is also clearly
visible based on the color shown.
You’ll nd below the fever status for each age range:
Viewing the history of my measurements
Once you’ve assigned a measurement from your Nokia Thermo, you can check the
history of measurements for the user. To do so, slide the touch sensitive area of your
Nokia Thermo from bottom to top to go back in time.
You can see the last ve measurements taken in the past 72 hours.