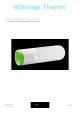
Withings Thermo Smart Temporal Thermometer Installation and Operating Instructions Withings Thermo v2.
Table of Contents Minimum requirements......................................................................
Using Thermia (iOS only) ������������������������������������������������������������������������������������������������������������� 43 Dissociating my Withings Thermo �������������������������������������������� 44 Cleaning and maintenance ����������������������������������������������������������� 46 Cleaning my Withings Thermo ��������������������������������������������������������������������������������������������������46 Changing the batteries �����������������������������������������������������
Important Notice By using your Withings Thermo you expressly agree to the Withings Services Terms and Conditions available on our website. Minimum requirements Internet access A personal home Wi-Fi router connected to the Internet is required to set up your Withings Thermo if you set it up in Wi-Fi. Your Wi-Fi router must be 802.11. b/g/n/ on a 2.4 GHz frequency. 5 GHz networks are not supported. For more details about Wi-Fi router compatibility, refer to “Specifications” on page 51.
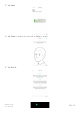
Withings Thermo description Overview The Withings Thermo is the most advanced temporal thermometer in the world. Not only does it have a sleek design, it is also really easy to use, accurate and hygienic. Thanks to the HotSpot Sensor™ technology, you simply have to press the button and run your Withings Thermo across your forehead. Its 16 infrared sensors will take 2,000 measurements per second, and provide you with an accurate measurement.
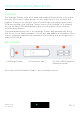
Product description (1) Main button (4) Touch-sensitive area Withings Thermo v2.
Setting up my Withings Thermo Installing the Withings Thermo app If the Withings Thermo app is not already installed on your device, perform the following steps: 1. Type thermo.withings.com in your device’s web browser. 2. Tap Download on the App Store or on Google Play. 3. Tap GET. The installation process starts. When a new version of the Withings Thermo app is available, you will automatically be prompted to update it.
6. Select an avatar if you would like to, or tap Next. 7. Add extra family members if you would like to or tap Next. You can add other family members later on if needed. 8. Tap Next. 9. Press and hold the button for 8 seconds until the display shows “SETUP”. Withings Thermo v2.
10. Tap Next. 11. Tap the Withings Thermo you want to install from the popup window (iOS only). 12. Tap Quick setup to use the Wi-Fi network already configured on your device or Setup another network if you want to use another one. For Bluetooth use, tap I don’t have a Wi-Fi network. Withings Thermo v2.
13. Tap Next. 14. Tap Start to watch the tutorial or Skip to skip it. 15. Tap Got it! Withings Thermo v2.
16. Tap Next to watch the tutorial or Skip to skip it. 17. Tap Done. I already have a Withings account If you already have a Withings account, perform the following steps: 1. Open the Withings Thermo app. 2. Log in to your Withings account. Withings Thermo v2.
3. Tap Settings. 4. Tap Install a Thermo. 5. Tap Install. Withings Thermo v2.
6. Press and hold the button for 8 seconds until the display shows “SETUP”. 7. Tap Next. 8. Tap the Withings Thermo you want to install from the popup window (iOS only). Withings Thermo v2.
9. Tap Quick setup to use the Wi-Fi network configured on your device or Setup another network if you want to use another one. For Bluetooth use, tap I don’t have a Wi-Fi network. 10. Tap Next. 11. Tap Start to watch the tutorial or Skip to skip it. Withings Thermo v2.
12. Tap Got it! 13. Tap Next to watch the tutorial or Skip to skip it. 14. Tap Done. Withings Thermo v2.
Customizing the settings of the Withings Thermo Changing the configuration of your Withings Thermo You may need to change the configuration of your Withings Thermo: • • • If you want to use a different Wi-Fi network, If you’ve changed the name or password of the Wi-Fi network you use, If you want to switch from a Bluetooth configuration to a Wi-Fi configuration.
3. Tap the name of your Withings Thermo. 4. Tap Configure a Wi-Fi network. 5. Press and hold the button for 8 seconds until the display shows “SETUP”. 6. Tap Next. 7. Tap the Withings Thermo you want to install. Withings Thermo v2.
8. Tap Quick setup to use the Wi-Fi network configured on your device or Setup another network if you want to use another one. If you want to set up your Withings Thermo in Bluetooth, tap I don’t have a Wi-Fi network. 9. Tap Allow. 10. Tap Done. Changing the units To select the temperature unit (Celsius or Fahrenheit), perform the following steps: 1. Open the Withings Thermo app. Withings Thermo v2.
2. Tap Settings. 3. Tap the unit set you want to change. 4. Tap the unit you want to use. 5. Tap the unit set again to validate. The Withings Thermo and the Withings Thermo app have to communicate once before the temperature unit change is reflected on the display of your Withings Thermo. Note that if your Withings Thermo is linked to several accounts, you’ll have to change the temperature unit on both accounts for the change to be reflected on the display of your Withings Thermo.
You can change system authorizations at any point, for example if you need to disable access to mobile data on your mobile device before going away in a foreign country. To do so, perform the following steps: 1. Open the Withings Thermo app. 2. Tap Settings. 3. Tap System authorizations. Withings Thermo v2.
4. Disable or enable the authorizations you want. Withings Thermo v2.
Using my Withings Thermo Before taking a measurement Make sure you follow these guidelines before taking a measurement: • • • • • The user and the Withings Thermo have to remain in the same ambient temperature for ten minutes before taking a measurement. The measurement has to be taken on dry skin. Sweaty skin could impact the results. Wait at least fifteen minutes after a workout before taking your measurement.
Assigning a measurement To assign a measurement from your Withings Thermo, perform the following steps: 1. As soon as the temperature comes up, slide your finger up or down on the touch sensitive area of the display to select the correct user. 2. Press the button to confirm your choice. The fever status LED turns on. Your Withings Thermo will power off after a few seconds. Your measurement is sent to the app after your Withings Thermo turns off.
Using the Withings Thermo app Viewing the Timeline Timeline overview All users of the Withings Thermo app have a Timeline of their own. The purpose of the Timeline is to keep track of one’s temperature throughout the weeks and to record various information about one’s health (symptoms experienced, medicine taken, pictures and notes). To view a Timeline, you simply have to log in to the Withings Thermo app and tap the name of the person whose Timeline you want to check.
Viewing the Calendar view Tapping the calendar icon allows you to display the calendar view of your Timeline. This view doesn’t offer as much detail as the Timeline but is a great way to know how often you have a fever. This is particularly helpful with younger children as it is important to keep track of fever episodes. Viewing the detailed view of a measurement You can see additional information about a temperature measurement by tapping it from the Timeline.
Adding Timeline items Adding manual temperature measurements While any temperature measurement taken with the Withings Thermo is automatically sent to the appropriate user’s Timeline, you also have the option to add manual temperature measurements. To do so, perform the following steps: 1. Open the Withings Thermo app. 2. Tap the name of the person whose temperature you want to add. 3. Tap +. Withings Thermo v2.
4. Tap Manual temperature. 5. Touch and drag the bubble to select the correct temperature and tap Done. Adding a note You can add notes to your Timeline, if you want to keep track of how your symptoms are evolving, for example. To do so, perform the following steps: 1. Open the Withings Thermo app. Withings Thermo v2.
2. Tap the name of the person whose Timeline you want to update. 3. Tap +. 4. Tap Note. Withings Thermo v2.
5. Enter your note and tap Save. Withings Thermo v2.
Adding medicine If you want to keep track of the medicine you’re taking, be it to treat your fever or to treat any kind of condition, you can add it to your Timeline. To do so, perform the following steps: 1. Open the Withings Thermo app. 2. Tap the name of the person whose Timeline you want to update. 3. Tap +. Withings Thermo v2.
4. Tap Medicine. 5. Enter the name of your medicine and tap Save. Once you’ve entered a type of medicine once, you’ll be able to select it later without having to type it all over again. Adding symptoms If you want to keep track of any symptoms you might experience, you can add them to your Timeline. To do so, perform the following steps: 1. Open the Withings Thermo app. Withings Thermo v2.
2. Tap the name of the person whose Timeline you want to update. 3. Tap +. 4. Tap Symptoms. Withings Thermo v2.
5. Select each symptom that applies to how you’re feeling and tap Save. Adding a picture You can add a picture to your Timeline if you want to. To do so, perform the following steps: 1. Open the Withings Thermo app. 2. Tap the name of the person whose Timeline you want to update. Withings Thermo v2.
3. Tap +. 4. Tap Picture. 5. Tap Select picture to use an existing photo or Take picture to take one. 6. If you’ve chosen to take a picture, tap Use Photo to confirm. Withings Thermo v2.
Assigning a measurement Assigning an unassigned measurement If you’ve taken a measurement using your Withings Thermo but didn’t assign it right away, you can do so from the Withings Thermo app. To do so, perform the following steps: 1. Open the Withings Thermo app. 2. Tap Assign to... in the top banner. It may take a few seconds for this banner to appear in the app as the app needs to sync with your Withings Thermo first. 3. Select the measurement and tap the user profile you want to assign it to.
2. Tap the name of the person you’ve wrongly assigned the measurement to. 3. Tap the measurement you’ve wrongly assigned. 4. Tap the assignment icon in the top right corner. Withings Thermo v2.
5. Tap the user profile you want to assign the measurement to. Deleting data You can delete any Timeline item (be it temperature measurements, symptoms, medicine, pictures or comments) if you choose to. To do so, perform the following steps: 1. Open the Withings Thermo app. 2. Tap the name of the person whose Timeline you want to update. Withings Thermo v2.
3. Swipe left on the item you want to delete and tap Delete. Note that you won’t be able to retrieve your data after this. Withings Thermo v2.
Setting a reminder If your latest temperature measurement indicated a high fever, or if you’ve entered symptoms that may be worrying, the Withings Thermo app offers the possibility of setting a reminder to make sure you monitor the situation regularly. You can also set a reminder manually. To do so, perform the following steps: 1. Open the Withings Thermo app. 2. Tap the name of the person for whom you want to set a reminder. Withings Thermo v2.
3. Tap +. 4. Tap Reminder. 5. Select the frequency and time range of the reminders. You can cancel the reminder at any time by editing it and tapping Stop reminders. Withings Thermo v2.
Please note that reminders are set locally on your smartphone and that they are not sent to our servers. As such, they will be lost if you log out from the app and then log back in. Sharing my data At this point, it is not possible to share your data with anyone from the Withings Thermo app. This option will be available at a future date. However, you can link the app with Apple Health where your data will be sent. To do so, perform the following steps: 1. Open the Withings Thermo app. 2. Tap Settings. 3.
4. Tap Allow. 5. Go to Apple Health > Sources > Thermo. 6. Select the data you want to share with Apple Health. Withings Thermo v2.
Getting personalized advice Getting Insights Whenever you add a temperature, be it manually in the Withings Thermo app or using your Withings Thermo, the Withings Thermo app displays Insights at the top of your Timeline. Insights are also displayed whenever you add symptoms or medicine to your Timeline. These Insights let you know when it is recommended to get in touch with a doctor, based on your temperature and symptoms.
Dissociating my Withings Thermo If you want to stop using your Withings Thermo and clear all user data from the device, you have to dissociate it from your account first. This can be useful if you want to give it to someone else. To do so, perform the following steps: 1. Open the Withings Thermo app. 2. Tap Settings. 3. Tap your Withings Thermo. Withings Thermo v2.
4. Tap Remove. 5. Tap Remove from my account. Note that dissociating your Withings Thermo, won’t delete any of your data from the Withings Thermo app. Withings Thermo v2.
Cleaning and maintenance Cleaning my Withings Thermo To clean your Withings Thermo, perform the following steps: 1. Wipe the surface of your Withings Thermo with a soft, dry cloth. 2. Use a cotton swab moistened with warm water to clean the lens. 3. Dry the lens with a clean, dry cotton swab. Do not, under any circumstance, use any solvent to clean your Withings Thermo. Changing the batteries When the battery level is getting low, it is time to change the batteries.
2. Tap Settings. 3. Tap your Withings Thermo. 4. Tap Update my device. Withings Thermo v2.
5. Press and hold the button for 8 seconds until the display shows “SETUP”. 6. 7. 8. 9. Tap Next. Tap the Withings Thermo you want to install. Tap Upgrade. Tap Close when the upgrade is complete. Withings Thermo v2.
User guide copyright This User guide is protected by Intellectual Property laws and copyright. Any reproduction, modification, representation, and/or publication without Withings prior approval is strictly prohibited. You may print this User Guide for your personal use exclusively. For any questions, please contact Withings at: https://support.withings.
Safety instructions Use and storage • • • • • Use the product at temperatures between 10°C and 40°C (50°F and 104°F). Product may be stored in a clean, dry location between -25°C and 55°C (-13°F and 131°F) when not in use. Remove the batteries if you do not plan to use your Withings Thermo for an extended period of time. The Withings Thermo is only meant to monitor body temperature, exclusively by running it on your forehead. Any other use is prohibited.
Specifications Withings Thermo • • • • Length: 116 mm (4.57 in.) Diameter: 33.2 mm (1.31 in.) Weight: 75 g (0.165 lbs), batteries included Made of ABS and thermoplastic elastomer Connectivity • • • • Wi-Fi 2.4 GHz 802.11 b/g/n Bluetooth Smart Ready MFI compatibility Apple Wireless Accessory Configuration Support (WAC) Technology • • • 16 infrared temperature sensors 2,000 temperature measurements per second Numeric LED temperature display Metrics • • • • Temperature in °C or °F Fever status 0.2°C (0.
Document release overview Release date Modifications July 2016 v1.0 First release April 2018 v2.0 Withings update The screenshots in this manual are used for explanatory purposes. Your actual screens may differ from the screenshots in this manual. Withings Thermo v2.
Warranty Withings One (1) Year Limited Warranty - Withings Thermo Withings warrants the Withings branded hardware product (“Withings Thermo”) against defects in materials and workmanship when used normally in accordance with Withings’s published guidelines for a period of ONE (1) YEAR from the date of original retail purchase by the end-user purchaser (“Warranty Period”).
Regulatory statements Federal Communications Commission (FCC) Statement FCC ID: XNASCT01 This device complies with Part 15 of the FCC Rules and with Industry Canada licence-exempt RSS standard(s). Operation is subject to the following two conditions: (1) This device may not cause harmful interference, and (2) This device must accept any interference received, including interference that may cause undesired operation. This device complies with the R&TTE Directive.
W ithings Thermo 0 I I QUICK INSTALLATION GUIDE GUIDE D'INSTALLATION j lNSTALLATIONSANLEITUNG I GUfA DE INSTALACION I GUIDA ALL'INSTALLAZIONE I GUIA DE INSTALA<;AO Read this manual before use EN I FR I DE I ES j IT I PT
THANK YOU FOR CHOOSING WITHIN GS THERMO MERCI D'AVOIR CHOISI WITHINGS THERMO I DANKE, DASS SIE WITHINGS THERMO GEWA.HLT HABEN I GRACIAS POR ELIGIR WITHINGS THERMO GRAZIE PER AVER SCELTO WITHINGS THERMO I OBRIGADO POR ESCOLHER O WITHINGS THERMO • Need help? Besoin d'aide? I Brauchen Sie Hilfe? I lNecesitas ayuda? ITi serve aiuto? I Precisa de ajuda? -. withings.com/support/thermo This guide is available in additional languages at: www.withings.
Box contents Contenu de la 601te I Lieferumfang I Contenido de la caja I Contenuto della confezione I Conteudo da caixa (- 3 AAA AAA -) Protective cap Withings Thermo Thermometer 2 AAA (LR03) batteries (already inserted) FR Capuchon FR Thermometre Withings Thermo FR 2 piles AAA (LR03) (deja mises en place) DE Verschlusskappe ES Capuch6n IT Cappuccio PT Tampa de protec;ao DE Wihtings Thermo Schlafenthermometer ES Termometro Withings Thermo IT Termometro Withings Thermo PT Termometro Withings Ther
How to install your Withings Thermo Comment installer votre Withings Thermo I So installieren Sie 1hr Withings Thermo I Como instalar W ithings Thermo I 1 Visit thermo.withings.com from your smartphone or tablet, and follow the instructions to install the Withings Thermo app. FR Allez sur thermo.withings.com depuis votre smartphone ou votre tablette et suivez les instructions pour installer !'application Withings Thermo. DE Rufen Sie uber 1hr Smartphone oder Tablet thermo.withings.
Come installare Withings Thermo I Como instalar o seu Withings Thermo 4-5 2 In the Thermo app, follow the instructions to install Thermo. ) ( FR Dans l'app, suivez les instructions pour installer le Withings Thermo. DE Folgen Sie der Anleitung in der App, um 1hr Withings Thermo Schlafenthermometer zu installieren. ES Desde la aplicaci6n, siga las instrucciones de instalacion de Withings Thermo. IT Nell'applicazione, seguire le istruzioni per installare Withings Thermo.
How to take a temperature Comment prendre une mesure de temperature I So messen Sie die Korpertemperatur I Como medir la temperatura 1 CD Press the button to turn the thermometer on. Clear any sweat or hair from the forehead before taking a measurement. FR Appuyez sur le bouton FR La zone de contact doit etre degagee et propre, sans sueur ni cheveux (frange ou meches). pour allumer le thermometre. DE Drucken Sie auf die Taste, um das Thermometer einzuschalten.
Come misurare la temperatura I Como medir a temperatura 6- 7 2 Starting from the middle of the forehead, slowly scan straight across to the hairline, up to 1cm above the skin. FR En partant du milieu du front, balayez I I en ligne droite jusqu'aux cheveux. DE Ausgehend von der Mitte der Stirn, parallel zum Haaransatz messen. ES Explora a traves de la frente, directamente desde el centro de la frente hasta el cabello.
How to take a temperature Comment prendre une mesure de temperature I So messen Sie die Korpertemperatur I Como medir la temperatura I 3 Thermo will vibrate twice when the measurement is complete. ., FR Le thermometre vibre pour indiquer la fin de la mesure. DE Das Thermometer vibiriert, wernn die Messung abgeschlossen ist. ES El term6metro vibrara cuando la medici6n se haya completado. IT II termometro vibrera una volta che la misurazione sara stata ultimata.
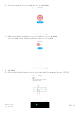
Come misurare la temperatura I Como medir a temperatura 8 -9 4 To assign the temperature to a user, scroll through names on the touch sensitive zone (1 ). Press the button to assign the reading (2). FR Glissez le doigt de haut en bas sur la surface tactile pour choisir un profil et lui attribuer la mesure (1 ). Appuyez sur le bouton pour confirmer votre choix (2).
How to take a temperature Comment prendre une mesure de temperature I So messen Sie die Korpertemperatur I Como medir la temperatura I 5 A colored LED indicates the fever level according to the user's age. FR 6 Une LED de couleur indique le niveau de fievre, qui prend en compte l'age de l'utilisateur. I I .... .• ..••• • • • ••• •• • ••• • • • ••• ••• • ••• DE Das gemessene Fieber wird uber eine farbige LED-Anzeige dargestellt. Dabei wird das Alter des Nutzers beachtet.
Come misurare la temperatura I Como medir a temperatura 10 -11 CD Months 36+ 3-36 0-3 97° 36° 99° 37° 100° 102° 104° T{°F) 38° 39° 40° T{°C)
& Important advice I I I I Recommendations importantes VorsichtsmaBnahmen Consejos de uso Precauzioni d'uso Recomenda<;6es importantes Person being measured must be indoors for 15 minutes prior to taking a reading. I Person being measured must have dry skin. If needed, dry with a towel prior to taking a reading. I Person being measured and the thermometer should be in the same ambient temperature for at least 15 minutes prior to taking a reading.
Overview Vue d'ensemble I Gesamtubersicht I Imagen general I Vista d'insieme I Visao geral @ Main button @ Touch-sensitive area FR Bouton principal FR Zone tactile DE Haupttaste DE ES IT PT ES Bot6n principal Pulsante principale PT Botao principal IT @ Sensor FR DE ES IT PT Capteur Sensor Sensor Sensore Sensor @ Screen FR DE ES IT Ecran Display Pantalla Scherma PT Tela Beruhrungsempfindliche Flache Zona tactil Area sensibile al tatto Area sensfvel ao toque @ Dragnostic LED FR LED indicatrice
Warranty Garantie I Garantie I Garantfa I Garanzia I Garantia US Withings Two (2) Years Limited Warranty - Withings Thermo Withings SA, 2 rue Maurice Hartmann, 92130 lssy-les-Moulineaux, ("Withings") warrants the Withings-branded hardware product ("Withings Product") against defects in materials and workmanship when used normally in accordance with Withings' published guidelines for a period of TWO (2) YEARS from the date of original retail purchase by the end-user purchaser (<
PT Garantia limitada de 2 anos Withings • Withings Thermo Withings SA, 2 rue Maurice Hartmann, 92130 lssy-les Moulineaux («Withings)>) fornece garantia ao produto da marca Withings • («Produto Withings») contra defeitos de materiais e de fabricac;ao, quando utilizado normalmente de acordo com as orientac;oes publicadas pela Withings, por um periodo de 2 ANOS, a partir da data de compra original do comprador final («Periodo de Garantia»).
QIG_SCT01 46 withings Withings Thermo ISmart temporal thermometer - Model: SCT01 - V 1.0 © 2019 Withings SA. All rights reserved.
Withings Thermo Regulatory information Disclaimer: Information in this guide may change without notice.
Warning and Precautions Please read this section carefully before using Withings Thermo thermometer. Intended use - Important safety information The device is intended for use in measuring temperature in adult population, children and babies population. This device is not suitable for children born before term. Withings Thermo (SCT01) is intended for the intermittent monitoring of human body temperature at home. Always consult your doctor.
Warning and Precautions Please read this section carefully before using Withings Thermo thermometer. Precautions before use - Remove the protective cap prior to taking a measurement. - The device and the patient should be in the same ambient temperature for 10 minutes. - Infants' body temperature might vary more than adults'. Avoid making measurements on babies after nursing or while they are crying. It is recommended to take measurements on children when they are calm.
After use Please read this section carefully before using Withings Thermo thermometer. Cleaning - Do not use a solvent agent to clean the device. - Clean the device with a soft and dry cloth. - Do not submerge the device or any of the components in water. Ensure that no liquid enters the interior of the thermometer. - Do not dismantle the device or try to repair it by yourself. If any problem occurs, refer to the distributor.
Troubleshooting If one of the following problems occurs while you are using Withings Thermo, refer to this section to help solve the problem. If the problem persists, please contact our customer service. For any enquiry, the serial number must be provided. It can be found inside the battery cover. It is made of 12 characters grouped by 2, each group separated by a column, for instance XX:YY:XX:YY:XX:YY. Problem Cause Solution Blank display. The device does not turn on. Multiple possible causes 1.
6- 7 Problem Cause Solution The temperature seems rather low The skin has sweat on it or there is hair on the skin. Ensure that there is no hair in front of the sensor. Clean the skin with a dry piece of cloth and wait for 5 minutes prior to taking a measurement. The patient has been staying in a cold room. Wait until the patient is warmer before proceeding to measurement Measurement was not taken on the temple. Please refer to the user manual to place the sensor on the correct location.
Technical Data 8 Product description Infrared temporal thermometer Brand Withings Model Withings Thermo Model number SCT01 Sensor Thermopile Temperature display 3 digits (°C) and 4 digits (°F) Resolution 0.1°C/0.1°F Measuring range 3s 0 c - 43.2°c (9S°F - 109.8°F) Clinical Accuracy ± 0.2°c on 35.5°C - 42.0°C range (± 0.4°F on 95.9°F - 107.6°F range) ± 0.3°C (± 0.
[I] Manufacturer: YA HORNG ELECTRONIC CO., LTD. No. 35, Shalun, Anding Dist., Ta"inan City, Ta·iwan TypeBF 2018 CE: 2460 IP2 2 (I I IP means dust and rain protected EC IREP I Kahl Handelsvertretung Add.: lsarstr.
FCC Statement Federal Communications Commission (FCC) Statement 15.21 You are cautioned that changes or mod1ficat1ons not expressly approved by the part responsible for compliance could void the user's authority to operate the equipment. 10 Operation is subject to the following two conditions: (1) this device may not cause harmful interference and (2) this device must accept any interference received, including interference that may cause undesired operation of the device. 15.
RF Statement 11 Medical Electrical Equipment needs special precautions regarding EMC and needs to be installed and put into service according to the EMC information provided in the following. - Interference may occur in the vicinity of equipment marked with. - Portable and mobile RF communication equipment (e.g. cell phones) can affect Medical Electrical Equipment. - The use of accessories and cables other than those specified may result in increased emissions or decreased immunity.
EMC Data Declaration - electromagnetic emissions and immunity for equipment and systems that are not life-supporting and are specified for use only in a shielded location. Non-Life Support Equipment Separation Distance Calculation (3Vrms / 3V/m compliance) Rated maximum output power of transmitter (W) Separation distance according to frequency of transmitter (m) 150 kHz to 80 MHz in ISM bands d = [3,5] P V1 80 MHz to 800 MHz d = [3,5] P E 1 800 MHz to 2.5 GHz d=[7]P E1 0.01 0.12 0.12 0.23 0.1 0.
12 - 13 The Withings Thermo electromagnetic immunity declaration The Withings Thermo system is intended for use in the electromagnetic environment specified below. The customer or the user of the Withings Thermo system should assure that it is used in such an environment. Immunity test IEC 60601 test level Compliance level Electromagnetic environment - guidance Conducted RF IEC 61000-4-6 3Vrms 150 kHz to 80 MHz N/A N/A Radiated RF IEC 61000-4-3 3V/m 80 MHz to 2.
EMC Data 14 Declaration - electromagnetic immunity The Withings Thermo is intended for use in the electromagnetic environment specified below. The customer or the user of the Withings Thermo system should assure that it is used in such an environment. Immunity test IEC 60601 test level Compliance level Electromagnetic environment - guidance Electrostatic discharge (ESD) IEC 61000-4-2 6 kV contact 8 kV air 6 kV contact 8 kV air Floors should be wood, concrete or ceramic tile.
Disposal Actuation of European directives 2002/95/EC, 2002/96/EC and 2003/108/EC, for reduction in use of dangerous substances in the electric and electronic device and for garbage disposal. The symbol applied on the device or its packaging means that at the end of its useful life the product must not be disposed of with domestic waste.
REG_SCT01 _55 withings Withings Thermo ISmart temporal thermometer I Model: SCT01 I V1 .1 © 2019 Withi.;gs SA. All rights resered.