
User Guide
207
Setting Up Media for Distribution
3. Click Share at the right of the Media page. The Share Release dialog appears.
4. From Copy/Share Media Settings From, select <None>.
5. Click OK.
The link between the selected release and other releases is broken. The current settings
of the releases are not changed, but changing settings for one release no longer affects
the settings of other release.
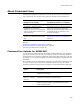
Example: Spanning an Installation Across Media and Sharing
Media Size Information
You can span an installation across CDs and use the Share media destinations/size
info with previous media entry option. Suppose the following:
! The files for your application use 1.5 GB of uncompressed disk space.
! You want to distribute the application on 2 CDs.
! For each of the 2 CDs, you can safely assume a maximum size of 550 MB, which
means that you need to compress some, but not all of your files.
! Your application includes some features that are always installed on the destination
computer. These are the files you compress.
! The application also includes some features that the end user can either install or run
from the CD-ROM. These are the files you don’t compress.
This scenario means that you need to create 2 media items:
! One media item for those features and components that are always installed,
compressed into one big .CAB file.
! A second media item for those files that can be run from the CD and that you
therefore don’t compress.
To create media items with shared size information:
The following steps are for the first media item.
1. Select Installation Expert > Media page.
2. Click Add at the right of the Media page. The Media Details dialog appears.
3. In Media Name, enter a name for the first media item. Example: Compressed Files.
4. From Compression Option, select Compress files into external Cab files.
5. From Cab Options, select One Cab (including modules).
6. In Max Media Size, enter 550 MB.
7. From Cluster Size, select 2048 Bytes.
8. In the Media Destinations section, click Add. The Media Destination Details dialog
appears. Make the following entries for the first CD:
• Destination Directory
C:\My Installation\CD 1
This assumes that you have a directory named My Installation on your C drive.
•Volume Label
CD One
It is very important to change volume labels for your disks or CDs to match this
value. Failing to do so will prevent your installation from working properly.
• Disk Name
CD 1