
User Guide

198
Creating Web-Based Installations With WebDeploy
! For more efficient downloading, organize the installation into components. Only the
components that are needed for the installation are downloaded. See Working With
Components and Features on page 540.
! Make the installation download more efficiently. On the Installation Expert > Media
page, display the Media Details dialog and select One Cab per component in the
Cab Options field. See Adding a Media Item on page 202.
! It is a good idea to digitally sign installations that you plan to deploy over the Web.
To add an authenticode digital signature to your installation files, use the Digital
Signature page. This requires Windows Installer 2.0 or later. See Adding a Digital
Signature to Your Installation on page 212.
Creating a WebDeploy Installation
" Editions and Windows Installer version.
Available in Professional and Enterprise Editions only. For best results with WebDeploy, the
destination computer should have Windows Installer 2.0 or later.
Note
This page is enabled in a .WSI only.
The WebDeploy page lets you enable an installation for distribution via the Web. You do
this by setting options for compiling the installation and for connecting to the Web server
that will contain the installation files. For suggestions on how to set WebDeploy options
to meet your requirements, see Creating Web-Based Installations With WebDeploy on
page 195. Also see Tips for Creating an Efficient WebDeploy Installation on page 197.
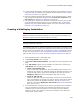
1. Select Installation Expert > WebDeploy page.
2. From Current Release, select a release.
3. Mark Create a Web-based installation. This enables the remaining options on the
page.
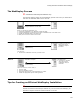
4. From .EXE Options, specify how the installation is created. This is linked to the
.EXE Options field on the Build Options page.
• Create a downloadable .EXE
Create an .EXE that is optimized for direct downloading from the Internet. The
installation will compile to an .EXE that contains the download information, and
an .MSI file that might or might not be embedded in the .EXE. This sets the
WebDeploy .EXE option on the Build Options page, and vice versa.
• Create an .EXE and .INI
Change the download information dynamically, perhaps as a result of end user
input. The installation will compile to an .EXE, an external .MSI, and an external
.INI file that contains the download information. (See INI File Properties on
page 420.) This sets the WebDeploy .EXE and .INI option on the Build Options
page, and vice versa.)
5. In the following fields, specify the URL to which you will upload various installation
files. This information is included in the installation and determines where the
installation looks for files to download. You must specify the full URL address,
pathname, and file name. Include a username and password if your Web server
requires them. Use the format: