
User Guide


Customizing Wireshark
155
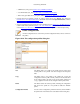
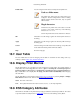
Decode As is accessed by selecting the Decode As... item from the Analyze menu; Wireshark will pop up
the "Decode As" dialog box as shown in Figure 10.6, “The "Decode As" dialog box”.
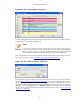
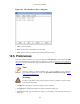
Figure 10.6. The "Decode As" dialog box
The content of this dialog box depends on the selected packet when it was opened.
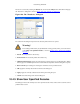
Warning!
These settings will be lost if you quit Wireshark or change profile, unless you save the entries
in the Show User Specified Decodes... windows (Section 10.4.3, “Show User Specified
Decodes”).
1. Decode: Decode packets the selected way.
2. Do not decode: Do not decode packets the selected way.
3. Link/Network/Transport: Specify the network layer at which "Decode As" should take place. Which
of these pages are available depends on the content of the selected packet when this dialog box is opened.
4. Show Current: Open a dialog box showing the current list of user specified decodes.
5. OK: Apply the currently selected decode and close the dialog box.
6. Apply: Apply the currently selected decode and keep the dialog box open.
7. Cancel: Cancel the changes and close the dialog box.
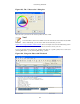
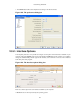
10.4.3. Show User Specified Decodes
This dialog box shows the currently active user specified decodes. These entries can be saved into current
profile for later session.