
User's Manual


11
• Editing a Class Roster
o To edit an existing username, right click on the
name and select Edit User from the drop-down
dialog. When the New User dialog appears,
make the desired corrections and click OK to
close the dialog.
o To delete a user, right click on the name and
select Delete from the drop-down dialog.
o After all changes have been made, return to
the Classes pane, ensure the class name is still
highlighted, and click the Save button. Notice
after saving that the asterisk (*) disappears
from the file name.
•
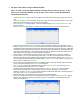
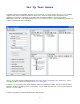
Create User Groups
Initially, when a class is first entered, there are no groups. However, it may be desirable to track class
progress by predefined groups. In the User Groups pane, groups can be created, and then students can be
added to a group. The User Groups pane, located to the left of the Edit Classes pane, displays all user
groups for classes selected in the Classes pane. This process is discussed below.
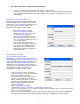
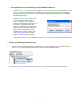
o To create initial User Groups,
select a class in the Classes pane.
In the User Groups pane, click the
file lever to the left of the class
name. The file will open and show
there are no groups in the class.
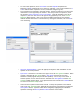
o To create a group, select New from
the User Groups toolbar. New User
Group 1 opens in a box, ready to be
renamed. Change group name and
press enter.
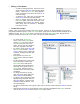
o Click the file lever in the Edit
Classes pane to show the student
names.
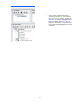
o To add a student user to the group,
select the name of a user in the
Edit Classes pane, hold the left
mouse button down and drag it to
the folder of the group in the User
Groups pane. Add more users in
the same manner until the group is
completed.
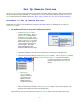
o To change the name of a group,
right click on the group name and
select Rename from the dialog.
o To delete a user group from a class,
highlight the group name and click
the Delete button. Classes are not
deleted by using this button – only
the selected group.
o To remove a student user from a group, right click on the user’s name and select Remove from the
dialog.
o When groups have been set up as desired, ensure the class is highlighted in the Classes pane and
click on the Save or Save As button on the Classes pane toolbar.