
User's Manual

10
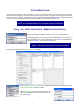
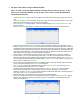
• Set up a Class Roster using Instructor Software
o In the Classes pane, select the name of then Class you wish to create.
o In the Edit Classes pane, click the New User button, or right click on the class name and select New
User from the drop-down dialog to add a new student user to the class. In either case the New User
dialog appears.
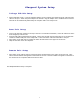
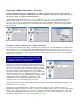
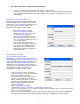
Setting up Class Roster By PIN
This dialog lets you enter the PIN, Last Name, First
Name, MI (middle initial) and Student ID of a new
student user. The Login Enabled checkbox gives the
user permission to log into the session. This
information will appear in various reports.
o Enter a PIN number for the user
o Ensure Login Enabled is checked
o Complete the Last Name, First Name,
MI, and Student ID of the user.
o If Next User is selected the New User
dialog re-appears for entry of another
user. If Finished is selected, the Session
Setup screen appears.
o After all users have been entered,
return to the Classes pane, ensure the
class name is still highlighted, and
click the Save button. Notice after
saving that the asterisk (*) disappears
from the file name.
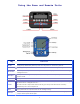
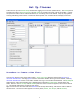
Setting up Class Roster
By Username and Password
This dialog lets you enter the Username, Password,
Password Required, Login Enabled, Last Name, First
Name, MI (middle initial), and Student ID of a new
student user. The Password Required checkbox
exempts a user from having to enter a password
during login. The Login Enabled checkbox gives the
user permission to log into the session. The
information will appear in various reports.
o In the Username box, enter a username,
such as the three initials of the user’s name.
Usernames must be in lowercase.
o In the Password box, type a user-specific
password. The password may contain
letters, numbers, and spaces. If the session
does not require passwords, leave the
password blank and uncheck the option
“Password Required”.
o Ensure Login Enabled is checked.
o Complete the Last Name, First Name, MI, and Student ID of the user.
o If Next User is selected the New User dialog re-appears for entry of another user. If Finished is selected,
the Session Setup screen appears.
o After all users have been entered, return to the Classes pane, ensure the class name is still highlighted,
and click the Save button. Notice after saving that the asterisk (*) disappears from the file name.