
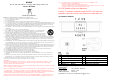
Instruction Manual


SETTING UP THE TABLE
Connect the 3 identical legs to the bottom of the table.
CONNECTING THE UNIT TO POWER
Plug one end of the AC adaptor into the DC power Input,
and then plug the other end into AC wall outlet. Before
switching on the unit, make sure that the voltage of your
electricity supply is the same as that indicated on the
rating plate.
WIRELESS CHARGING
When the unit is on, place a supported mobile device on the wireless charging pad.
The wireless charging indicator will be on as below:
1. While charging, the Qi indicator will be RED. (Andriod Phones and Apple Phones)
2. Fully charged: the Qi indicator will be WHITE for some specific Andriod phones. For Other
smart phones, the Qi indicator will stay RED.
3. Improper charging error**: the Qi indicator will keep FLASHING. (Android Phones and Apple
Phones)
You can also check the charging icon displayed on the mobile device’s screen for the charging
status.
The wireless charger is compatible with Wireless Power Consortium (WPC) certified
devices.
**Note :
If the mobile device is not placed properly on the wireless charging pad, or depending on
the location of the mobile device’s wireless charging coil, your mobile device may not
charge properly.
When the mobile device is fully charged, remove it from the wireless charger.
Do not place foreign materials, such as metal objects, magnets and magnetic stripe card
between the mobile device and the wireless charger. The mobile device may not charge
properly or may be damaged due to overheating.
Wireless charging may not work properly if you have attached a thick case to your mobile
device. If your case is thick, remove it before placing on the wireless charger.
Wireless charging uses magnetic field. Do not place too close with magnetic stripe or chip
card (ID card, bank card etc.) to avoid magnetic failure
USB CHARGING
Connect the USB cable to your device and the unit’s USB port. The unit will charge your device,
such as smartphones or tablets. .The unit contains one USB port with 1A charging.
-3-
BLUETOOTH STREAMING
1. Press and hold the Mode / Standby button to turn the unit on. Press Mode / Standby
button to select the BLUETOOTH mode. The mode indicator will light up and the BLUE
LED (Bluetooth mode) will flash .
2. Turn on your Bluetooth of your Bluetooth device and search the speaker for connection.
Your Bluetooth device should find “HX-201Qi HANNLOMAX”.
3. If connection is successful, the BLUE LED will stop flashing and remains light up.
4. Select and play the audio files though your Bluetooth device.
5. To play/pause playing, press button.
6. To adjust the volume, press and hold VOLUME – and VOLUME + button.
7. To stop the streaming, press and hold the Mode / Standby button.
SKIP MODE
1. During play or pause mode, press the Button to go to the next track.
2. During play or pause mode, press the Button to go back to the beginning of the track
and press twice to go back to the previous track.
BLUETOOTH AUTO PAIRING
Once the unit paired with the Bluetooth device, it will automatically pair with that device next
time when you turn on the unit and that Bluetooth device.
BLUETOOTH UNPAIRING
Press and hold Bluetooth Unpair Button to disconnect the Bluetooth pairing.
AUX IN CONNECTION
1. Insert one side of the audio cable (requires 3.5mm stereo plug, not supplied) into the
line-out jack or phones jack on your audio device and the other side to the aux-in jack on
the unit.
2. Press and hold the Mode / Standby button to turn the unit on. Press Mode / Standby
button to select the Bluetooth mode. The mode indicator will light up and the GREEN LED
(Aux-in mode) will flash.
3. Turn on your audio device and follow the playback instruction.
4. To stop this function, remove the audio cable from the unit and press and hold the Mode /
Standby button.