Wine Cellar Cooling Systems Installation, Operation and Maintenance Guide Models: WG 40, WG 75, WG 100, WG 175 50Hz Manufactured by: Wine Guardian division of Air Innovations, Inc. Syracuse, NY www.wineguardian.com www.airinnovations.com Wine Guardian reserves the right, without notice, to make changes to this document at our sole discretion. Please visit our web site for the most current version of the Wine Guardian Manual and other literature.
Table of Contents Directory of Terms....................................................................................................................... 2 Receiving, Inspecting and Unpacking the Wine Guardian Unit .......................................... 3 Receiving and Inspecting the Unit .............................................................................................................................. 3 Review the Packing Slip to verify: ....................................................
Installing the Unit Outdoors .......................................................................................................................................21 Mounting the Unit............................................................................................................................................................... 22 Floor Mounting ......................................................................................................................................................
Monthly ............................................................................................................................................................... 44 Yearly.......................................................................................................................................................................... 44 Troubleshooting ........................................................................................................................
Directory of Terms Ambient Air – The surrounding area outside the cellar such as a room, basement, garage or outdoors. CACLS – Cubic litres per second. A unit of measurement for the amount of air handled by the fan. Condensate / Condensation – The water formed out of the air when it is cooled below a certain temperature (called dew point). Often referred to as “sweating” on pipes and cold surfaces.
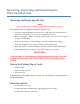
Receiving, Inspecting and Unpacking the Wine Guardian Unit Receiving and Inspecting the Unit NOTE Wine Guardian units are factory assembled and tested prior to shipment. Wine Guardian units are shipped in individual cardboard boxes. Lift at the designated handhold locations only or fully support from underneath. A shipment may include one or more boxes containing accessories. Before opening the container, inspect the packing crates or boxes for obvious signs of damage or mishandling.
General Description View the Overview Illustration on page 8 for details. The Wine Guardian cooling unit is a professional grade American manufactured, self-contained climate control unit designed specifically for the storage of wine at cellar temperatures. It is designed for easy installation and operation. Wine Guardian uses digital electronic controls and environmentally friendly R-134a refrigerant. All Wine Guardian 50Hz units carry the CE mark.
Standard Specifications IMPORTANT Design and specifications are subject to change without notice The Wine Guardian Unit Contains A thermal expansion valve to control the flow of refrigerant into the evaporator coil A filter dryer to keep the refrigerant clean and free of contaminant A sight glass to observe the level of refrigerant An automatic low pressure switch on the discharge to protect the compressor form high pressures The unit uses only environmentally friendly refrigerant F-134a A bui
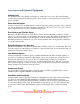
Accessories and Optional Equipment Heating Coils An optional heating coil is built-in and requires no additional power source. The electric heating option is factory installed and includes primary and secondary over-temperature protection devices per UL and NEC. Water Cooled Option A water cooled option is available that uses a tube-in-tube heat exchanger in place of the condenser coil and fan. Waste heat from the refrigerant is transferred to the water.
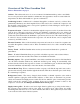
Overview of the Wine Guardian Unit Refer to illustrations on page 8 Cabinet – The cabinet and access doors are constructed of aluminum with a powder coated finish for corrosion protection and an attractive, maintenance free appearance. Areas in contact with cold temperatures are lined with insulation to prevent condensation. Condensing Section – Ambient air is circulated through the condenser section by a direct drive, permanently lubricated, motorized impeller blower.
Overview Illustration of the Wine Guardian Unit Refrigeration Illustration - Vapor Compression System 8 2
Wiring Diagram Model WG 40 9
Wiring Diagram Model WG 75 10
Wiring Diagram Model WG100 11 11
Wiring Diagram WG 175 12
Wine Guardian Wine Guardian Dimensional Data Model Number WG4 WG75 WG100 WG175 Dimensions - Nominal - add 9.5mm for each mm A - Width mm B - Height mm C - Length mm D – Cond. discharge location mm E – Evap. discharge location mm F - Inlet opening width mm G - Drain outlet location mm H - Discharge opening width mm I - Inlet opening Height mm J - Location to wall kg Weight g Refrigerant Charge – 134A grille 356 356 889 540 137 267 502 63 202 368 36.3 539 559 356 991 591 137 470 552 254 282 419 56.
Safety Before installing or maintaining the Wine Guardian Unit do the following: 1) Read these instructions. 2) Keep these instructions. 3) Heed all warnings. 4) Follow all instructions. IMPORTANT The equipment described in this manual uses electricity. When using this equipment, be sure to follow the safety procedures outlined in the Wine Guardian Manual.
Following is a typical example of a Caution message as it could appear in the manual: CAUTION RISK OF PERSONAL INJURY OR DAMAGE TO EQUIPMENT Improper installation may result in the equipment malfunctioning and a safety hazard. Read all of the installation instructions before installing the Wine Guardian unit. Lockout/Tagout Procedure 1) Turn off the power switch (indicator light should be off) 2) Unplug the unit from the electrical outlet and cover the outlet to prevent accidently plugging in the unit.
Moving Parts Hazards The Motor and Blower must be disconnected prior to opening access panels. The motor can start automatically. Disconnect all power and control circuits prior to servicing to avoid serious injuries or possible dismemberment. The fans are free-wheeling after the power is disconnected. Allow the fans to stop completely before servicing the unit to avoid cuts or dismemberment. Rotating Fan Blades are present in the Wine Guardian unit.
All supports for the unit must be designed to meet applicable local codes and ordinances. Do not remove access panels until fan impellers have completely stopped. Pressure developed by moving impellers can cause excessive force against the access panels. Fan impellers continue to turn (free-wheel) after the power is shut off . CAUTION Clean only with a dry cloth. Never pressurize equipment above specified test pressure.
Installation CAUTION SHARP EDGES RISK OF SERIOUS INJURY Sharp edges are present inside the Wine Guardian system. Pre-installation Test Test the system before installing it to check for non-visible shipping damage. To test the system: Set the system on the floor or a sturdy level surface. Plug in the system. Press the on/off switch, control illuminates. This indicates the system has power. The built in timer prevents short cycling and keeps the system from turning on right away.
WARNING RISK OF PERSONAL INJURY OR DAMAGE TO EQUIPMENT Modification to the equipment may cause injury or damage to the equipment . DANGER This equipment is heavy. Place the unit on the floor or on a level and stable surface that can support the full weight of the unit. Do not modify the equipment, it may cause damage to the equipment and will void the warranty. Never place anything on top of the unit. Never block or cover any of the openings or outlets to the unit.
Planning the Installation Addressing Items in the Planning Process Where to locate the unit? Should it be built into the wall or mounted remote and ducted into the cellar? How to mount the unit? Decide where to locate the supply and return grilles in the room to achieve the temperature gradient and circulation preferred. Locate the electrical power outlet close to the unit, in cellar or out.
Grilles Each of the inlets and one evaporator outlet and one condenser outlet come from the factory with grilles over the openings. The grilles are removable. Remove the necessary grilles for installing ductwork between the unit and the cellar. If desired, use the grilles as wall grilles inside the cellar. The return air, or inlet, to the unit must connect to the return air outlet from the cellar.
Mounting the Unit CAUTION RISK OF PERSONAL INJURY OR DAMAGE TO EQUIPMENT Check supporting structure for load bearing capacity to support the Wine Guardian. All supports must be designed to meet applicable local codes and ordinances. If in doubt, consult a qualified architect, engineer or contractor. Note Review the mounting illustrations on pages 32 and 33 before mounting the unit.
Installing the Drain Line The drain line must extend from the unit to an external drain or disposal site. Do not use drain tubing any smaller than 12mm inside dimension on the unit. Splice the drain extension onto the drain outlet with a sort piece of 12mm copper tubing and secure with claps. If no drain is available, use a bucket. Do not extend the drain below the rim of the bucket. Empty the bucket periodically. The Guardian Unit is provided with a built-in drain trap.
Wiring the Unit for Power DANGER ELECTRICAL SHOCK HAZARD RISK OF SERIOUS INJURY OR DEATH The electrical outlet and wiring installation must meet the national and local building codes. DO: Match the electrical outlet to the plug provided on the Wine Guardian. Provide dedicated circuit and wiring for the system. Match the wiring and breaker size to the rated load as shown on the serial plate and in this guide. See sample serial plate illustration on the following page. Serial No. Model No.
Installing the Thermostat and Communication Cable The Wine Guardian Remote Interface Controller is a combination temperature and humidity controller with single stage cooling, heating and humidifier control. Each Wine Guardian unit is supplied with a Remote Interface Controller and 15 meters feet of communication cable. It is wired at the factory for testing prior to shipment. In most applications the Remote Interface Controller will be mounted within the wine cellar.
2. Remove the back plate of the controller and mark the mounting points at the desired location. (Fig. 2) a) Mark the location of the communication cable connection as this area will require sufficient clearance for instance, a 3.8cm hole in the wall for flush mounting of the back plate. (Fig. 3) Fig. 2 3. Drill two (2) .32cm holes and insert anchors (provided) within the mounting surface. Anchors may not be required if securing to a wall stud or racking system. Fig. 3 4.
Installation of the Wine Guardian Remote Sensor The Remote Sensor is a combination temperature and humidity sensor only. It is designed to be mounted within the wine cellar and can be used in combination with the Remote Interface Controller or up to three additional Remote Sensors to read and control multiple areas within the wine cellar. Mounting the remote sensor 1. Disconnect the communication cable from the side of the Wine Guardian unit and the remote sensor.
4. Drill two (2) .32cm holes and insert anchors (provided) within the mounting surface. Anchors may not be required if securing to a wall stud or racking system. (Fig.3) Fig.3 5. Plug in the communication cable to the back of the Remote Sensor and attach to the wall using the two screws provided in the kit. (Fig.4) Fig 4 6. Plug the Remote Sensor cables into the splitter device at the WG unit along with the communication cable for the Remote Interface Controller. (Fig.5) Fi Fig.
Joining Communication Cable Important Wine Guardian cooling systems are supplied with 15 meters of 6 wire, Cat 3 twisted pair communication cable with RJ11 type connectors. Caution must be taken when connecting two lengths of communication cable (splicing) to ensure uniform wire color before and after splice. An RJ11 Modular 6 wire STRAIGHT THROUGH type coupler is the ONLY coupler approved for splicing Wine Guardian twisted pair communication cable.
STANDARD CONTROLLER FUNCTIONS Humidity Up Button Temperature Down Button Alarm Indication Area Mode button (right side) On/Off (left side) Mode Area How to: Turn system on/off Press the On/Off” button once. Note: There is a five (5) second time delay before the system turns on or turns off. Change Temperature Press the “Up” arrow once. The display will show the existing temperature set point. Press the up or down arrow buttons to adjust the temperature to the desired set point.
Settings – Press and hold the “Mode” button for five (5) seconds to access the following settings. Deg F or Deg C Setting 1 Press the “Down” arrow to change temperature from Deg F to Deg C. Press the “Up” arrow to change temperature from Deg C to Deg F. Low temperature alarm set point Setting 2 Press “Mode” button to advance to Setting 2. Press the “Up” or “Down” arrow buttons to adjust to the desired set point. Factory default is 10 Deg. C..
Advanced Settings-Special access required. Contact Wine Guardian Service Department for access code Setting 8 Press “Mode” button to advance to Setting 8. Press the up or down arrow buttons to adjust number to the access code. Press “Mode” button to continue onto setting 9 through 19. Compressor anti-short cycling time Setting 9 Press “Mode” button to advance to Setting 9. Press the “Up” or “Down” arrow buttons to adjust to the desired time in one (1) minute increments.
Differential temperature adjustment Setting 16 Press “Mode” button to advance to Setting 16. Press the “Up” or “Down” buttons to adjust to the desired set point. This setting changes the system/compressor. Turn on temperature above set point. Factory default is set to 1°C. Example: Sensor reading = 13°C Setting 16 set to +1°C System/compressor turns on at 14 Deg. C. Deadband setting Setting 17 Press “Mode” button to advance to Setting 17.
Alarm Codes High temperature alarm Press the “Up” or “Down” arrow once to change screen from alarm to normal Temperature and Humidity indication. “Hi Temp” will remain on screen until temperature falls below the High Temperature Alarm set point (Setting 3). Low temperature alarm Press the “Up” or “Down” arrow once to change screen from alarm to normal Temperature and Humidity indication. “Lo Temp” will remain on screen until temperature rises above the Low Temperature Alarm set point (Setting 2).
Installing the Ductwork Use ductwork to connect the unit to the supply and return outlets in the wine cellar. Use only insulated ductwork to minimize cooling loses, prevent sweating, and to reduce noise. Use ductwork on the condenser section to redirect or absorb sound, to bring in outside air to the unit inlet, and/or to exhaust the hot air out of the ambient space. NOTE Do not exceed a total of 7.5 meters for each length of ductwork run.
Uninsulated ducts and surfaces cause bare exposed metal surfaces to sweat, further degradation of the insulation and a loss of equipment cooling capacity. General Duct Recommendation Support the flexible duct often to prevent sags or bends. Stretch the duct to make for a smoother interior for less air resistance. For a 90 degree bend, insert a metal elbow inside the flexible duct to avoid crimping. Do not squeeze or reduce the inside diameter of the ducts. This restricts the airflow.
Typical Mounting Arrangements The following illustrations are suggested mounting arrangements. These illustrations are not intended to be complete and detailed installation drawings. For questions or help regarding installation, call customer service at or 00 1 315-452-7400 fax 00 1 315-452-7420 or email (info@wineguardian.com) a sketch of the proposed area where the unit is to be installed.
Duct Adapter Sizes UNIT SIZE LOCATION ROUND DUCT SIZE 1/4 1/4 1/2 & 1 1/2 & 1 1 2 2 2 INLET OUTLET INLET OUTLET DUAL OUTLET INLET OUTLET DUAL OUTLET 202 202 252 253 202 303 303 252 OPENING SIZE WIDTH 267 203 346 254 254 479 295 295 Ducting Options Single Outlet Duct Installation Dual Outlet Duct Installation 38 HEIGHT 283 283 283 283 283 381 381 381 FLANGE WIDTH 295 244 549 295 295 549 346 346 SIZE HEIGHT 346 346 346 346 346 448 448 448
Inspection and Start-up Checklists Receiving and Inspecting Unit received undamaged Unit received complete as ordered including accessories Handling and Installing Unit mounted on solid level surface Sufficient space allowed for access to unit and accessories Proper electrical service provided Hot water provided to humidifier Drain lines and trap installed properly Ductwork, fittings and grilles installed properly All cold duct surfaces insulated Low ambient c
Starting-up and Operating the Wine Guardian Now that the installation is complete, it’s time to start the unit up. Check to make sure all ductwork and electrical connections are secure. Replace all panels which were removed during installation. Check that all of the openings in the unit are covered with a blank panel, a ductwork connection or a grille. CAUTION Rick of personal injury. Cover all openings of the unit to prevent a hand or finger from access inside the unit. Turn on the Unit Plug in the unit.
Cycling the Unit The fans continue to free-wheel for several minutes when the unit cycles off. This is normal. If the unit is furnished with a low ambient control, the condenser fan also cycles on and off during cooling. This maintains the head pressure on the compressor under low ambient conditions, and is normal. The bottom of the compressor stays warm even when the unit is off to keep the lubricating oil warm and separated from the refrigerant.
Maintenance General WARNING BEFORE PERFORMING MAINTENANCE ON THE UNIT, READ AND UNDERSTAND THE SAFETY INFORMATION CONTAINED WITHIN THE SAFETY CHAPTER OF THE WINE GUARDIAN MANUAL. DANGER HIGH VOLTAGE - RISK OF SERIOUS INJURY OR DEATH High voltages are present in the cabinets. Turn off all power. Use the Lockout/ Tagout procedure before opening panels. CAUTION SHARP EDGES RISK OF SEROUS INJURY Sharp edges are present on the fan wheels, housing, fins and coils.
Cleaning the Filters The evaporator and condenser coils are provided with reusable, washable air filters. The filters protect the coils from becoming coated or plugged by dust. Frequency of cleaning the filters is based on the amount of dust or dirt generated in the cellar or basement. 1. 2. 3. 4. 5. Remove the grille or duct collar on the inlet end of the unit. Remove the filter covering the face the coil. Wash it under warm water. Shake off excess water. Inspect and clean the face of the coil.
No additional maintenance is required for the heating coil. To test the heating coil operation, set the thermostat on HEAT and set the temperature above the cellar temperature. The supply air temperature should rise above the return air temperature by an amount shown in the specifications. Low Ambient Option The purpose of the Low Ambient Option is to protect the compressor and refrigerant system.
Troubleshooting WARNING BEFORE PROCEEDING, READ AND UNDERSTAND THE SAFETY INFORMATION CONTAINED IN THE SAFETY SECTION OF THE WINE GUARDIAN MANUAL. IMPORTANT This section is intended as a diagnostic aid only. For detailed repair or parts replacement procedures, contact a qualified service company. Check the following table for some solutions before calling a service technician.
Unit is Operating and Blows Evaporator Air, but the Supply Air is Not Colder Than the Return Air from the Cellar Possible Cause Solution Thermostat not set up properly Check thermostat setup in the manufacture’s thermostat guide Compressor not operating High pressure switch open (button up) (see below) Condenser airflow is blocked Remove blockage Clean filter and coil (if needed) Head Pressure (HP) switch is open Reset HP switch See reset instructions on page 49 Problems Controlling Cellar Tempera
Problems Controlling Cellar Humidity Humidity too low or supply air is too cold, without optional humidifier Possible Cause Solution Not enough evaporator airflow Remove blockage in supply or return ductwork Check and clean filter and coil Coil frozen – shut off unit for two hours Defective Thermal Expansion Valve If under warranty call for service If not under warranty call a refrigeration technician Raise temperature set point at thermostat Temperature set too cold Humidity too low, without optiona
Humidity too high when the unit is not running Possible Cause Solution Unit needs to run to dehumidify Run unit. Seal openings around doors (gasket and sweep) Humidity too high when unit is running and cooling Possible Cause Solution Too much moisture in cellar Poor vapor barrier installation Humidifier malfunction refer to the humidifier instructions.
High Pressure Switch has Shut the Unit Down Every Wine Guardian unit has a manual reset high pressure switch in the refrigeration system. This switch shuts the compressor and condenser down if the head pressure in the system is too high. It is intended to protect the compressor. Restricted airflow through the condenser is the most common reason for the pressure to become too high. This can be caused by dust covering the filter or an obstruction blocking the airflow in the duct or grille.
Advanced Troubleshooting IMPORTANT THIS SECTION IS INTENDED FOR QUALIFIED REFRIGERATION SERVICE TECHNICIANS ONLY. THE TECHNICIAN SHOULD REPEAT ALL OF THE PREVIOUS TROUBLESHOOTING STEPS BEFORE TAKING ACTION ON THESE MORE TECHNICAL SOLUTIONS.
Appendix Warranty Procedure The Wine Guardian unit serial number is noted on all packing lists and bills of lading and, along with the shipping date, is kept on file at Wine Guardian for warranty purposes. All correspondence regarding warranty must include the model number and serial number of the unit involved. Note that the warranty is null and void if the serial number on the unit or compressor is altered, removed or defaced.