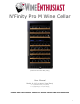
N’Finity Pro M Wine Cellar (Features and Size May Vary) User Manual Model #: 237 0X 94 0Y (Dual Zone) X= 2 (Stainless Steel) or 3 (Black) Y= 3 (Right Hinge) or 4 (Left Hinge) PLEASE READ THIS MANUAL CAREFULLY BEFORE INSTALLING AND OPERATING 1
IMPORTANT SAFEGUARDS When using this appliance, always exercise basic safety precautions, including the following: 1. Read all of the instructions before using this appliance. 2. This appliance is not intended for use by persons (including children) with reduced physical, sensory or mental capabilities, or lack of experience and knowledge, unless they have been given supervision or instruction concerning use of the appliance by a person responsible for their safety. 3.
DANGER Risk of child entrapment. Before you throw away your old wine cellar, take off the doors. Leave the shelves in place so that children may not easily climb inside. Thank you for using our Wine Enthusiast product. This easy-to-use manual Model number will guide you in getting the best use of your wine cellar. Serial number Please remember to record the model and serial number, they are on a label Date of purchase in back of the wine cellar. Staple your receipt to your manual.
Table of Contents IMPORTANT SAFEGUARDS ................................................................................................. 2 Wine Cellar Features and Use ............................................................................................ 6 Initial Setup ..................................................................................................................... 6 Temperature Adjustment ............................................................................................
Electrical Requirement • Make sure there is a suitable power Outlet (115 volts, 15 amps outlet) with proper grounding to power the wine cellar. • Avoid the use of three plug adapters or cutting off the third grounding in order to accommodate a two plug outlet. This is a dangerous practice since it provides no effective grounding for the wine cellar and may result in shock hazard. Install Limitations • Do not install your wine cellar in any location not properly insulated or heated e.g. garage etc.
Wine Cellar Features and Use Initial Setup • Before connecting the wine cellar to the power source, let it stand upright for approximately 24 hours. This will reduce the possibility of a malfunction in the cooling system from handling during transportation. • Once you have plugged the unit into an electrical outlet, let the unit run for at least 30 minutes to acclimate before making any adjustments.
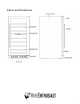
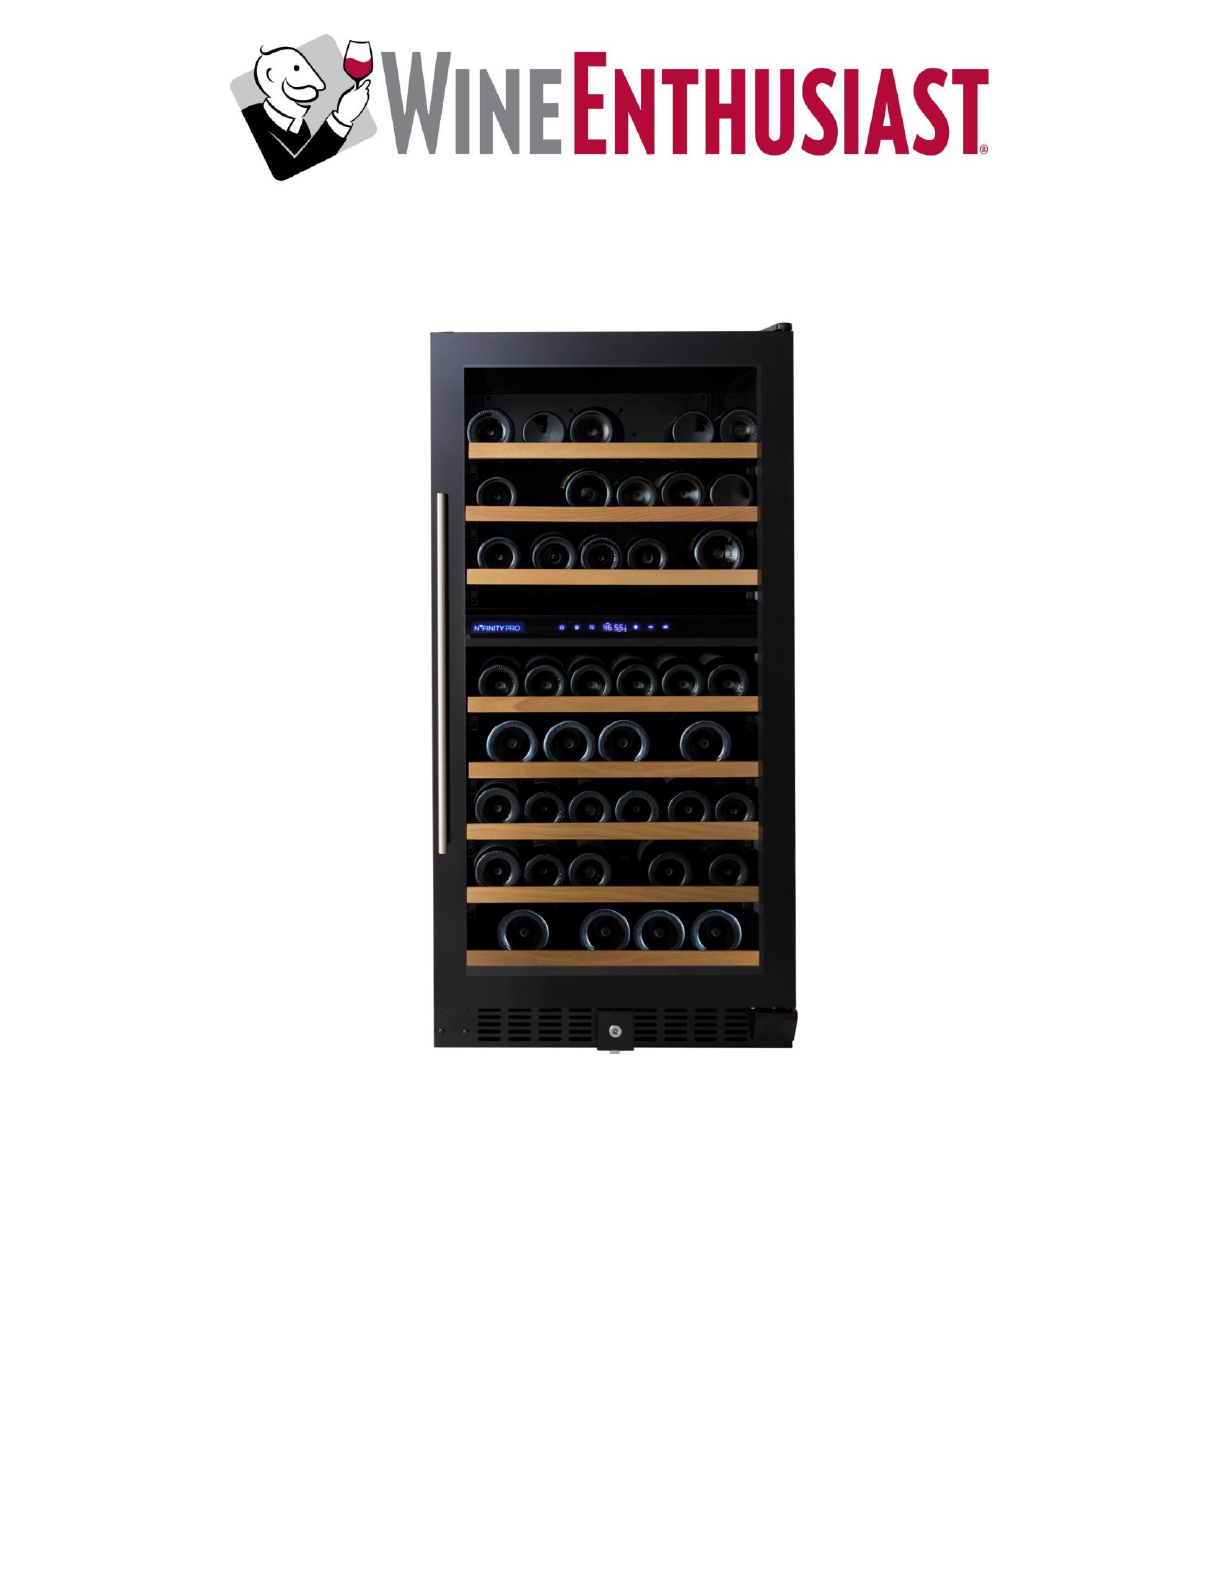
Parts and Features 7
Installation as a Built-In Cellar These cut out dimensions show the minimum space required for your wine cellar to perform as designed.
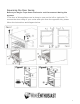
Reversing the Door Swing Before you begin: Tape down shelves to avoid movement during the process • The door of this appliance can be hung to open on the left or right side. To reverse the door swing of your cooler and open from the opposite side, please follow the instructions and diagram below.
1. Pry up the hinge cover (1) and hinge cap (2) using a flat head screwdriver. Using a Phillips head screwdriver, loosen the hinge screws (3a) and remove the top hinge (4). You can now lift the door (5) off the bottom hinge and set it off to one side. Be careful not to lose the washer (11) between the bottom hinge and the door. You will need this later. Also remove lock hole cap (6) and screws (7) and (8) from the top of the door. The lock cap can be pried up using a small flat head screwdriver. 2.
Installing the Handle 1. Pull back the door seal behind handle location. 2. Insert screws into pre-drilled screw holes. 3. Attach handle and tighten screws. 4. Press door seal back into place. Operating Your Wine Cellar Each wine cellar includes an operating panel on the front of the unit. This operating panel includes several features to operate and control the temperature.
Before You Start The wine cellar should be placed in a location where the ambient temperature is between 60-80° Fahrenheit. If the ambient temperature is above or below this range, the performance of the unit may be affected. For example, placing your unit in extreme cold or hot conditions may cause interior temperatures to fluctuate.
To UNLOCK the control panel: 1. Touch the control panel to wake it up from sleep mode. 2. Simultaneously press the Power and Lighting buttons. 3. The control panel will beep and the LOCK icon will darken. Removing the Rolling Shelf 1. Remove all bottles. 2. Pull out the shelf as far as possible. 3. Hold one of the telescopic rails with one hand, with the other hand gently lift the front of the shelf from the front tab, then push backward to unlock from the rear hook. 4.
Interior Light • To complement the look of your wine collection, a soft light has been built into the wine cellar. Simply push the "Light" button and the light comes on, push again for off. For maximum energy efficiency, leave light off when not viewing your collection. Door Lock • This unit comes with key lock. • The keys are located inside the plastic bag along with the user manual. To unlock the door, insert the key into the lock and turn counter clockwise.
Technical Data N’Finity Pro M Wine Cellar Total Volume 9.53 Cu. Ft. Installation Free-Standing or Built-In Power 115V~60Hz Current 1.6A Protection Class I Climate Class T Start-Up Amps 9.4A Running Amps 1.6A Ambient Temperature 60 - 80°F Refrigerant R600a – 1.8 oz. Temperature Control Range Upper Zone: 41°F to 54°F Lower Zone: 54°F to 66°F Approx. Net Weight 181 LBS Dimensions (W x D x H) 23-3/4” x 29-1/4” x 48” Handle will add 2” to depth.
Proper Wine Cellar Care and Cleaning Cleaning and Maintenance Warning: To avoid electric shock always unplug your wine cellar before cleaning. Ignoring this warning may result in death or injury. Caution: Before using cleaning products, always read and follow manufacturer’s instructions and warnings to avoid personal injury or product damage. General: • Prepare a cleaning solution of 3-4 tablespoons of baking soda mixed with warm water.
Vacation and Moving Care • For long vacations or absences, unplug the wine cellar and clean the wine cellar and door gaskets according to "General cleaning" section. Leave doors open, so air can circulate inside. • Always move the wine cellar vertically. Do not move with the unit lying down, as possible damage to the sealed system could occur. Note: After moving, wait for 24 hours before plugging in the wine cellar. Troubleshooting Many common issues with your wine cellar can be easily solved.
• Clean condenser coils. • Check gasket for proper seal. • Check to see if doors are completely closed. Moisture build-up on interior or exterior of the wine cellar: • This is normal during high humidity periods. • Prolonged or frequent door openings. • Check door gaskets for proper seal. Wine cellar door does not shut properly: • Level the wine cellar. • Check for blockages e.g. wine bottles, shelves.
Limited Warranty This Warranty Covers Appliances Within The Continental United States Only. Length of Warranty: This Limited Warranty lasts for one (1) year from date of receipt of purchase of the wine cellar (“Limited Warranty Period”) and the sealed system (compressor, condenser, evaporator) will be covered for three (3) years. Extended warranties may be available for an additional cost at the time of purchase or up to the seventh month from date of purchase.
under this Limited Warranty. Wine Enthusiast reserves the right to substitute materials of substantially similar quality in the event that identical materials are not available at the time the Limited Warranty services are performed. Wine Enthusiast reserves the right to request that purchaser contact a local refrigeration company to service the wine cellar.