
Instructions / Assembly


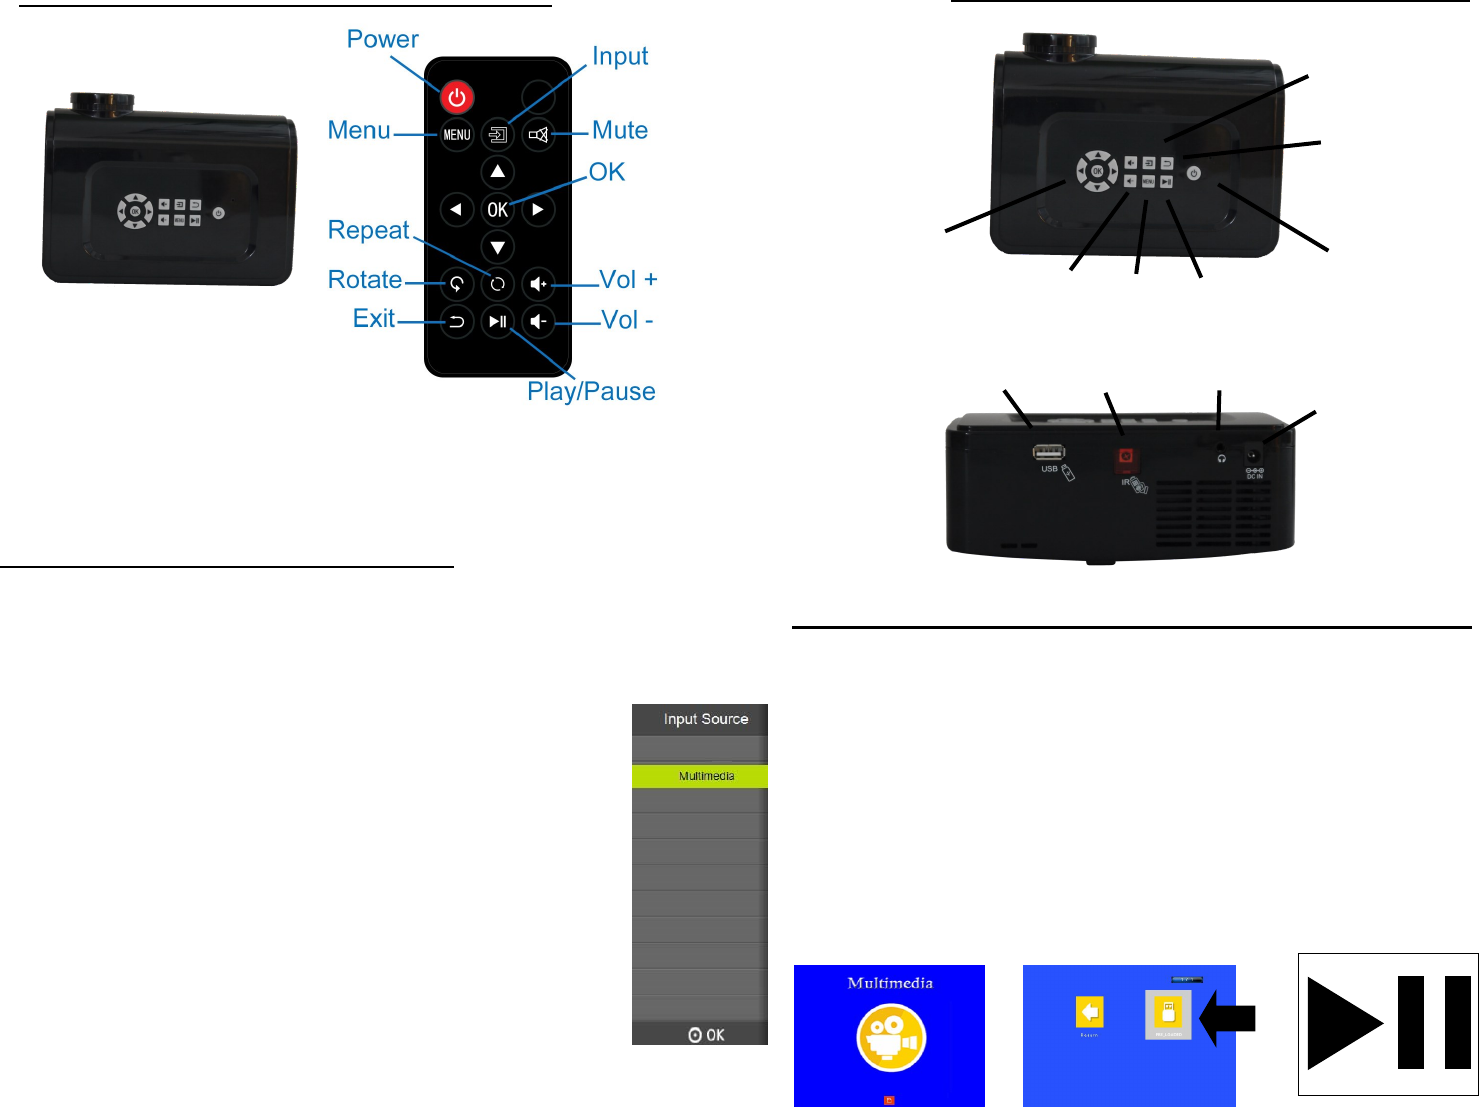
USB
Infrared port
Headphone Jack
Adaptor Port
Arrows and
Select (OK)
Volume Up
& Down
Menu
Play/Pause
Power On/O
Back/Return
Input Source Menu
1. Select Mulmedia Icon (Image 4), then press OK on your remote or projector.
2. Select Preload Icon (Image 5), then press OK on your remote or projector.
3. To play all videos, press play (Image 6) on the remote or projector; to select specic videos,
highlight the videos and press OK on the remote or projector and a small checkmark will
appear. Aer a few seconds of non-acvity, a small preview video will appear. To exit out of
preview mode, simply move using the arrow keys or press play and the videos will enter full
screen format.
4. Once the playlist has been played, they will automacally repeat unl the opon is changed
or the unit is turned o. Remark: You can press ‘Repeat’ buon to select Repeat On/Repeat
All/None.
Image 3
Image 2
Image 4
Image 1
Image 5
Image 6
Le arrow moves Le.
Right arrow moves Right.
Up arrow moves Up.
Down arrow moves Down.
Volume Up/Down
Menu: Operate mulple funcons.
Source: Choose input signal source.
Power Buon: Power on/o projector.
MINI PROJECTOR USER MANUAL - Funcons
Buon funcon
Projector
MINI PROJECTOR USER MANUAL - Projector Ports
Power on/o
Plug the provided adaptor into the DC adaptor port (Image 2)
Power on: Press the power buon on the projector or remote control once, the projector starts
working.
Power o: Press the power buon on the projector or remote control once, the projector is o.
Focusing
Put the projector at a certain place within the proper distance from the screen.
To focus, twist the lens on the front of the camera, le or right in order to adjust the focus and
sharpen the image. The projector must be ON in order to focus properly.
Changing the Input Source
Press “SOURCE” buon on the remote control to get the source menu, repeat pressing “source”
buon to move the cursor to the input signal source you need, the press “OK” buon to con-
rm Or press “Source” buon on the projector to get the source menu, then press the
“OK” (Image 3)
MINI PROJECTOR USER MANUAL - Set Up
MINI PROJECTOR USER MANUAL - Set Up Connued