
Use and Care Manual

6
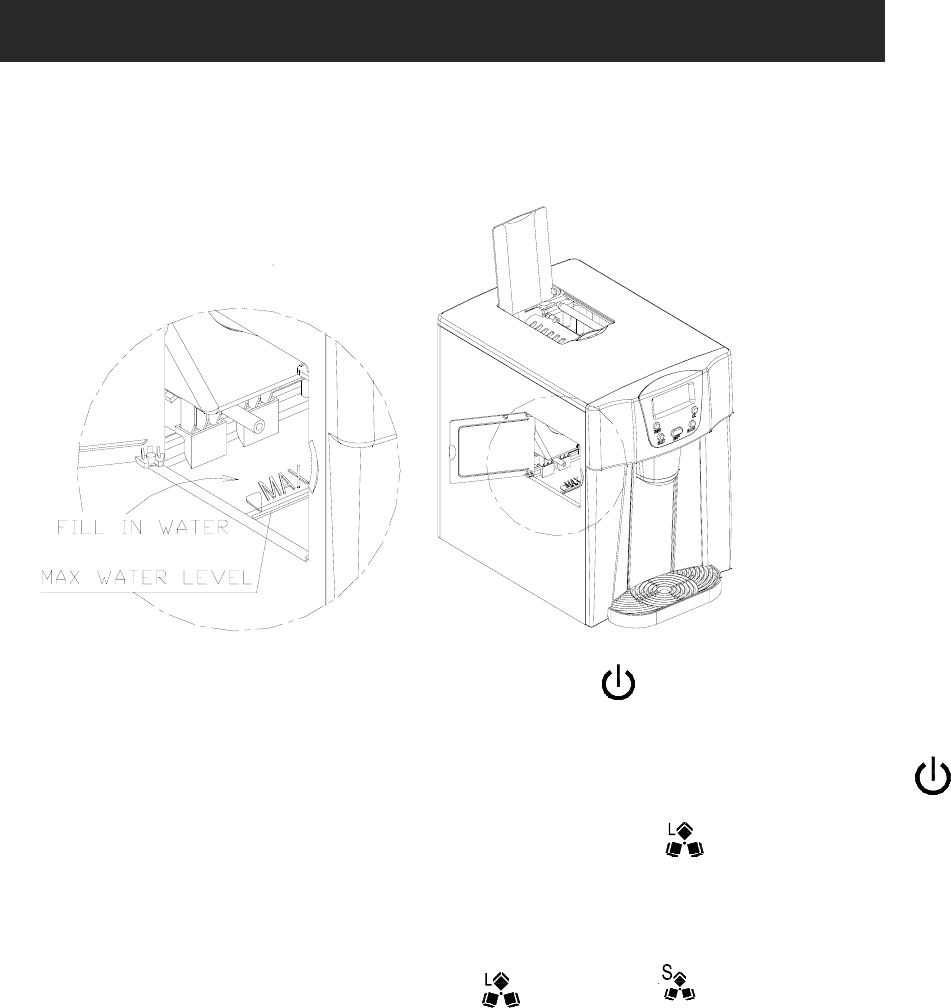
How to start the unit
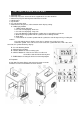
1. Open the left side door, pour potable water into water reservoir.
Keep water level below the “MAX” water level mark.
2. Plug your ice-maker into the main power outlet, then the “
” symbol will flash in LCD display
window.
3. Press “ON/OFF” button on the control panel to begin the ice making cycle. After this, the “
”
symbol will change to light on always in LCD display window, and “
” symbol will flash on in the
mean time.
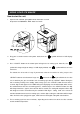
The default size of ice-cube is Large. If you want to select the size of the ice cube, just press the
“SELECT” button to select between Large size
and Small size . If you still think the ice cube
size is not fit for you, you can add the each ice-making cycle time by “SELECT” button. During the
unit ice-making running or on standby mode, always press the “ON/OFF” button for more than 5
seconds, digit “0” will appear in the TIMER delay time displaying area of LCD window, which means
the standard time of the once ice-making process, continue to press the “SELECT” button, the digit
will change from 0 to 1, again 2, then return 0. After 5 seconds, the setting will complete and the digit
will disappear and be remembered by the controller. With digit 1 setting, it will add 1 minute to
standard duration time of each ice-making cycle, and the digit 2 setting, the added time will be longer
more. And if the unit is plugged on again, it will recover to the digit 0 setting with standard time.
4. The ice making cycle lasts 6 to 12 minutes, depending on the normal size of the ice cube selection
and the ambient temperature.
USING YOUR ICE MAKER