
Instruction manual

16
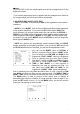
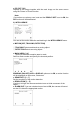
3) PRIVACY ZONE SETUP
The PRIVACY function will protect your privacy by screening the privacy area
that you have specified during monitoring. You can specify up to 12 privacy
zones. If you set the PRIVACY SET to ON, your PRIVACY ZONE settings
will be applied. You can change the style to adjust the mosaic size and color
of the PRIVACY ZONE.
Use the ▲▼◀▶switch to select one from PRIVACY 1 through 8. Select one
from PRIVACY1~12 and press the SET switch to confirm your setting. You
can specify a pixel that moves as you change the PIXEL LEVEL to set the
position.
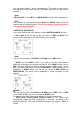
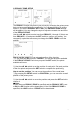
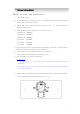
How to set the point: You can set each position of the 4 points.
If you press the ① SET switch in <POINT>, you will see the points available
in the PRIVACY ZONE. Each time you press the SET switch, the points
available will move.
Use the ▲▼ switch to set the position of each point. Set each position ②◀▶
of the four points and press the SET switch to complete the positioning.
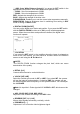
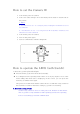
How to set the position: You can move the position of the overall area.
By pressing the ① SETUP switch in <POSITION>, you can move the overall
position of the privacy zone.
Use the ▲▼ switch to move the position and press the ②◀▶ SET switch to
confirm it.
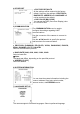
※ Note:
If more than one PRIVACY ZONE is specified and the PRIVACY SET is set
to ON, the PIP function will be deactivated. If the 12th PRIVACY ZONE is
specified, the LINE function of FENCE will be deactivated.