
Install Instructions


CG
i
GAS-FIRED
wATER
BOILER-
sERIEs
a-
Boiler
Manual
lOb
Service &
maintenance
- annual
start-up
<con
t.)
0
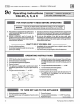
Inspect
•••
Burners
and
base
I&
WARNING
I
I&
WARNING
I
The
boiler
co
ntains ceramic fiber
and
fibergla
ss
mat
erials. Use
care
wh
en
handling
th
ese materials
per
instruc
-
ti
ons
o n
Page
70
of
thi
s
ma
nu
al.
Failure to comply could result in severe
personal inj
ur
y.
If insulation is damaged
or
displaced,
do
not
operate
the
boiler.
Re
place
or
reposition insulation as necessary. Fail-
ure
to
replace
damaged
insulation
can
result
in
a fire hazard,
ca
usin
g severe
personal injury,
death
or s
ub
stan
tial
property
damage.
I. After
turn
i
ng
off power
to
the
bo
ile
r,
remove
th
e base
bu
rn
er
shield {
Figure
40
, item 4, page 60}.
2.
Inspect
burners
and all
othe
r
co
m
po
n
ents
in
the
boiler
base.
3.
If
b
urn
ers
mu
st
be
cleaned
see
Burner
cleaning
In-
structions
be
low.
4.
Inspect
th
e
slotted
jacket cooling
open
ings in
the
bot
-
tom
left
and
right
of
the
base
pan
{
Figure
40
,
ite
m 7,
page
60).
5. Inspect
the
base
insulation. Pay
atte
ntion
to th
e WARN-
ING
on
Page 70 regarding
worki
ng
with
in
sul
at
ion
mat
er
ials. Verify
that
th
e insulation is
inta
ct a
nd
secure
ag
ain
st all four s
id
es
of
the
base.
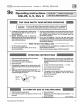
Burner
cleaning Instructions
I&
WARNING!
Airborne
mat
er
ials, s
uch
as
fiberglass
and
· ·
dust,
are
present
durin
g con
st
ruction
and
re
modelin
g.
These
mat
er
ia
ls
can
be
drawn
in
with the
co
mb
ust
ion
air
and
obstruc
t
burner
ports, resulting in carbon
monoxide
producti
on, a fire hazard,
or
building
freeu
damage.
R
ead
and
fol-
l
ow
the WARNING on page
9.
Failure to
in
spect
and
clear gas
burner
ports
could
result in severe personal injury, death
or
substa
ntia
l
property
damage.
1. Remove
burner
s
hi
eld a
nd
the base
pan
air
baffle. Next
remove the pilot bracket
asse
mb
ly.
Then
r
emove
the
four screws sec
urin
g
the
burner
tray to the
ma
nifold
and
s
lid
e
th
e
burne
r tray out
under
the
manif
old.
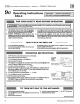
2.
Inspect each
burner
to
insu
re
that
every
port
is
com
-
pletely
ope
n.
3.
If
any
po
rt
is
not
complete
ly
dear,
run
a vacuum
at
the
burner
inlet while clean
in
g the
burner
ports
wi
th
a
wire b
ru
sh.
The
v
acuum
will he
lp
to
dra
w
any
airborne
mat
er
ia
l
out
of
the b
urn
er.
Part
Nu
m
ber
550-
1
42-780
/0712
4. Rein
sta
ll
compone
nt
s,
st
arting w
ith
th
e bu
rner
tray,
th
en
the p
il
ot
br
ac
ket assembl
y,
burner
baffle,
and
air
inlet t
op
and
fro
nt
pan
els.
5.
Follow the
start
-up procedure in the boiler manual.
Condensate
drain
system
1.
In
spect
condensate
drain
fittings
and
tubin
g.
Verify
that
con
densate
can
flow freely to
drain
.
0
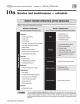
Service
•
••
Inducer
motor
I.
Wit
h boiler
power
off, place a few drops
of
S.A.E.
20
mot
or
oil in
each
of
th
e
two
oil cups.
I&
WARNING
!
Use only S.A.E.
20
motor
oil to l
ub
ricate the
indu
cer
motor.
Do
not
use
tm
iversal househo
ld
oils. Mot
or
co
u
ld
be
dama
ged, resulting
in
possible severe property
damage.
Oiled-bearing
circulators
I.
The
circ
ul
at
or
shipp
ed
wit
h
th
e CGi boiler is water-lubricated.
No
oiling is required.
2. Check o
th
er
circulators in the system. O
il
any
circulators
requ
i
ring
oil,
fol1ow
in
g circulat
or
manufactur
er's in
st
ructi
ons.
Over
~
oil
in
g
will
dam
age
the
circulator.
Temperature
sensor
I.
Th
e
temperature
sen
so
r
ma
y
accumulat
e
depos
i
ts
on
th
e pr
obe
surface.
Annual inspection
and
clean
in
g
of
the
probe
will
imp
rove
boiler
perforn
1ance.
Disconnect power,
unplu
g harness from sensor.
a.
Drain
boiler water to a level below
th
e sensor.
b. R
emove
senso
r from boiler.
c.
Wipe
any
built
up
contaminates from
probe
and
insul
at
or
surfaces.
d. Reinstall sensor i
nt
o boiler.
Do
not
overtighten.
0
Start-up
...
I. Pe
rfomt
a
ll
start
-up
pr
oce
dures
in
S
ec
ti
on 7
of
this
manua
l.
2. Verify
cold
fill
pressure
is
co
rrect a
nd
that
fill system is wo
rking
pr
ope
rl
y.
3. Verify
antifreeze
level
(if
used}
is
at
the
ri
ght
concentrati
on
and
that
inhi
bitor
level is correct.
4.
Check
gas
piping
per
manual
Sec
ti
ons 5
and
7a
,
ver
ifying
no
indications
of
leakage
and
all
pipi
ng
and
co
nn
ections
ar
e in
good
condition.
5.
R
ead
the
a
pp
r
opr
iate
Operating
Instructions
(Sec
tion
9c
of
this
manual
or
on
boiler label}
app
ly
in
g
to
the boiler.
6.
Start
th
e boiler followi
ng
th
e a
ppr
opriate
Operating
instructions
(Sect
ion
9c
of
thi
s manual or on boiler label
).
47