
Manual
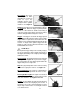
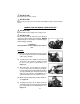
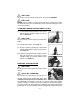
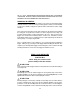

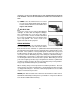
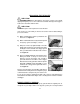
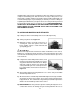
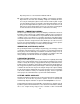
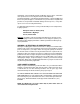

Fig. 8
Ejector Rod: The ejector
rod is pushed while
unloading the revolver in
order to eject any
cartridges and/or empty
casings from the cylinder
chambers. See Figure 9.
Hammer: The hammer is located behind the cylinder.
See Figure 10. When the trigger is pulled (and the
hammer is either down for double action firing or
cocked for single action firing), the hammer falls to
strike the firing pin and discharge the revolver.
Trigger: The trigger is located in the trigger guard.
See Figure 11. When firing in double action, pull the
trigger with the required force and it will cause the
hammer to move backward and fall forward to fire the
revolver. In single action, pull the trigger after the
hammer is fully cocked to allow the hammer to fall
forward and fire the revolver.
W A R N I N G !
Never pull the trigger until you are actually ready to
fire. Keep your fingers off the trigger and outside of
the trigger guard until you are ready to pull the trigger
and fire the revolver.
Trigger Guard: The trigger guard is located around
the trigger. See Figure 12. It protects the trigger.
Keep your finger out of the trigger guard and off the
trigger until you are ready to fire.
Grip: The grip is that portion of the revolver used by
the shooter to grasp the revolver. See Figure 13.
The Serial Number: The revolver’s serial number is
located on the upper right hand side of the receiver.
Front Sight/Rear Sight: The sights are located on
top of the barrel on the muzzle end and above and in
front of the hammer. See Figures 14 and 15.
Holster: A good quality, properly designed holster
should be used for safe carrying of your revolver. It
must be the correct size, and it should have a safety
flap or strap or other means of securing the revolver
so it cannot fall out.
Figure 9 Figure 10
Figure 11
Figure 12
Figure 13
11
Figure 14
Figure 15