
Manual
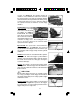
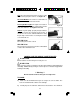
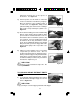
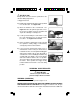
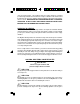
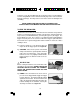
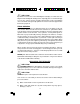
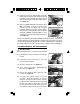


Fig. 8
revolver. See Figure 10. The cylinder contains six
chambers. Note: While this revolver has a transfer
bar safety and does not require an unloaded chamber
under the hammer, European American Armory Corp.
recommends that you keep one chamber empty in
the cylinder and rest the hammer on that empty
chamber.
Loading Gate: The loading
gate is located on the right
side of the revolver behind
the cylinder. See Figures
11a and 11b. The loading
gate, when opened, allows
the revolver to be loaded or
unloaded and allows for the
extraction of empty cases. The loading gate must
also be opened to allow for the removal and/or
replacement of the cylinder.
Ejector Rod: The ejector rod is located under the
barrel of the revolver. See Figure 12. The ejector rod
is pushed while unloading the revolver in order to eject
any cartridges and/or empty casings from the cylinder
chambers.
Hammer: The hammer is located behind the cylinder.
See Figure 13. When the trigger is pulled with the
hammer cocked, the hammer falls to strike the transfer
bar, which in turn strikes the firing pin, causing the
revolver to discharge.
Trigger: The trigger is located in the trigger guard.
See Figure 14. Pull the trigger after the hammer is
fully cocked to allow the hammer to fall forward and
fire the revolver.
W A R N I N G !
Never pull the trigger until you are actually ready to
fire. Keep your fingers off the trigger and outside of
the trigger guard until you are ready to pull the trigger
and fire the revolver.
Trigger Guard: The trigger guard is located around
the trigger. See Figure 15. It protects the trigger.
Keep your finger out of the trigger guard and off the
trigger until you are ready to fire.
11
Figure 10
Figure 11a
Figure 11b
Figure 12
Figure 13
Figure 14
Figure 15