
User Documentation


Wi-Fi device IE-WL-BL-AP-CL Getting Started
2-14
NOTE
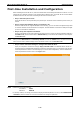
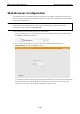
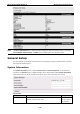
After you click Submit to apply changes the web page is refreshed (indicated by an “(Updated)” status
appearing next to the title) and a blinking reminder to restart the device of the new settings to take effect, will be
shown on the upper-right corner of the web page:
To activate the changes click Restart and then Save and Restart after you change the settings. About 30
seconds are needed for the IE-WL-BL-AP-CL to complete the reboot procedure.
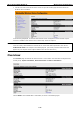
• Step 5: Select the IE-WL-BL-AP-CL operation mode.
By default, the device’s operation mode is set to AP. You can change to Client mode in Wireless LAN Setup
→ Operation Mode. Detailed information about configuring the device’s operation can be found in
Chapter 3.
• Step 6: Test communications.
In the following sections we describe two test methods that can be used to ensure that a network
connection has been established.
Communication Testing
After installing the IE-WL-BL-AP-CL you can run a sample test to make sure the device and wireless connection
are functioning normally. Two testing methods are described below. Use the first method if you are using only
one IE-WL-BL-AP-CL device, and use the second method if you are using two or more units.
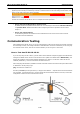
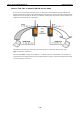
How to Test One IE-WL-BL-AP-CL
If you are only using one Wi-Fi device, you will need a second notebook computer equipped with a WLAN card.
Configure the WLAN card to connect to the IE-WL-BL-AP-CL (NOTE: the default SSID is Weidmueller), and
change the IP address of the second notebook (Notebook B) so that it is on the same subnet as the first
notebook (Notebook A), which is connected to the IE-WL-BL-AP-CL.
After configuring the WLAN card, establish a wireless connection with the Wi-Fi device and open a DOS window
on Notebook B. At the prompt, type
ping <IP address of notebook A>
and then press Enter (see the figure below). A “Reply from IP address …” response means the communication
was successful. A “Request timed out.” response means the communication failed. In this case, recheck the
configuration to make sure the connections are correct.