
User Manual


Your Weber Pulse™ comes with the incredible, built in, iGrill Bluetooth thermometer. We
recommend using your iGrill thermometer to not only monitor your barbecue’s temperature,
but to also perfectly cook every meal, every time.
Your iGrill is simple to set up and even easier to use. Follow this guide and you’ll never step a
foot wrong. Alternatively, head to our website and watch the Pulse’s iGrill setup video.
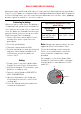
Setting up your iGrill:
1. Download the iGrill app onto your smart
device.
2. Turn on your Weber Pulse barbecue.
3. Open your iGrill application on your
smart device and select ‘find device’.
4. Select your Pulse barbecue, then press
continue.
Your Pulse barbecue has now been
connected to your smart device. For any
trouble shooting, head to the ‘support’
section in your iGrill application or contact
our customer service team.
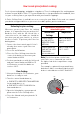
Using your iGrill:
Now that you’ve connected your iGrill, it’s
time for the fun and flavour filled moments
to begin.
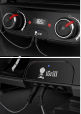
To start off, simply connect one of the
supplied iGrill meat probes to the control
panel of your Pulse. Then insert the meat
probe into the thickest part of the meat,
being careful to avoid bones or cavities if
they are present. Then;
1. Within the iGrill app, select start
barbecuing.
2. Select the protein you are cooking.
3. Select your desired doneness
temperature.
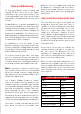
Using the iGrill® Bluetooth® Thermometer
Tips:
Keep the meat probe away from bones and
cavities. This is to ensure a correct reading
is provided, as bones and cavities will
generate incorrect readings and result in
under or over cooked food.
To assist with placing the meat probe
correctly, place the probe on top of or next
to the meat to estimate the centre. Then
hold the probe with your fingers where the
edge should be, and then insert the probe
into the meat up to your finger level.
For further guidance, please watch our
Pulse iGrill educational video on our
website.
15