
User Manual
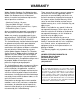

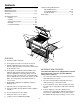
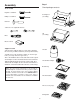

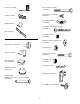
Table Of Contents
- DANGER
- WARNINGS
- WARRANTY
- LP Tank
- PATENTS AND TRADEMARKS
- Contents
- FEATURES
- General Instructions
- For Installation in Canada
- Storage
- Operating area
- Assembly
- Tools needed
- Supplies needed
- Check package contents
- Assemble wheels
- Assemble frame
- Continue frame assembly
- Complete frame assembly
- Insert casters
- Add cooking box
- Install manifold bracket
- Install tank panel assembly
- Add fuel scale assembly
- Install igniter
- Set LP fuel scale
- Fill LP tank
- Check that the burner valves are off
- Connect LP tank
- Check for gas leaks
- Install Flavorizer Bars and Cooking Grates
- Install the bottom tray
- Install the lid
- Install tool holders, control panel and burner control knobs
- Install swing table
- Complete accessory installation
- OPERATING INSTRUCTIONS
- Lighting
- Crossover Ignition System
- To Extinguish
- Manual Lighting
- To Extinguish
- Cooking
- Storage and/or Nonuse
- Periodic Cleaning
- Refilling the LP tank
- Removal of the LP tank
- Connecting the filled LP tank
- LP Tank
- Safe handling tips for LP Gas
- Liquid Propane (LP) Tank(s)
- Annual Maintenance
- Inspection and Cleaning of the Weber Spider Stopper Guards
- General Maintenance
- Weber Spider Stopper Guards
- Main Burner Flame Pattern
- Main Burner Cleaning Procedure
- Replacing Main Burners
- Crossover Ignition System Operations
- TROUBLESHOOTING
- Parts List
- A FINAL WORD OF THANKS
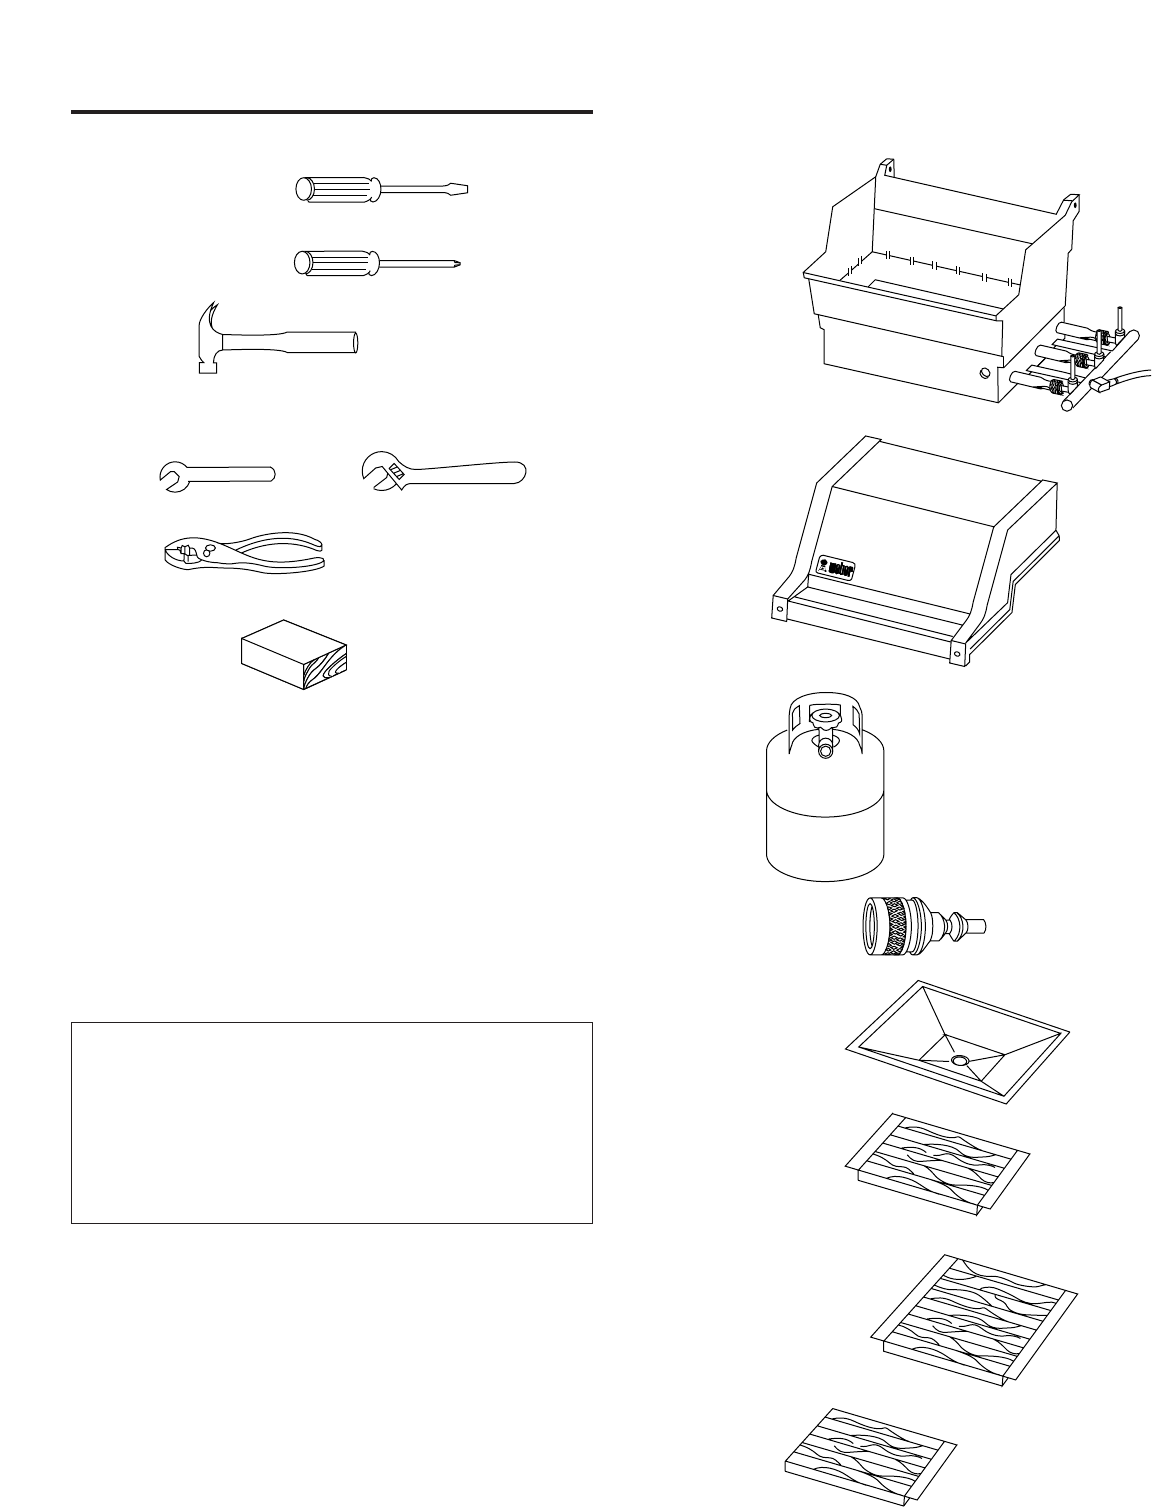
Step 1
Check package contents
Cooking box
(assembly)
Lid
(assembly)
LP tank
LP tank filler adapter
Bottom tray
Two work tables
Two accessory trays
Swing table
7
Assembly
Tools needed
Regular screwdriver
Phillips screwdriver
Hammer
7/16 inch or an adjustable wrench
Pliers
Block of wood
Supplies needed
Your LP tank is shipped empty for safety. After setting the
LP fuel scale you will need to fill it. (See Step "Fill LP tank.")
You will need a soap and water solution to check for gas
leaks. (See Step "Check for gas leaks.")
Note - The hardware size of nuts, bolts and screws is given.
For example "1/4-20 x 2 inch bolt" means a bolt 1/4 inch in
diameter with 20 threads to the inch, 2 inches long. On a
small screw for example, "6-32 x 1/2 inch screw" means a
number 6 screw, with 32 threads to the inch, 1/2 inch long.
®
®
®
®
®
®
®
®
While we give much attention to our products,
unfortunately an occasional error may occur. If a part is
missing, do not go back to the store. Call the Weber
Customer Service Center toll free 1-800-446-1071 to
receive immediate assistance. Have your owner’s
manual and serial number of the barbecue available
for reference.