
Installation Manual


Webasto Air Top Installation Guide – AT2000STC
3
Air Top 2000STC Installation Guide 2018 | Webasto Thermo & Comfort Australia Pty Ltd.
Pre-Installation Considerations
1) Location and orientation of the heater.
The heater may be fitted to the interior or exterior of the vehicle. If it is installed externally, ensure that the heater is fitted in
a position where it is protected from water and dust ingress.
2) Length of hot air outlet ducting – the shorter, the better. Ensure that the hot air outlet is not directed towards or
in contact with the human body, as the hot air temperature can range from 80-120˚C.
3) Return vent - in some cases where there is enough air circulation in and around the heater, ducting may not be
required to the return air vent. Where it is required, keep ducting to a minimum.
4) Location of the controller, electrical wiring, fuse and battery connections.
5) Location of the fuel pump and fuel filter.
6) Location of the exhaust system. Ensure that the exhaust is not facing direction of travel.
7) Location of the combustion air systems.
8) Fuel pick-up options – 12L Webasto fuel tank or standpipe.
9) Electrical - ensure to use the supplied fuses in the kit and battery positive and negative connected directly to the
house battery.
Tips
Loosely attach the heater with the mounting bracket and place it in your desired location to predetermine the heater
orientation, ducting layout, airflow, wiring, controller and general clearance for easy accessibility and for future
service and repair.
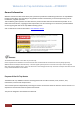
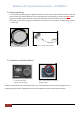
Serial Number Labelling
Ensure that the serial number labels are attached on the top or the side of the heater in case the heater is mounted
against a wall and the original label may be inaccessible. Additional labels are supplied in the kit and one should go
on the installation manual envelope to hand over to the customer at the time of commissioning.
The Serial Number label on the AT2000STC will still state AT2000ST. This is to avoid the necessity of applying for a
new EC type approval. The heater will still be an AT2000STC based on the manufacture date and serial number.
Note: In case of warranty situations, the serial number will be requested by Webasto or an authorised dealer to
validate.
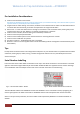
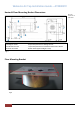
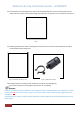
Fig 1 – Serial number labels – Heater
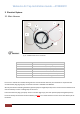
Fig 2 – Serial number label written as Fabr Nr.